
Willow-zette? or Blue Willow? Either way, I’m wearing a Pinspired mash-up of the Willow Wrap Bodice with the Bluezette Tulip maxi skirt (aff links) and it is BEAUTIFUL and perfect for Spring! I’ll walk you through the very minor adjustments I made, and throw in a mini-tutorial on using lingerie elastic (or clear elastic) to keep your wrap necklines from gaping.
It took minimal adjustments to make this absolutely perfect, and we’ll go top-to-bottom to cover it.
- Fabric: This is double-brushed poly (DBP) from So Sew English Fabrics – it’s SO soft and drapes beautifully, and stretches really nicely. I ordered 3 yards and didn’t have much left over.
- Bodice: I normally make a 1″ short torso adjustment, but because I planned on attaching the skirt to the bodice using the method in the Bluezette, I didn’t shorten the torso at all. Inserting the elastic takes up about 1″ from your bodice overall length, but the maxi skirt is pretty heavy, and that pulls the bodice down some. So if you’re average to long-waisted. don’t add as much as you *think* you need. It’s a bit of a guessing game, but take into account your normal torso adjustments, and the fabric you’re using. Alternatively, you may cut 2 sets of the Willow Wrap waistband and enclose elastic there, and that will give you some extra length.
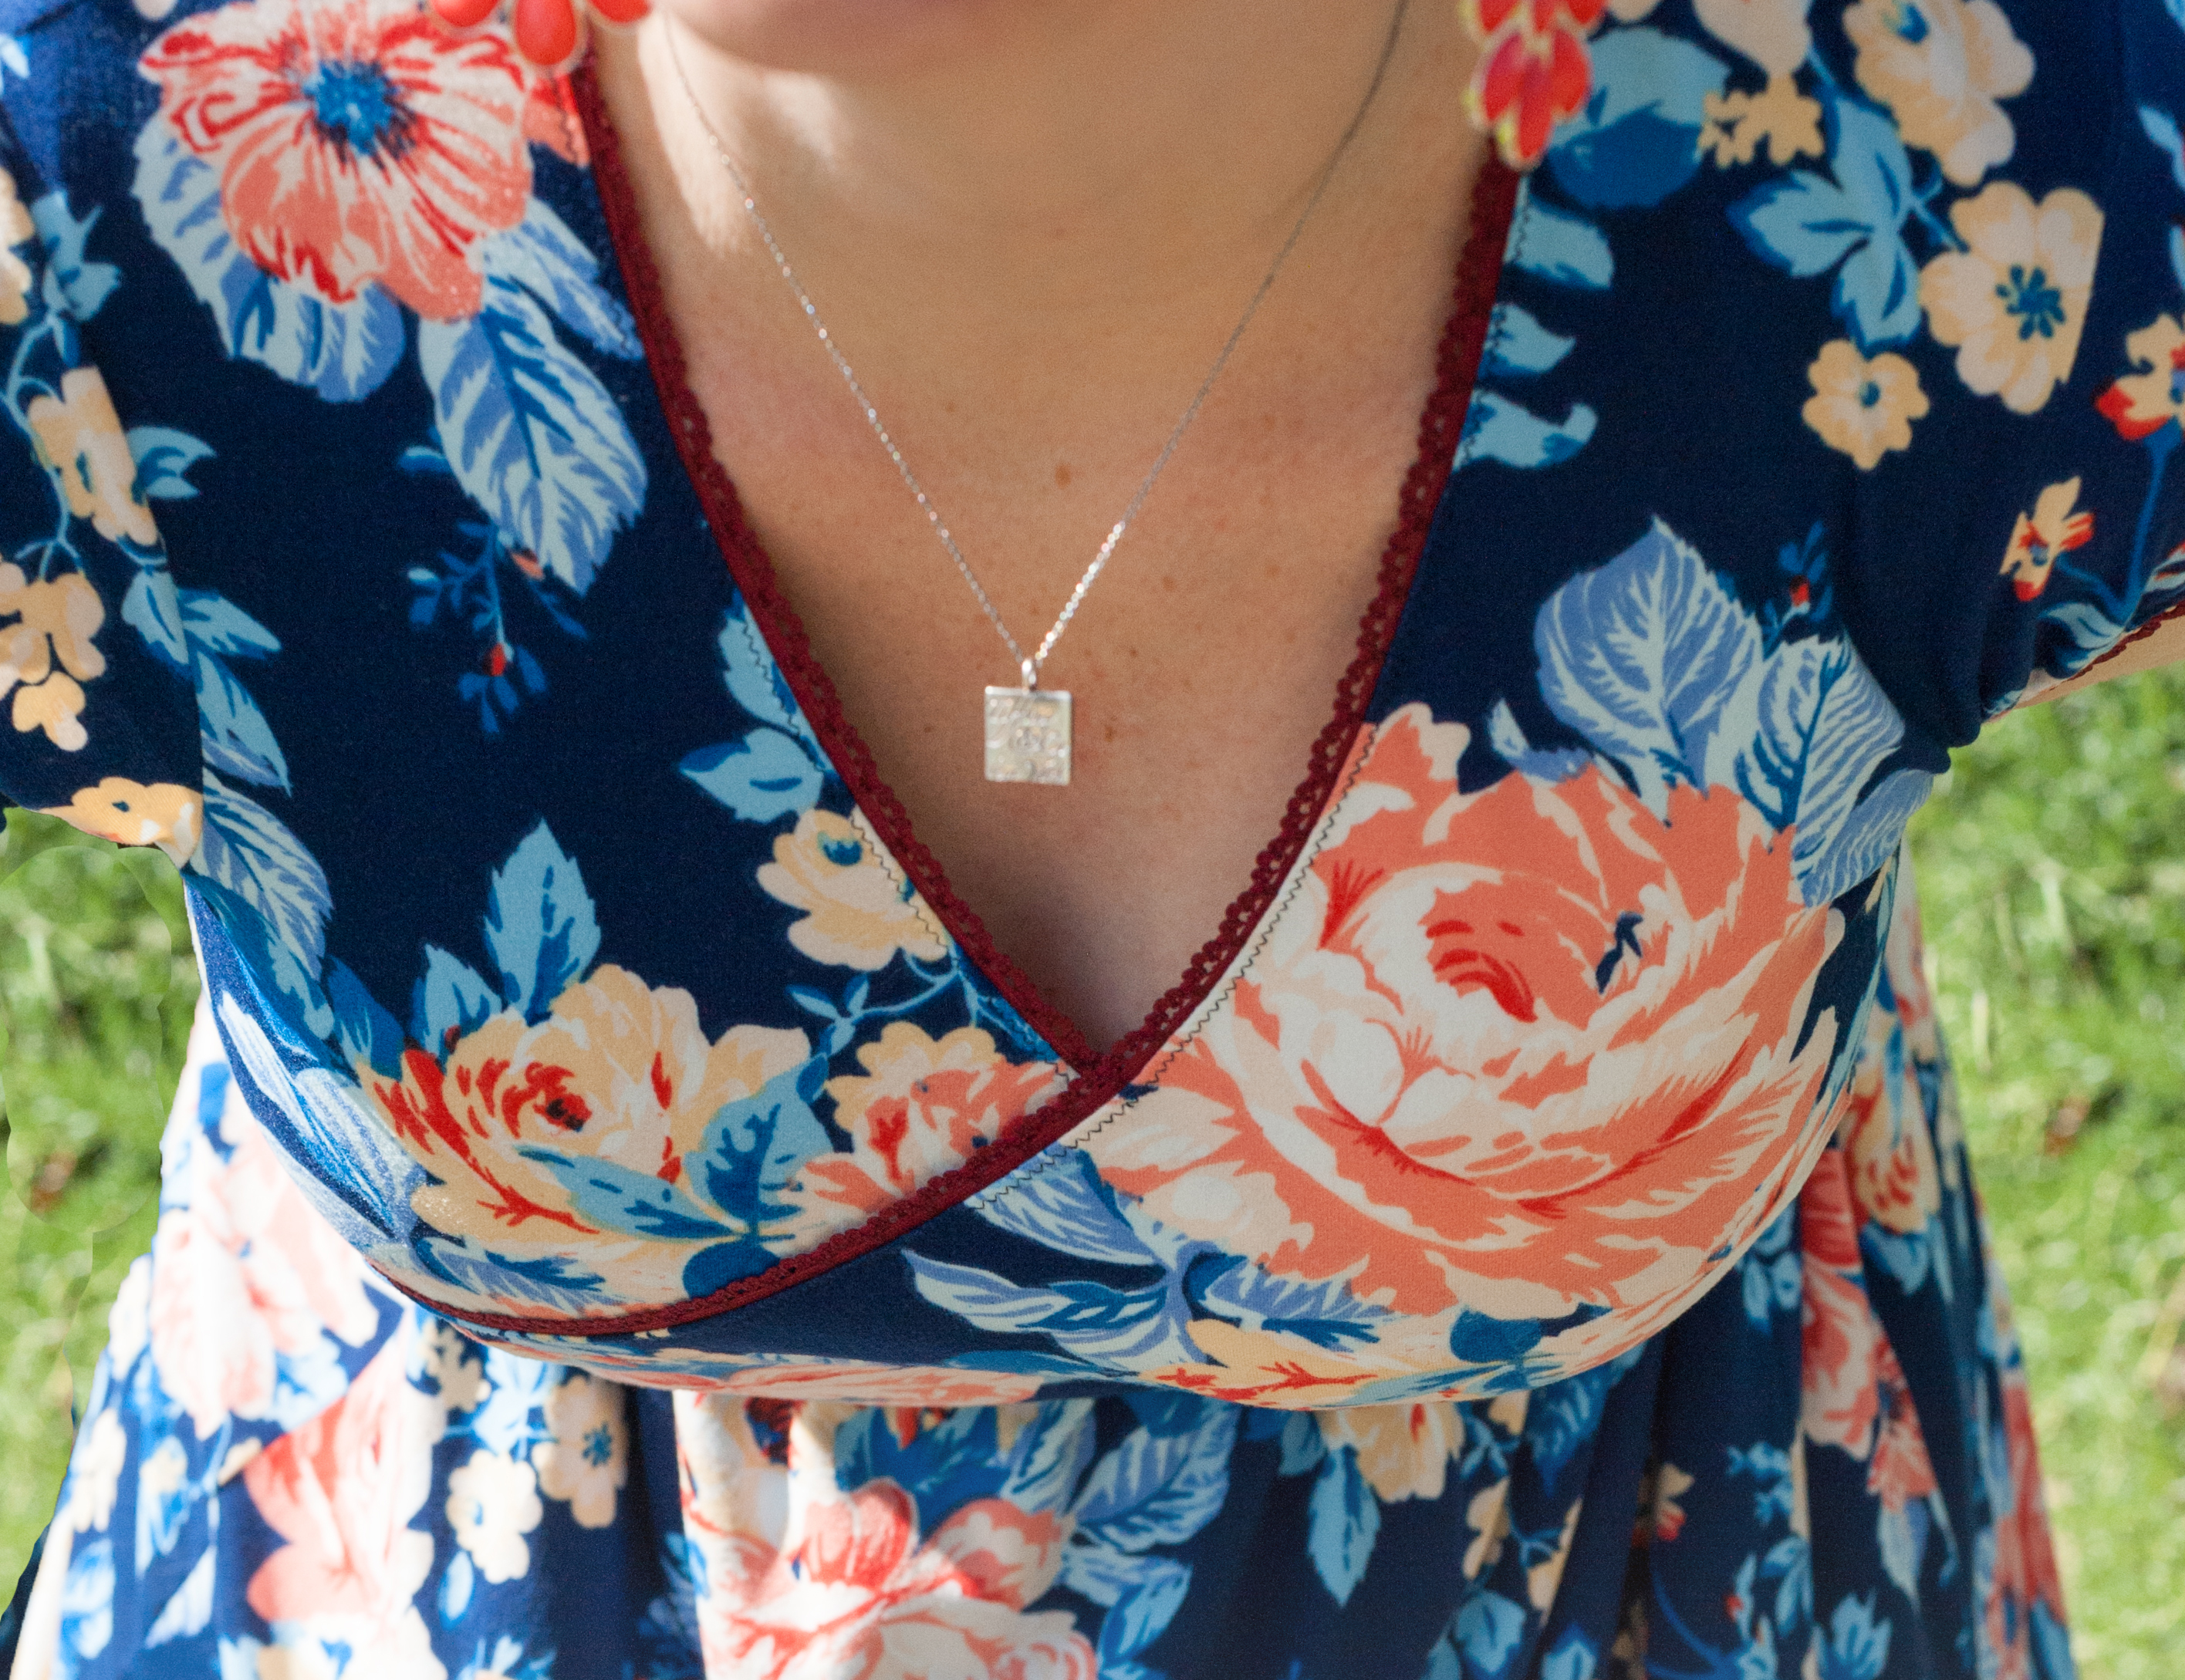
- This is the lower/ nursing-friendly neckline. For the neckline finish I used my favorite trick that I learned in a lingerie-making class years ago. Put your bodice together front-to-back at the shoulder seams, then starting at the bottom of one of your front bodice pieces, place your pretty picot-edge lingerie elastic right sides together, with the straight edge of the elastic aligned with the raw edge of your fabric.
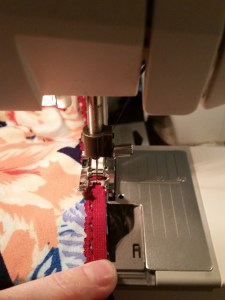
- Stretch VERY gently as you baste (long-stitch) the elastic all the way up your first front piece, around your back neckline, and back down the other front bodice piece. You want to stretch the elastic just enough to keep the DBP firm, not enough to cause noticeable gathers. Do NOT stretch your DBP! I never pin at this step, just go by feel for about 10% stretch on the trim (that’s less stretching than most neckbands as a point of reference).
- Once the elastic is basted on, flip that seam allowance over to the wrong side and use a narrow zig-zag stitch to keep it down. Again, go all the way around and only stretch enough to keep your DBP free of any tucks or gathers. The zigzag stitch will stretch with you as you wear it.
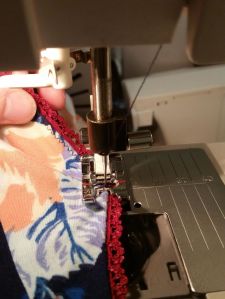
- If you don’t have any pretty-trim elastic, you can use narrow clear elastic to do the same thing- I like 1/4″. Just baste it onto the WRONG side of the bodice stretching gently as described above. Then turn it under once and zigzag to finish the edge. This encloses the clear elastic and will keep your bodice snug against your chest. This is also a great trick to use for keeping your nursing necklines from losing shape. See- barely any cleavage! You’re welcome 🙂

The lingerie elastic keeps things nice and snug, even when I bend over.
- Sleeves: These were a bit of a dilemma for me – I really wanted full, billowy sleeves similar to the inspiration pic, but long sleeves are hateful past April in Southern California, so I opted for short sleeves. I took the Willow Wrap sleeves and did a slash-and-spread to make them bell-shaped, ending just below my bicep. Unfortunately when I tried it on they hit at the same height as my bust and it was a very bad visual – I looked very, very top-heavy and unbalanced. So I cut them into a cap sleeve instead, and finished the sleeve hem with the same picot-edge elastic. Because I kept the slash-and-spread base around the armscye, there is just the tiniest pouf at the shoulders that I really like.
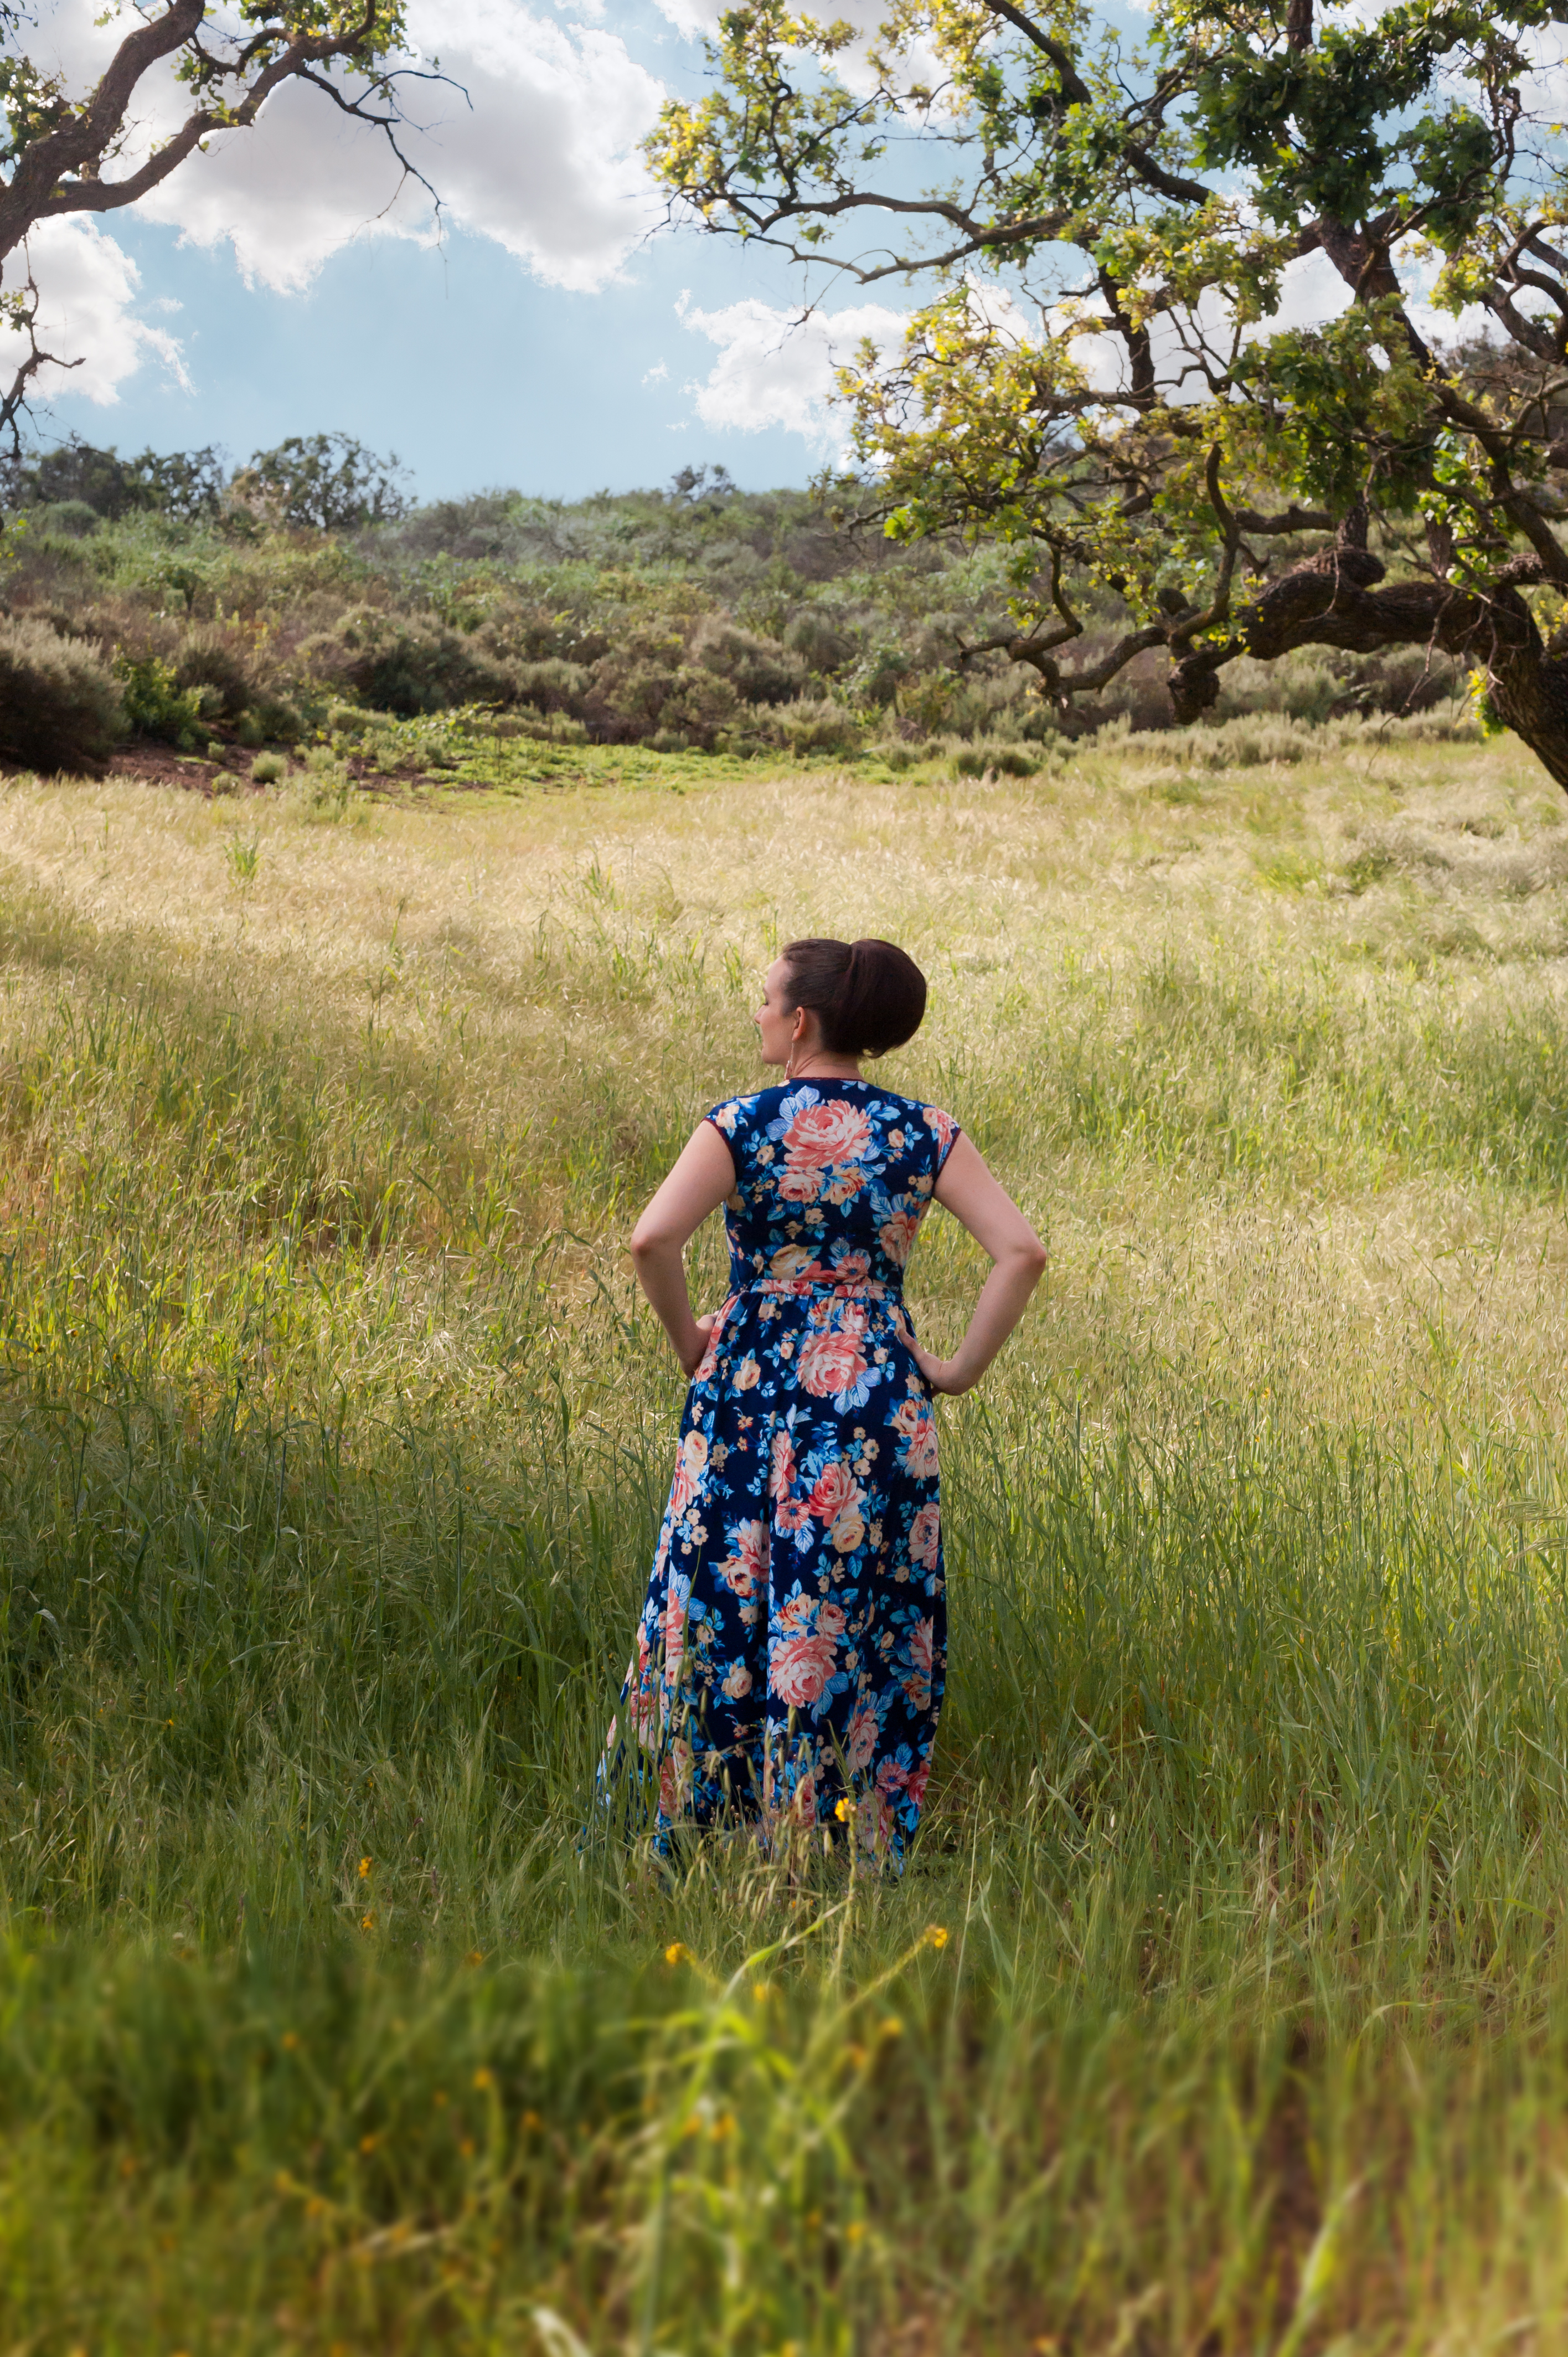
- Now the skirt- and this is where all the drama is. I used the Tulip skirt option from the Bluezette, but I wanted it to be REALLY full. I’m a size Medium, but I cut the skirt pieces using the largest available size, XXXL. If you’re a larger size and want this same fullness, you can widen the pieces fairly easily, and just re-draw the hem curve to smooth it out. This is really what took up most of the 3 yards of my fabric. I had the front overlapping pieces go from side seam to side seam, and I wasn’t paying close enough attention, or I would have made the front overlap on the other side, to match the wrap closure on the bodice. As it is, I still like it, and this way would make for some really dramatic color blocking if you’re so inclined.
- Because I’m short, and didn’t want to waste any fabric, I used the paper pattern piece to estimate how much length to take off from the skirt to ensure the back hem would hit me low on my ankle. Remember that you use up 1″ at the top when you attach to the bodice, and that if you’re using 4-way stretch fabric it will lengthen just a bit. Now that I have this skirt pattern prepped, I’m going to be mashing it on all sorts of dresses this summer – it should go very well with the Olympia and Margot (aff link).

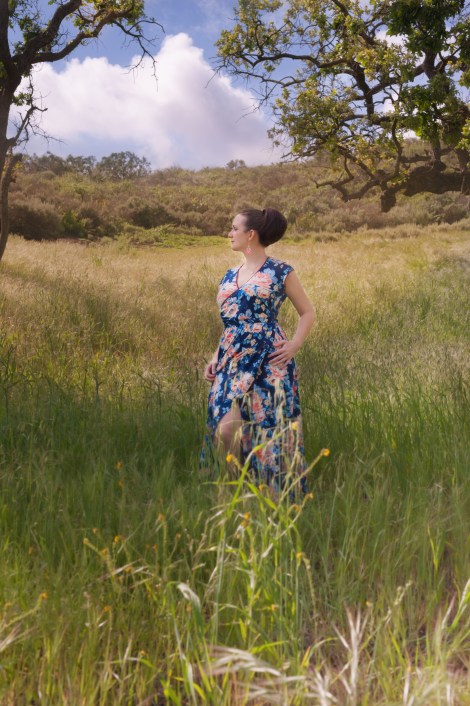
Sorry, the awesome field covered up my hemline 🙂
- Now you should have much, much more skirt than you do bodice. Make the skirt by hemming all the way around, then overlapping your 2 front skirts pieces (mind which side is going in front). Baste them together with the plan of using that basting stitch to gather the skirt to fit the much slimmer bodice. Run a separate gathering stitch across the back skirt so you don’t have to worry about your thread breaking. Gather the skirt gently to fit the bodice, then attach using the 1″ seam allowance, insert your elastic and finish the waistband as described in the Bluezette pattern.
- You’re done! Make sure you check out the blog at LoveNotions.com to see other inspired Love That Look posts!
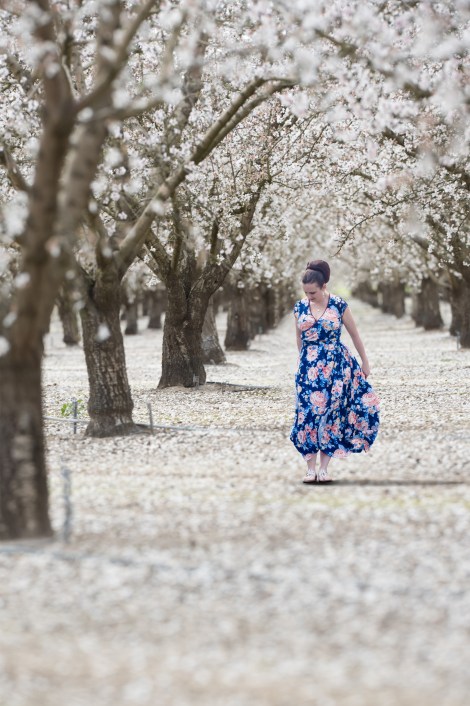 Photo credit and buckets of love to Marj Dee


Pingback: Love That Look: Bluezette Inspiration - Love Notions Sewing Patterns·
Gorgeous!!! Thank you so much for sharing!
I love this! I have both patterns so this just made it to the top of my to do list! Thank you for the great inspiration and tutorial
Pingback: Sewing Up Spring: Papercut Clover | DoodleNumber5·
I love the pivot edge elastic trick! Beautiful dress!
Pingback: Bluezette tour – Blue Rhapsody | DoodleNumber5·
Hmm it seems like your site ate my first comment (it was super long) so I guess I’ll just sum
it up what I had written and say, I’m thoroughly enjoying your blog.
I as well am an aspiring blog writer but I’m still new to everything.
Do you have any tips for rookie blog writers? I’d genuinely appreciate it.