I have had quite a bit of interest recently in seeing a tutorial for upcycling neckties for piping and bias tape- so here’s part 1 for piping. A few words of wisdom before you get started.
- This is not a project for the OCD. You are most likely looking at 100% silk that has been tied in knots, tugged, yanked, stretched, scrunched, and balled up many times over many years. The fabric will be a bit distorted and the pattern not perfectly predictable. It will also be slippery but exceptionally sturdy, and the texture changes inherent in the weave may resist your rotary cutter. Do not expect perfect strips or perfect piping. It will be pretty no matter what, and most oddities will be hidden in your seam allowance anyway.
- For piping, ties that have patterns that are small in scale and repeat are best- only a small bit of the fabric will be visible on the right side of your project, so you want it to be high impact.
- Be prepared for your piping to maybe not perfectly match your main fabric unless you are working with solids or monochromatic patterns. Sometimes weird colors are used for men’s clothing. We all have seen this.
- You are likely most comfortable with working with 100% cotton piping and bias tape- that’s what you get in the little packages at the fabric store. It’s great and comes in a lot of colors. Silk will behave differently- it’s a little slippery (or sometimes a lot slippery). Silk is much, much stronger than cotton when speaking of tensile strength. That means you are less likely to tear or break your new piping. It may show wear more quickly from abrasions though, and it’s not as washable either. So think carefully about when and how you want to use it.
- If fiber content is important to you, ties should always have a label to tell you if it’s silk, cotton, polyester, or some blend. Truthfully, I don’t think content is critical as long as it moves well and isn’t too bulky.
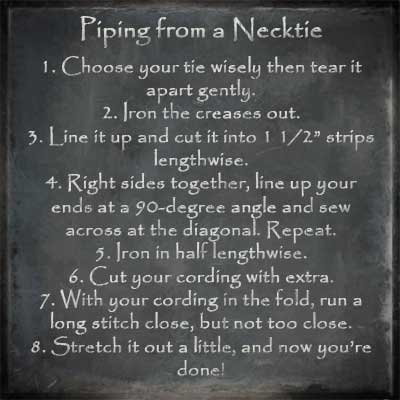
I’m going to skip the basics and definitions here- I’m assuming you know what grain, cross-grain and bias mean, and that you understand that fabric is cut on the bias to ensure good stretch and drape around curves. So now, let’s get started! This will be mostly pictures, with just a little text. And I’ll put a text-only printable at the end if you want to keep it posted in your sewing room.
Pick your tie. As noted above, patterns that are small in scale and repeat are best for piping. I also think- the bolder the better. Why not pack a whole lot of punch into this small detail? I’m going to go with the yellow for the piping and save the mauve for some bias tape.
Neckties: In the beginning
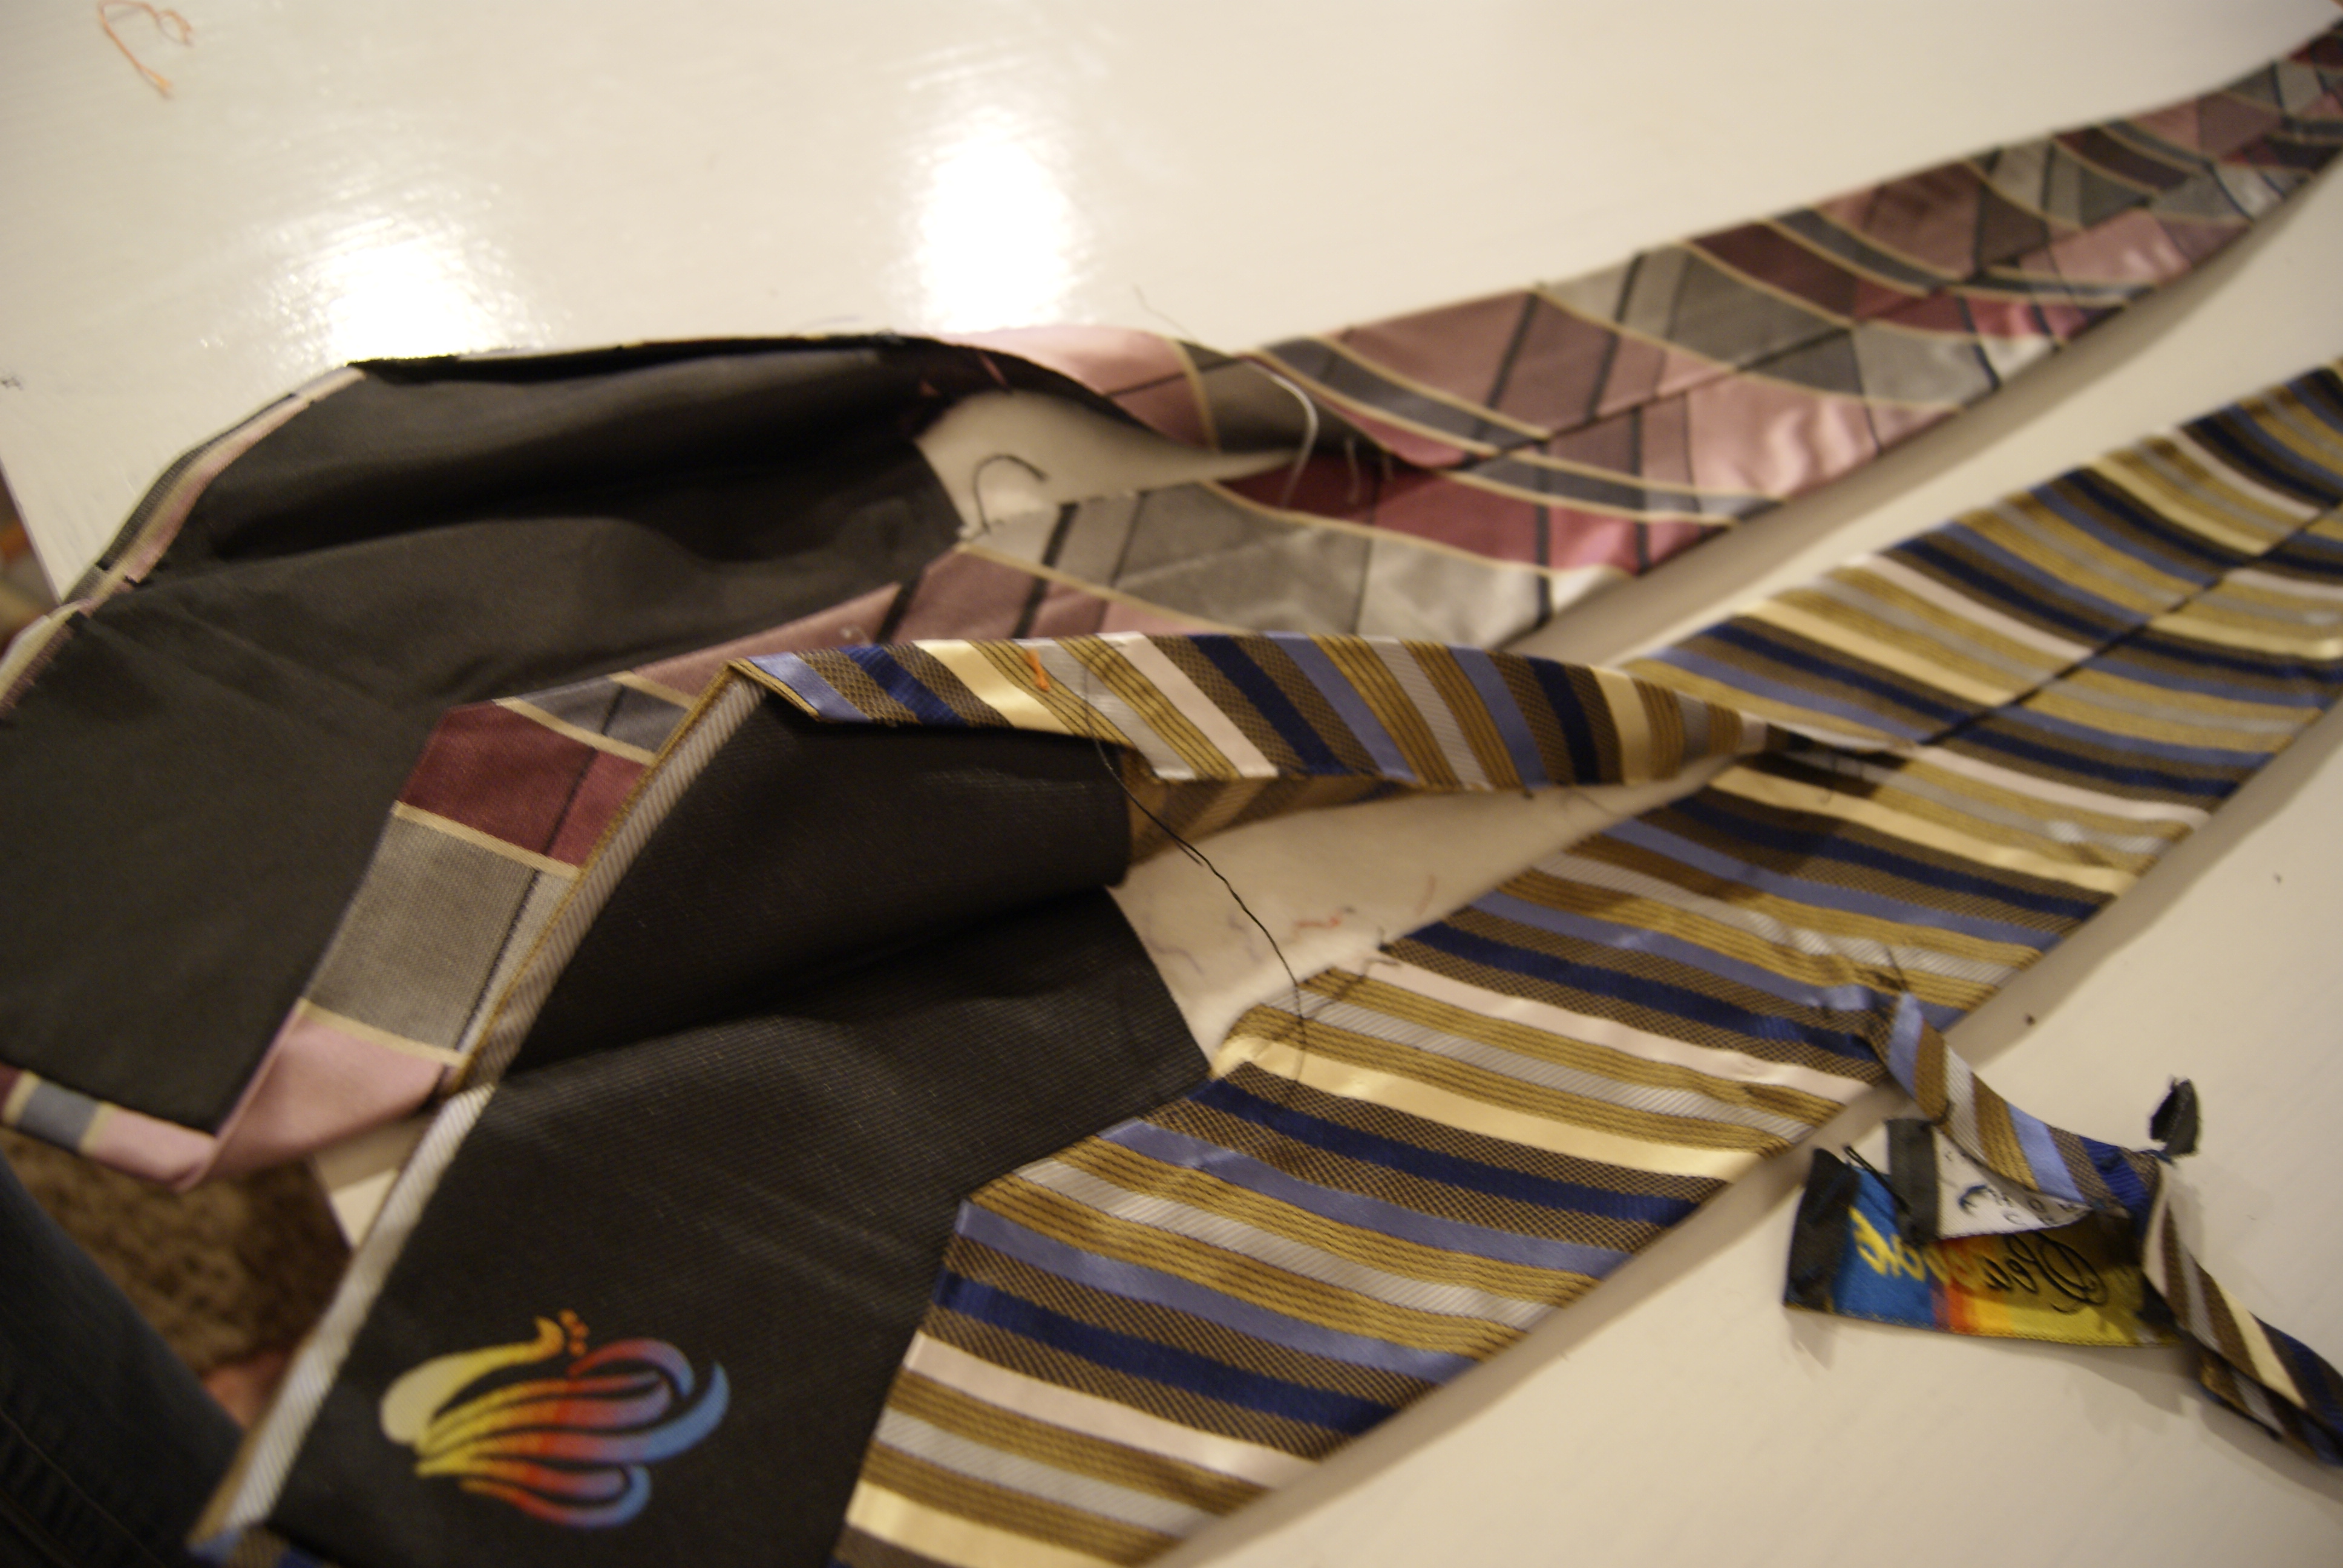
2. Take your tie apart. There will be a loose basting stitch running up the center back of the tie holding the folded edges together. You should be able to pull that out very easily. Then remove the tie tack and any labels. Pull out the interfacing. I like to save mine even though I haven’t found a good use for it yet. Let me know if you come up with something brilliant. Then carefully rip the seams to separate the lining. Be careful here- you don’t want to damage the tie fabric by leaving holes or small tears.
Pull those bad boys to pieces.
3. Iron out all the creases. I use my highest heat, apply a good amount of pressure, and go slowly. These creases have been there for a long time and will take some muscle to work out. You can steam out the most stubborn areas, but go easy on the water. By now you have the tie opened up and you can see that it is most likely already pieced together like regular bias tape.

See? You’re tie is already a giant bias strip
4. Measure the width at the thinnest part of the tie. This will tell you if you can get one strip or two down the longest part of the tie. You’re going to want 1 ½” strips for your piping. Most ties are just over 3” wide when opened up, so you can squeeze in 2 strips long ways, then another 2 shorter strips from the fat end of the tie.
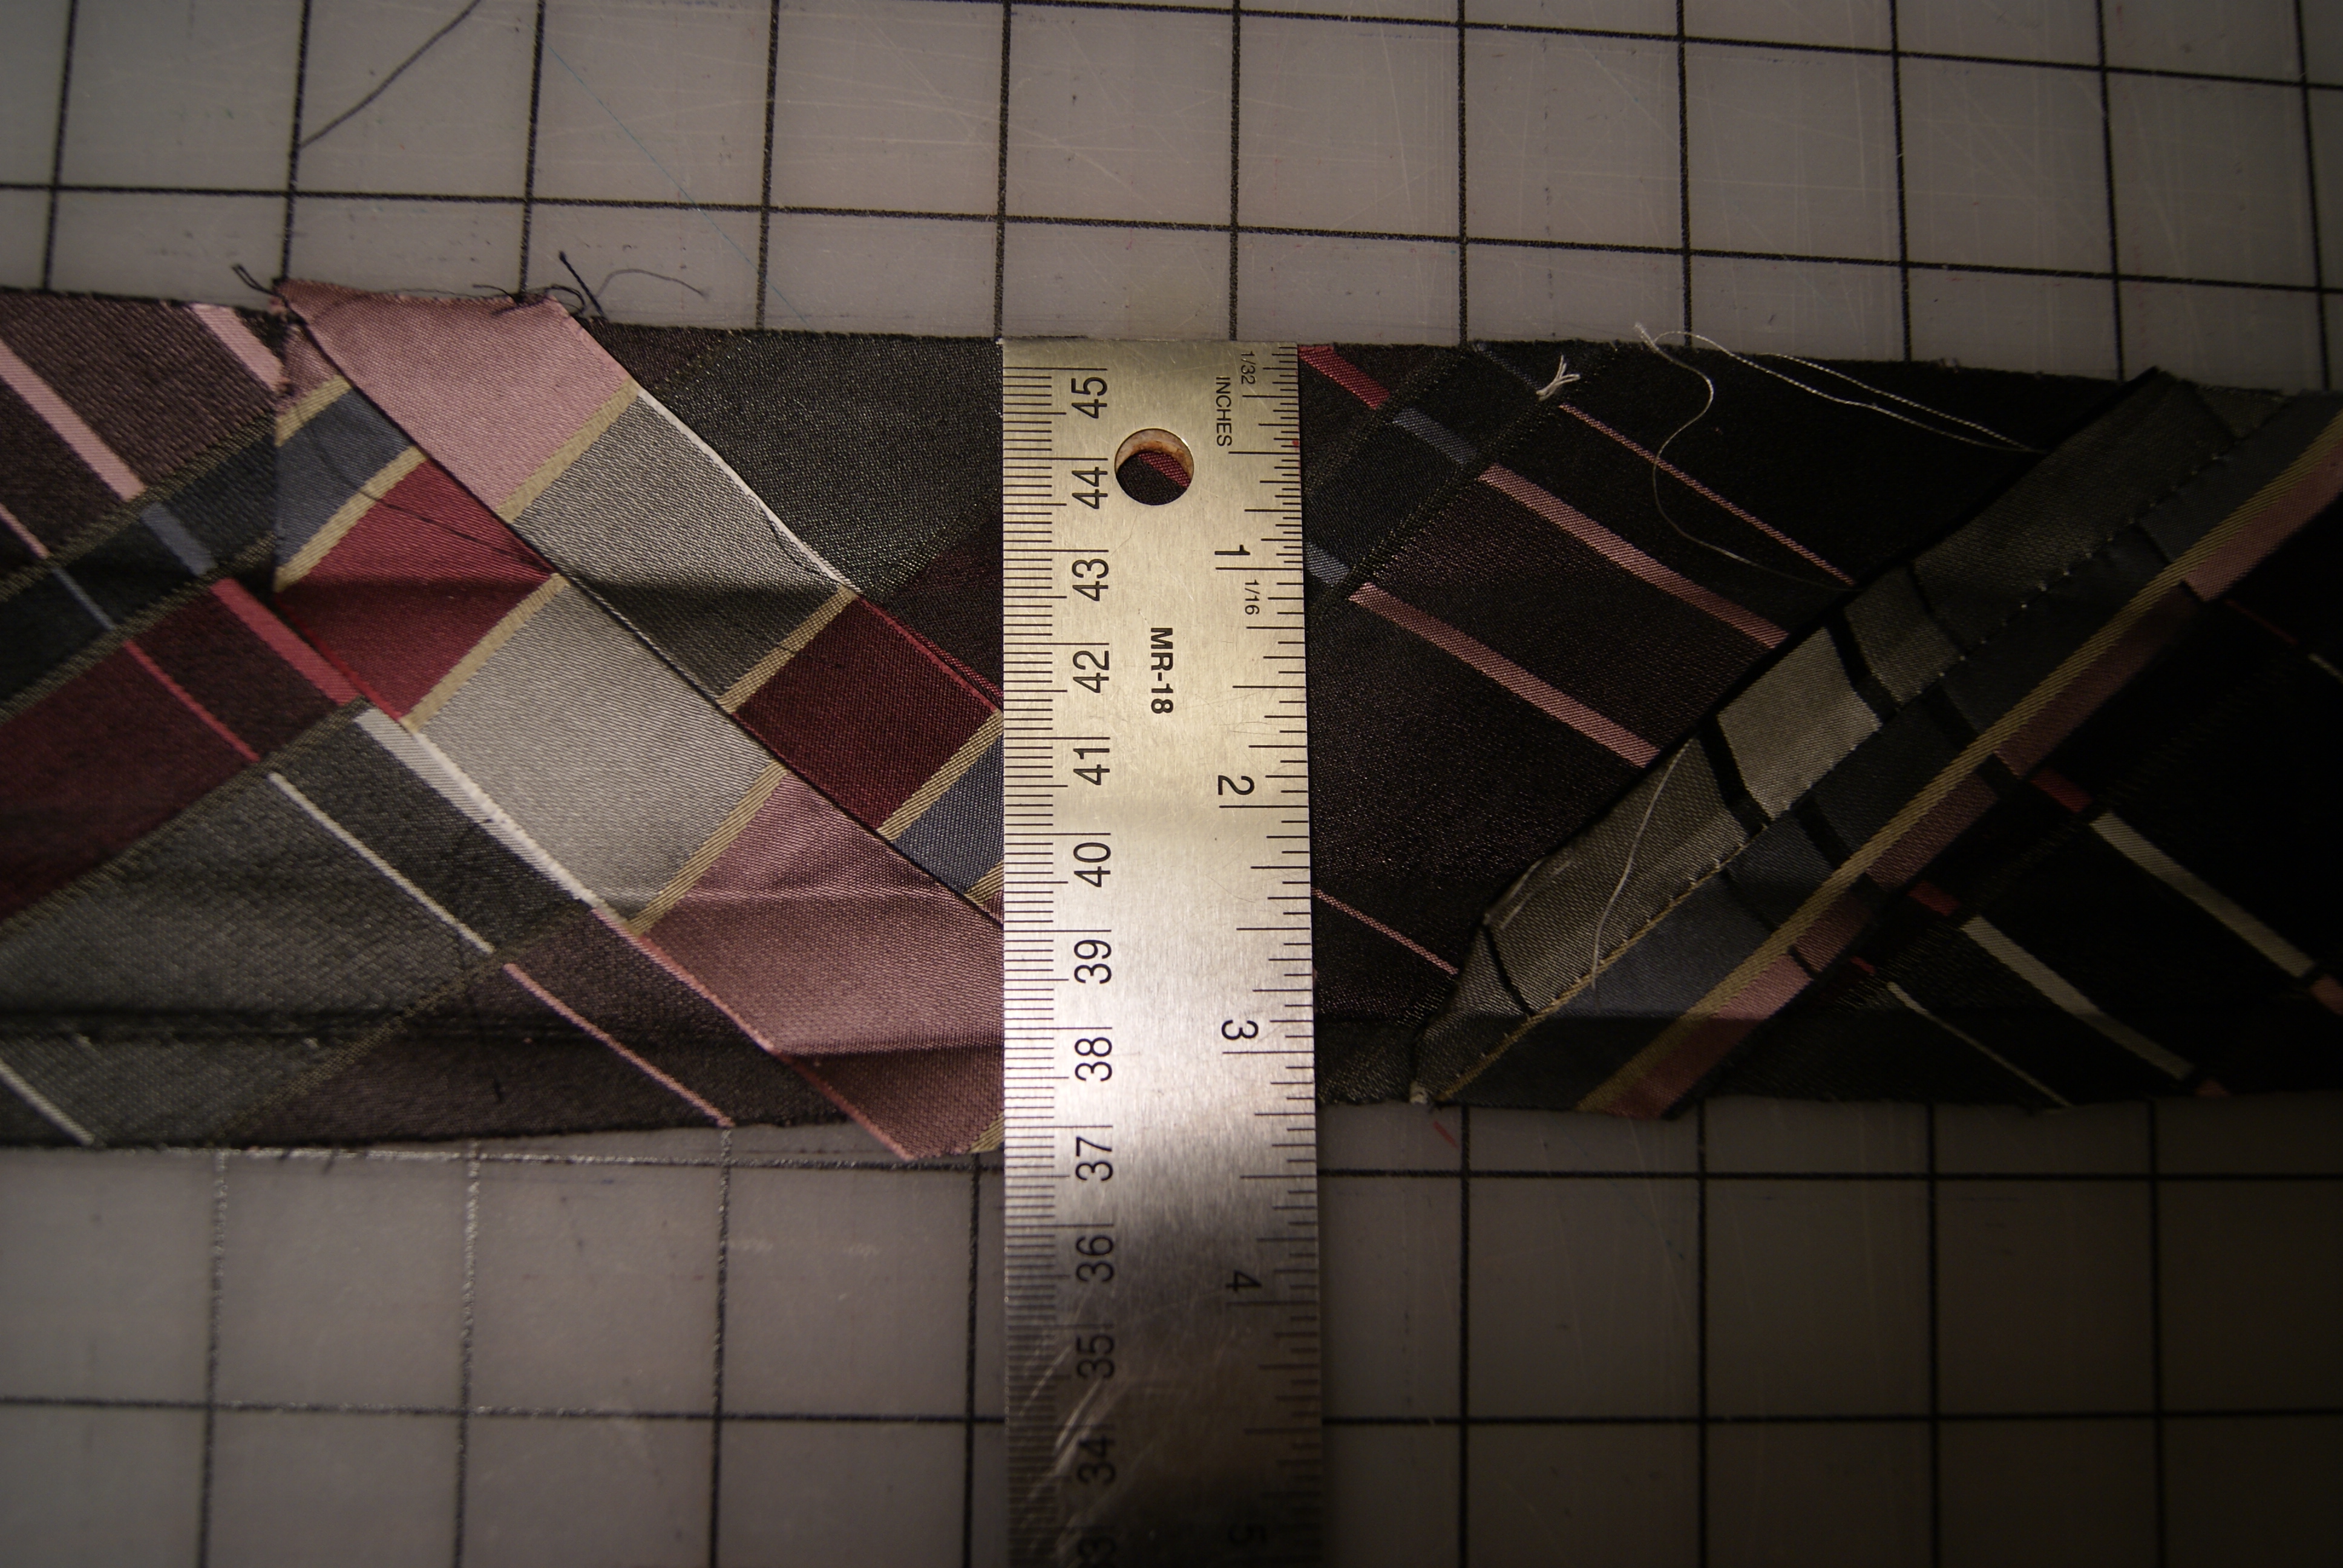
3 1/4″ across. Perfect!
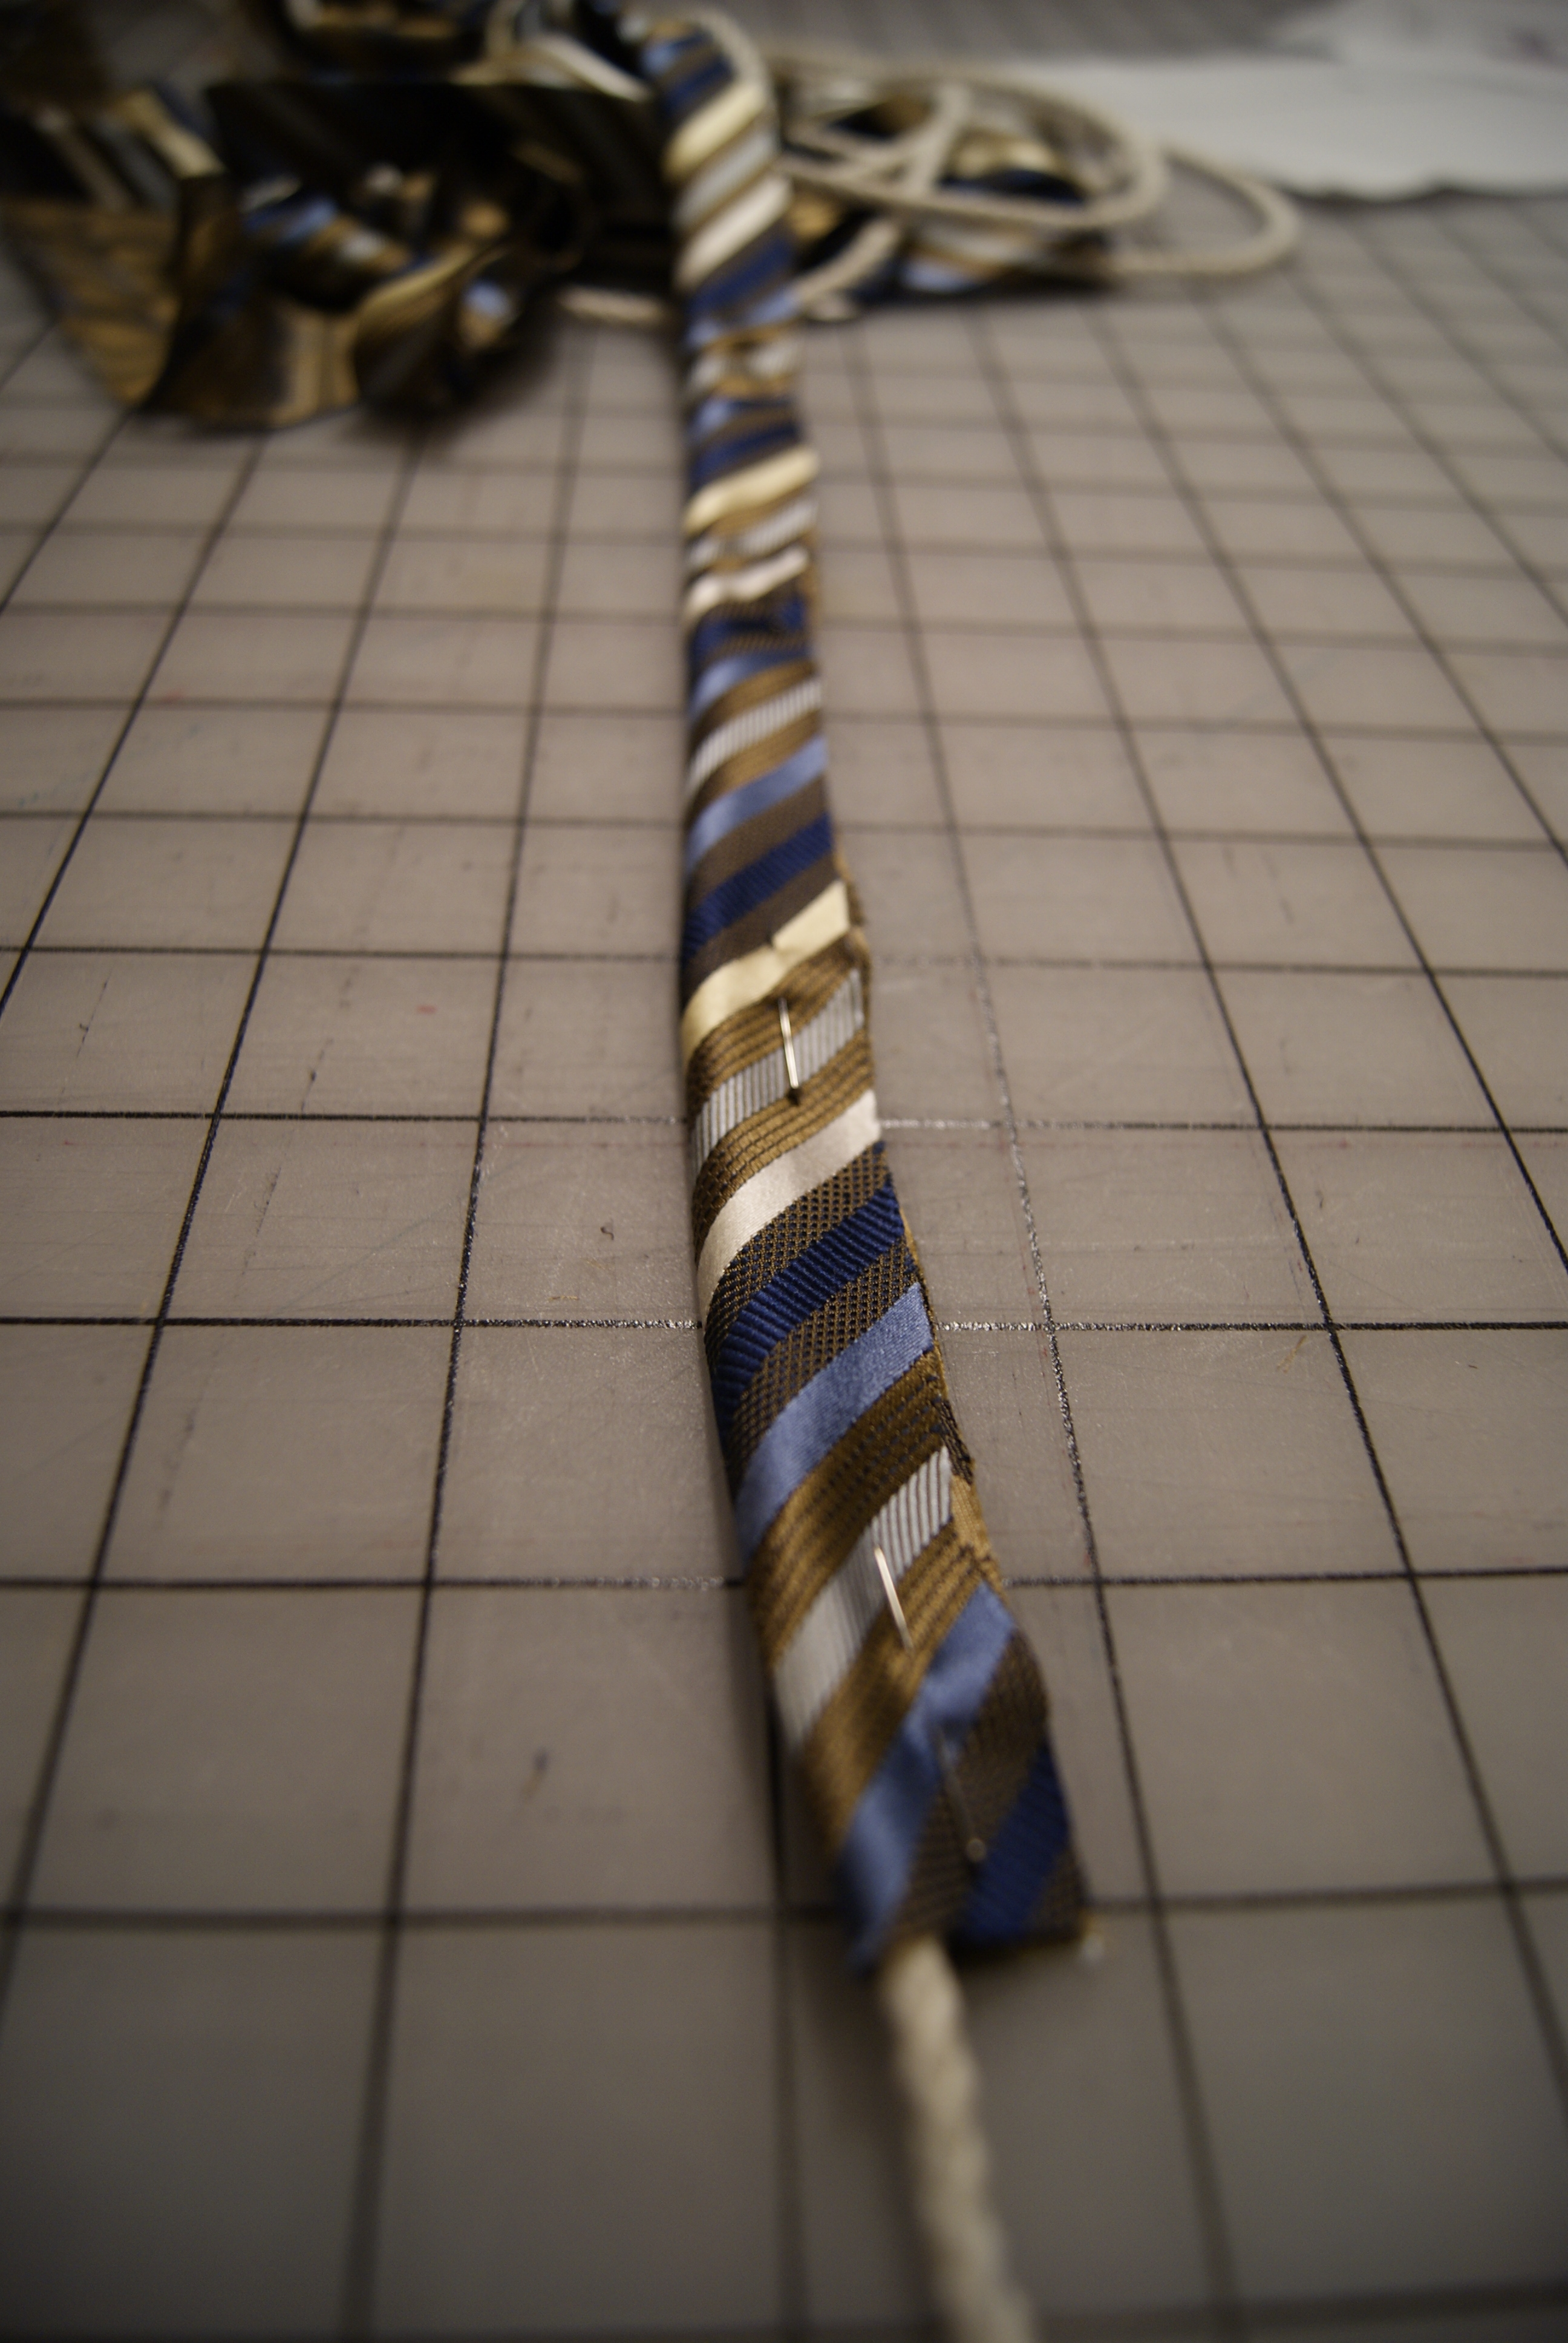
5. Lay out your tie for cutting. I like to fold it into two long halves, and centering the points. Draw a line down the center. Then mark 1 ½” on either side of the center line. You will get very close to the edge, and may get small scrap pieces when you cut. I like to pin the two halves of the tie together at this point to reduce slipping and help keep things as straight as possible.

On your mark…
6. Start cutting- I usually use my scissors since cutting through 2 layers of silk with your rotary can get messy. You can certainly cut one layer at a time if you want to be more precise, but end-to-end on a necktie is a long stretch.
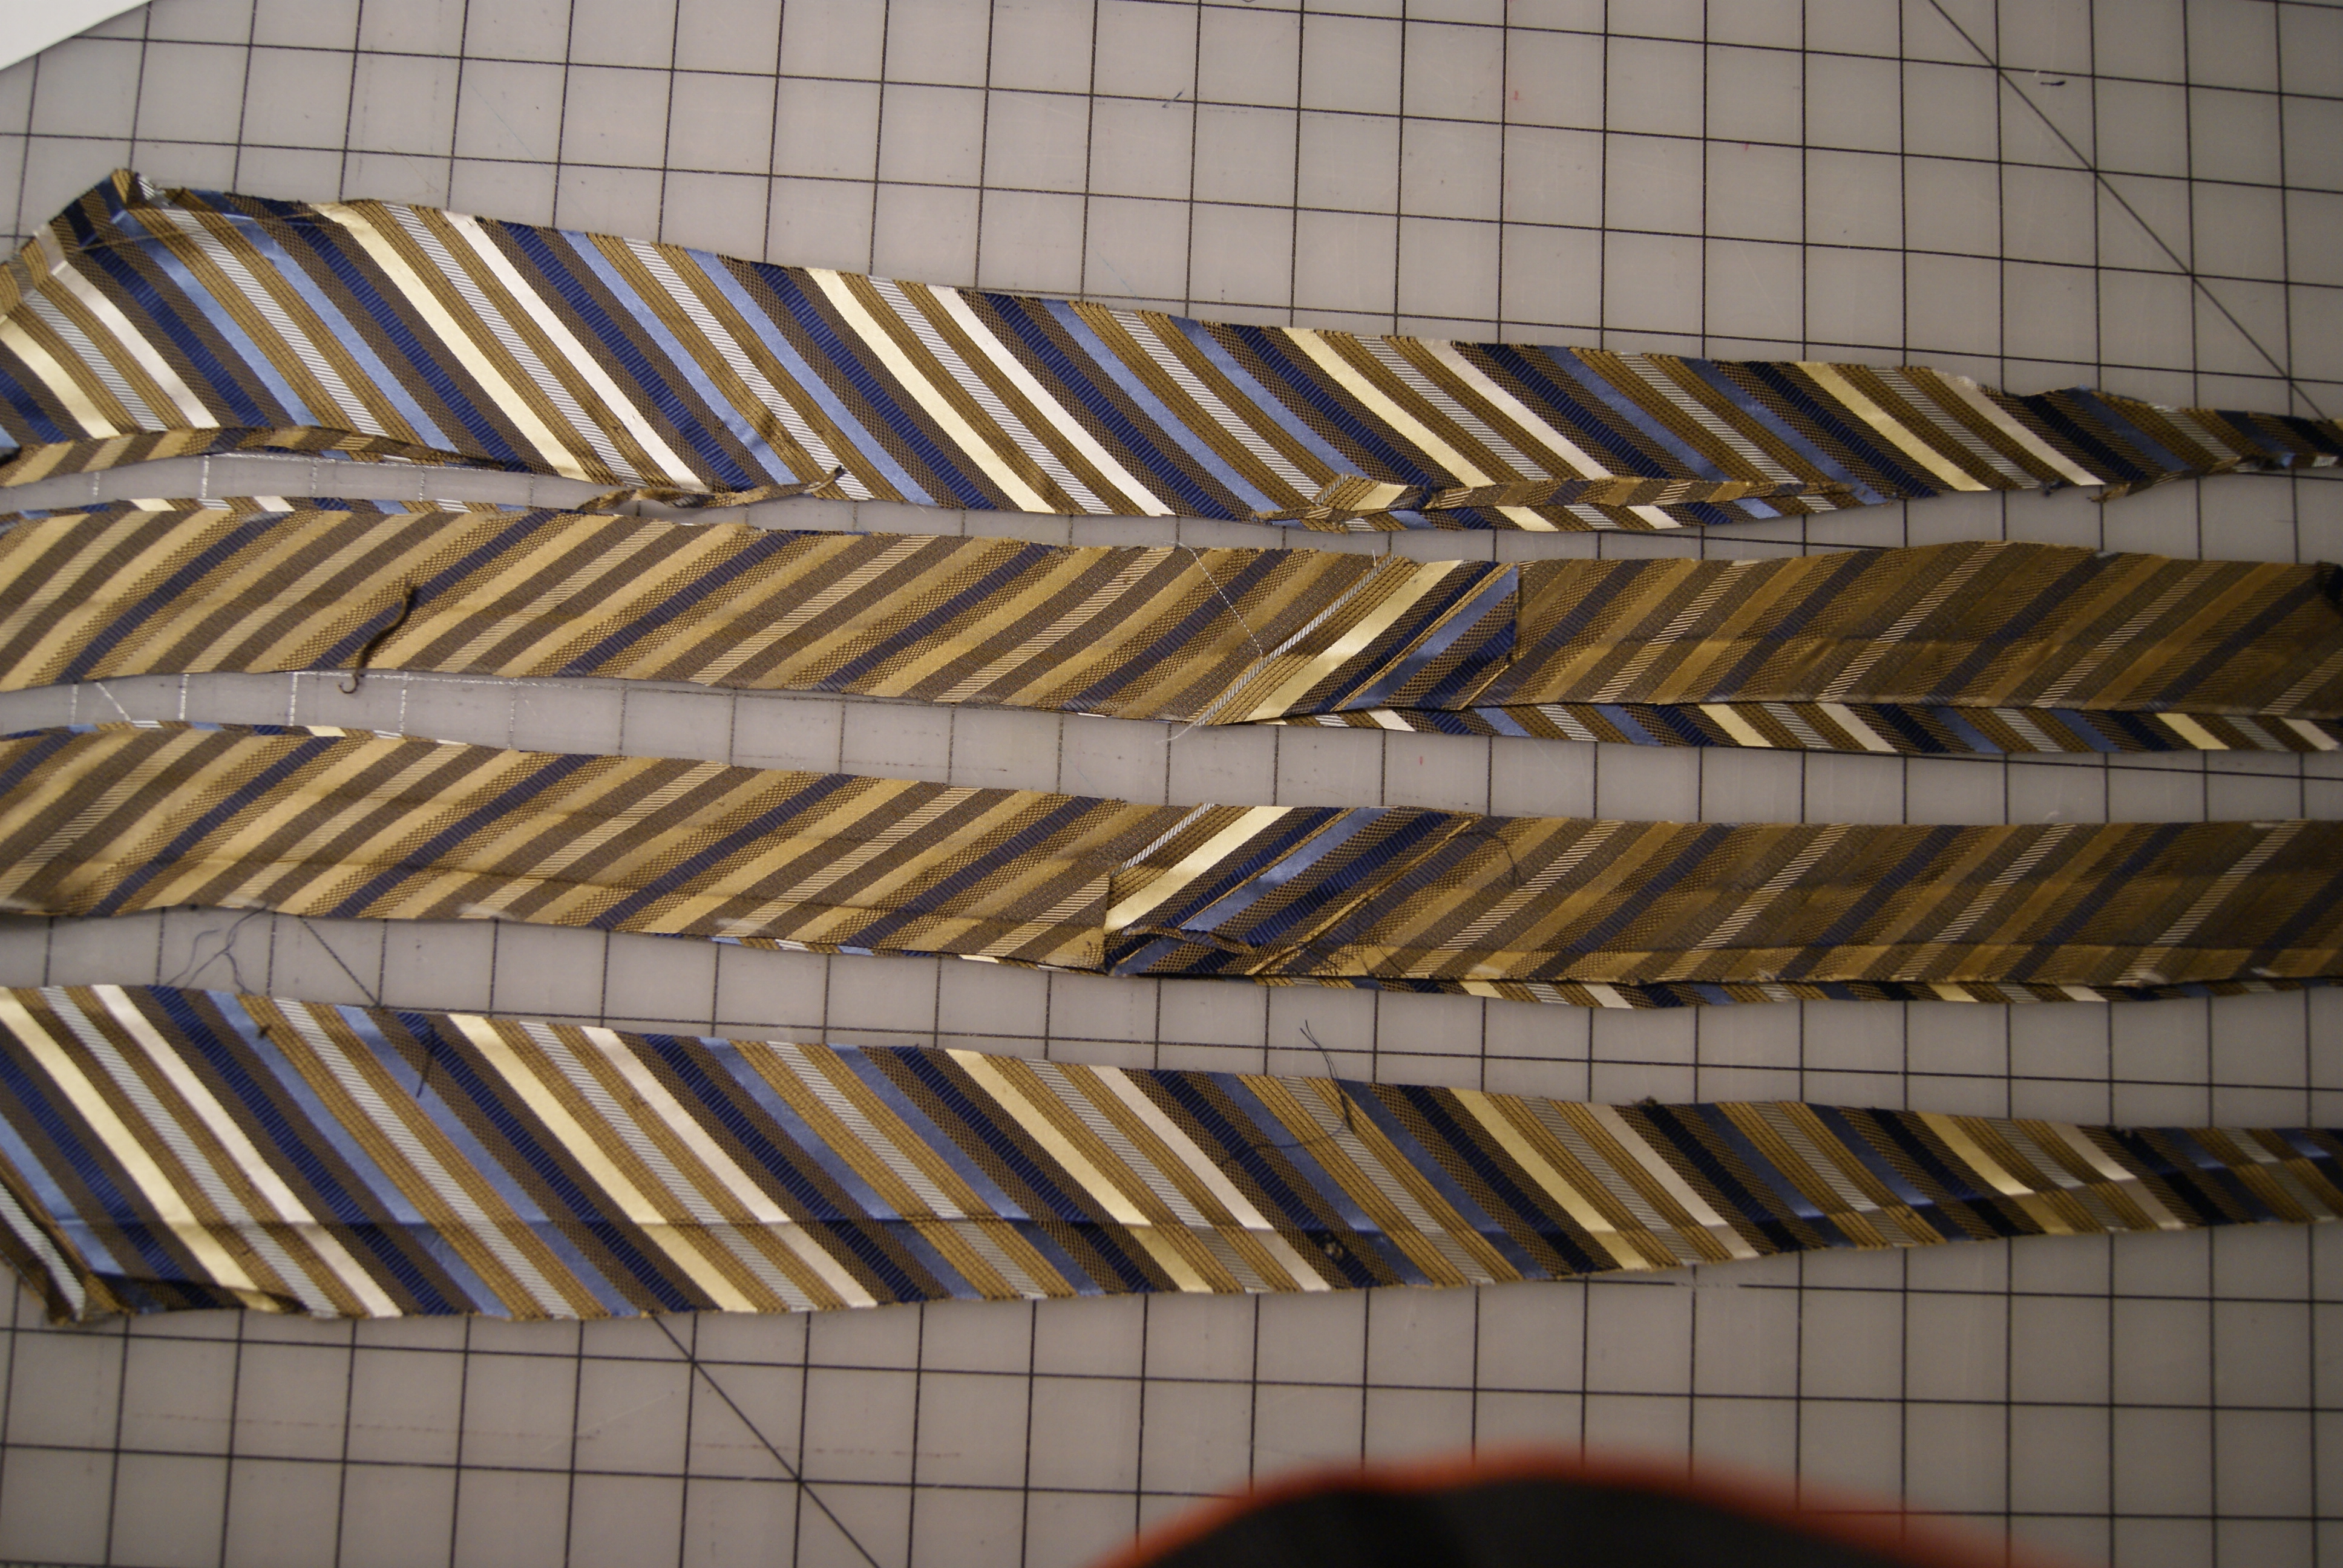
The hardest part is over now
7. Set your 2 center-cut strips aside (it sounds like we’re talking about steak now doesn’t it?) and bring the scraps from the wide end of the tie together. Using the straight cut edge as a guide, mark where it is 1 ½” wide. That’s the longest these last strips will be. Then measure out 1 ½” from the straight edge and cut those strips. Everything leftover is scrap now. Do whatever you do with scraps.
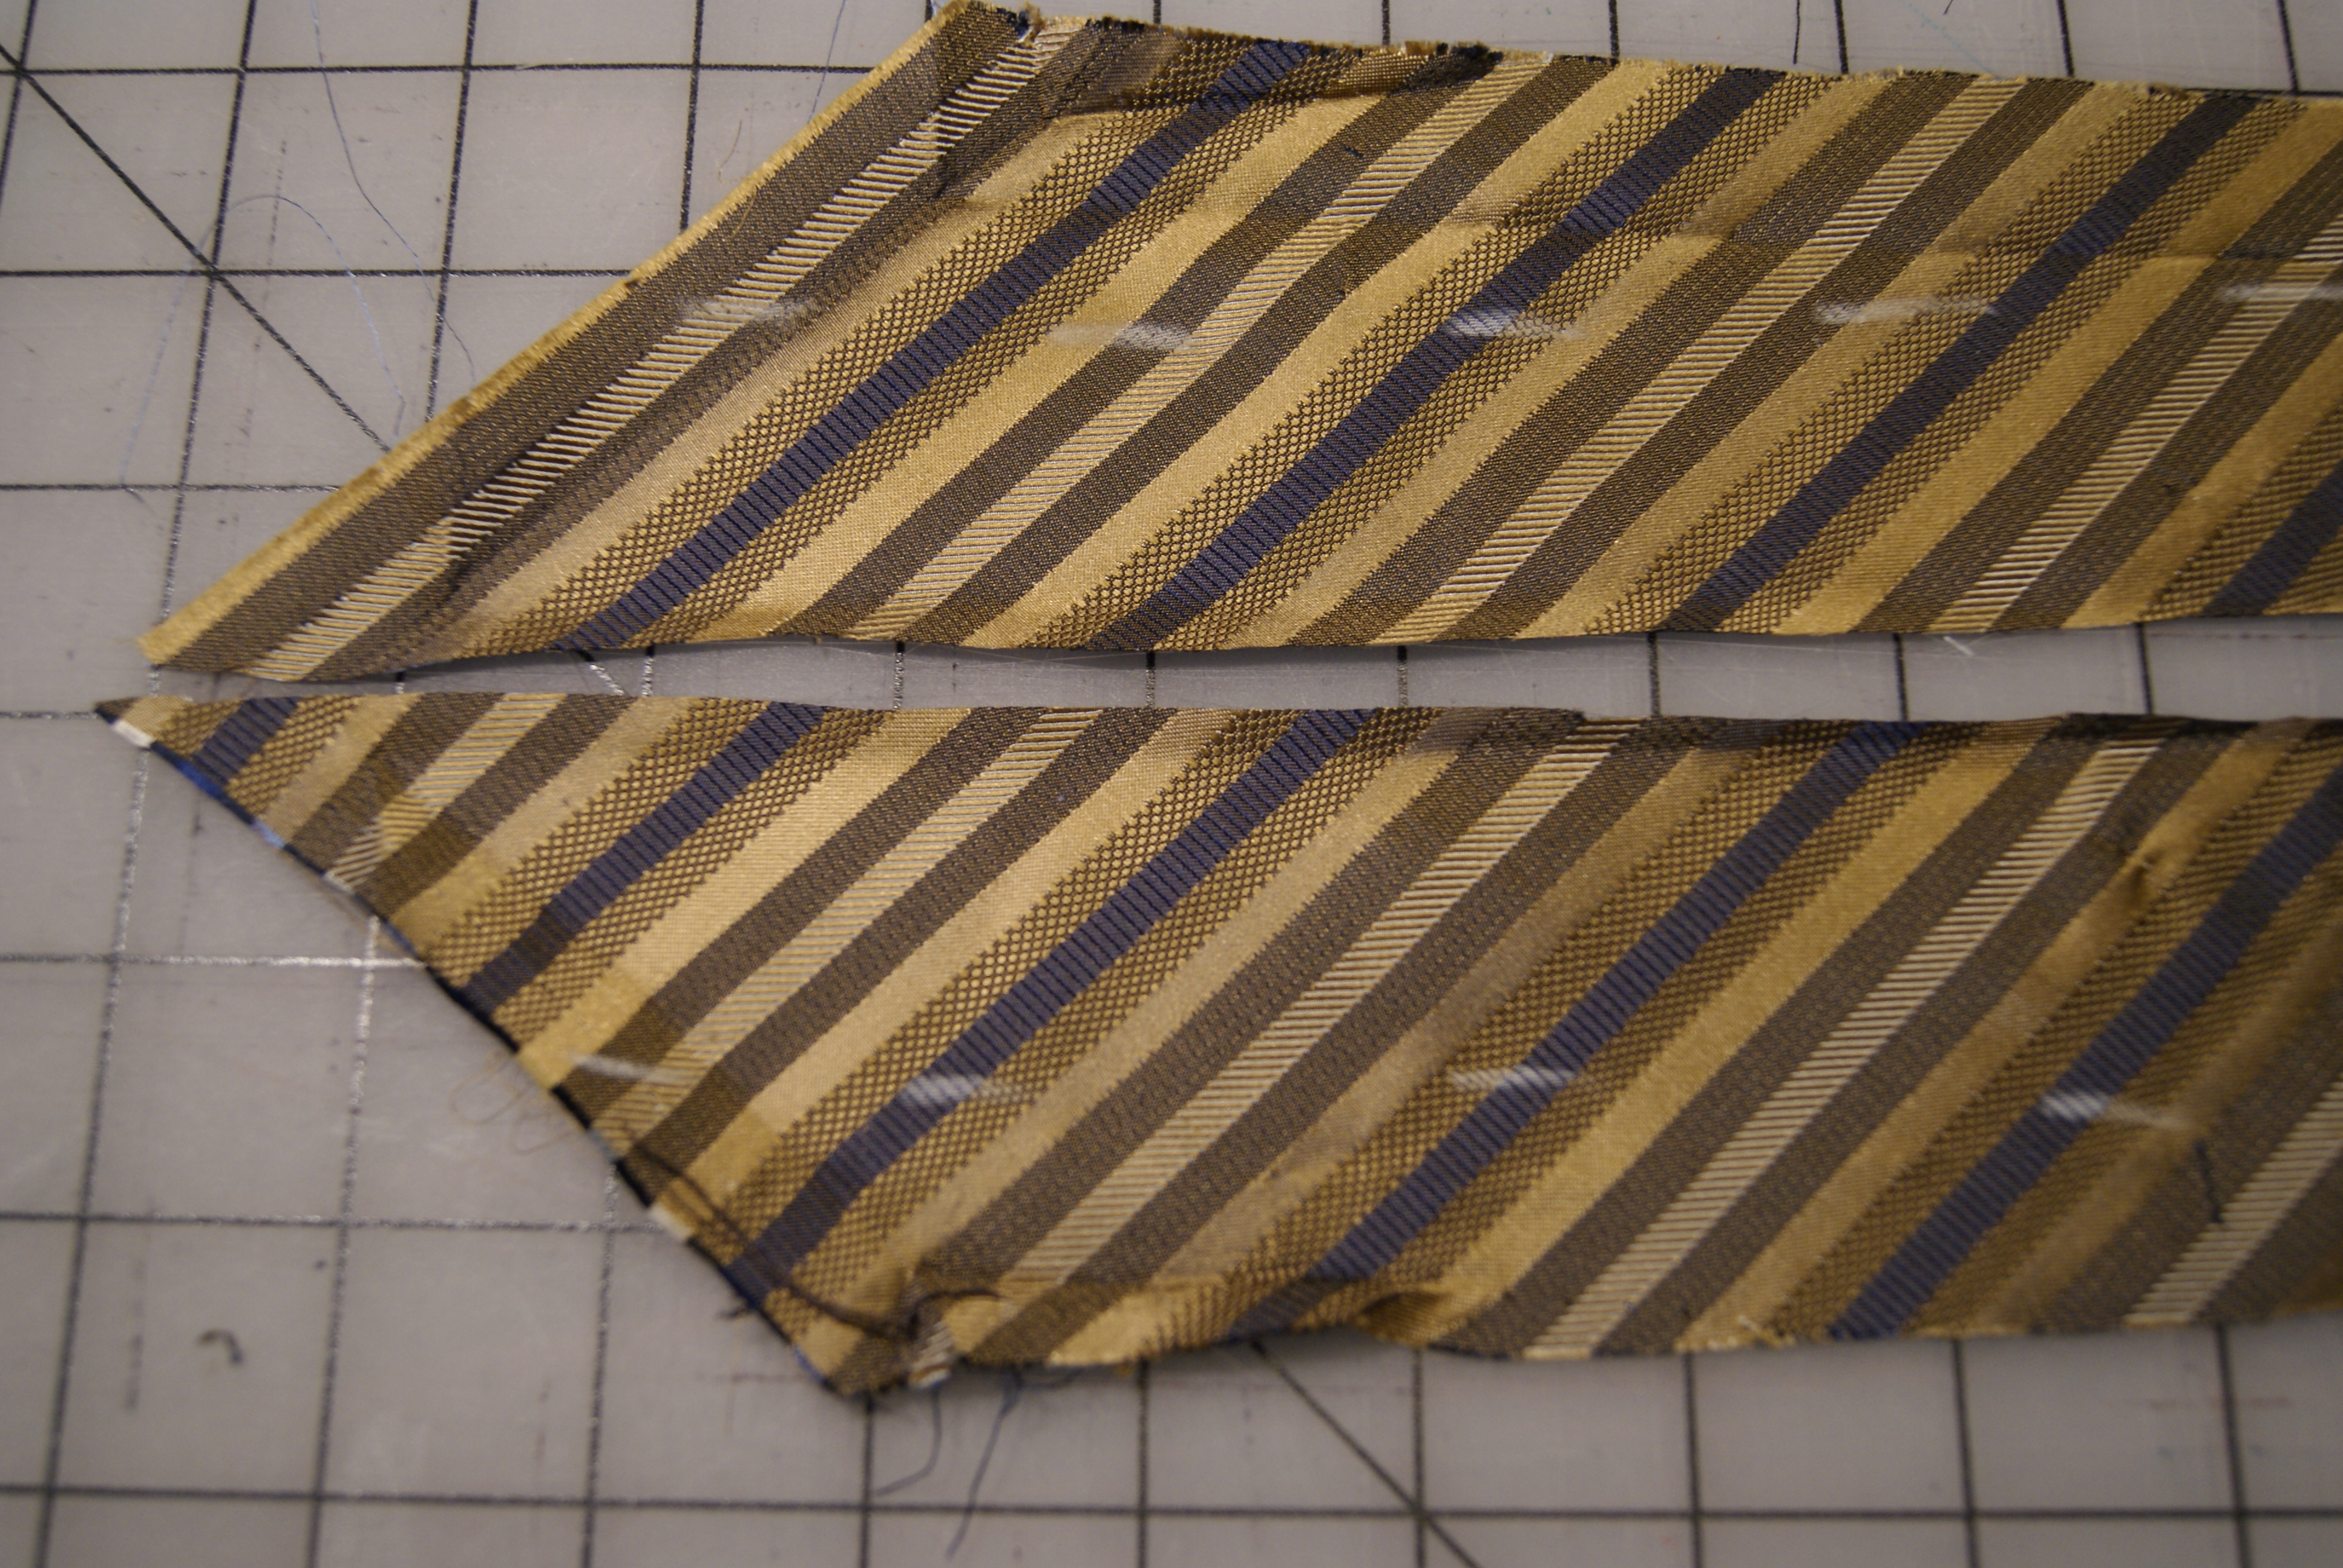
Almost done
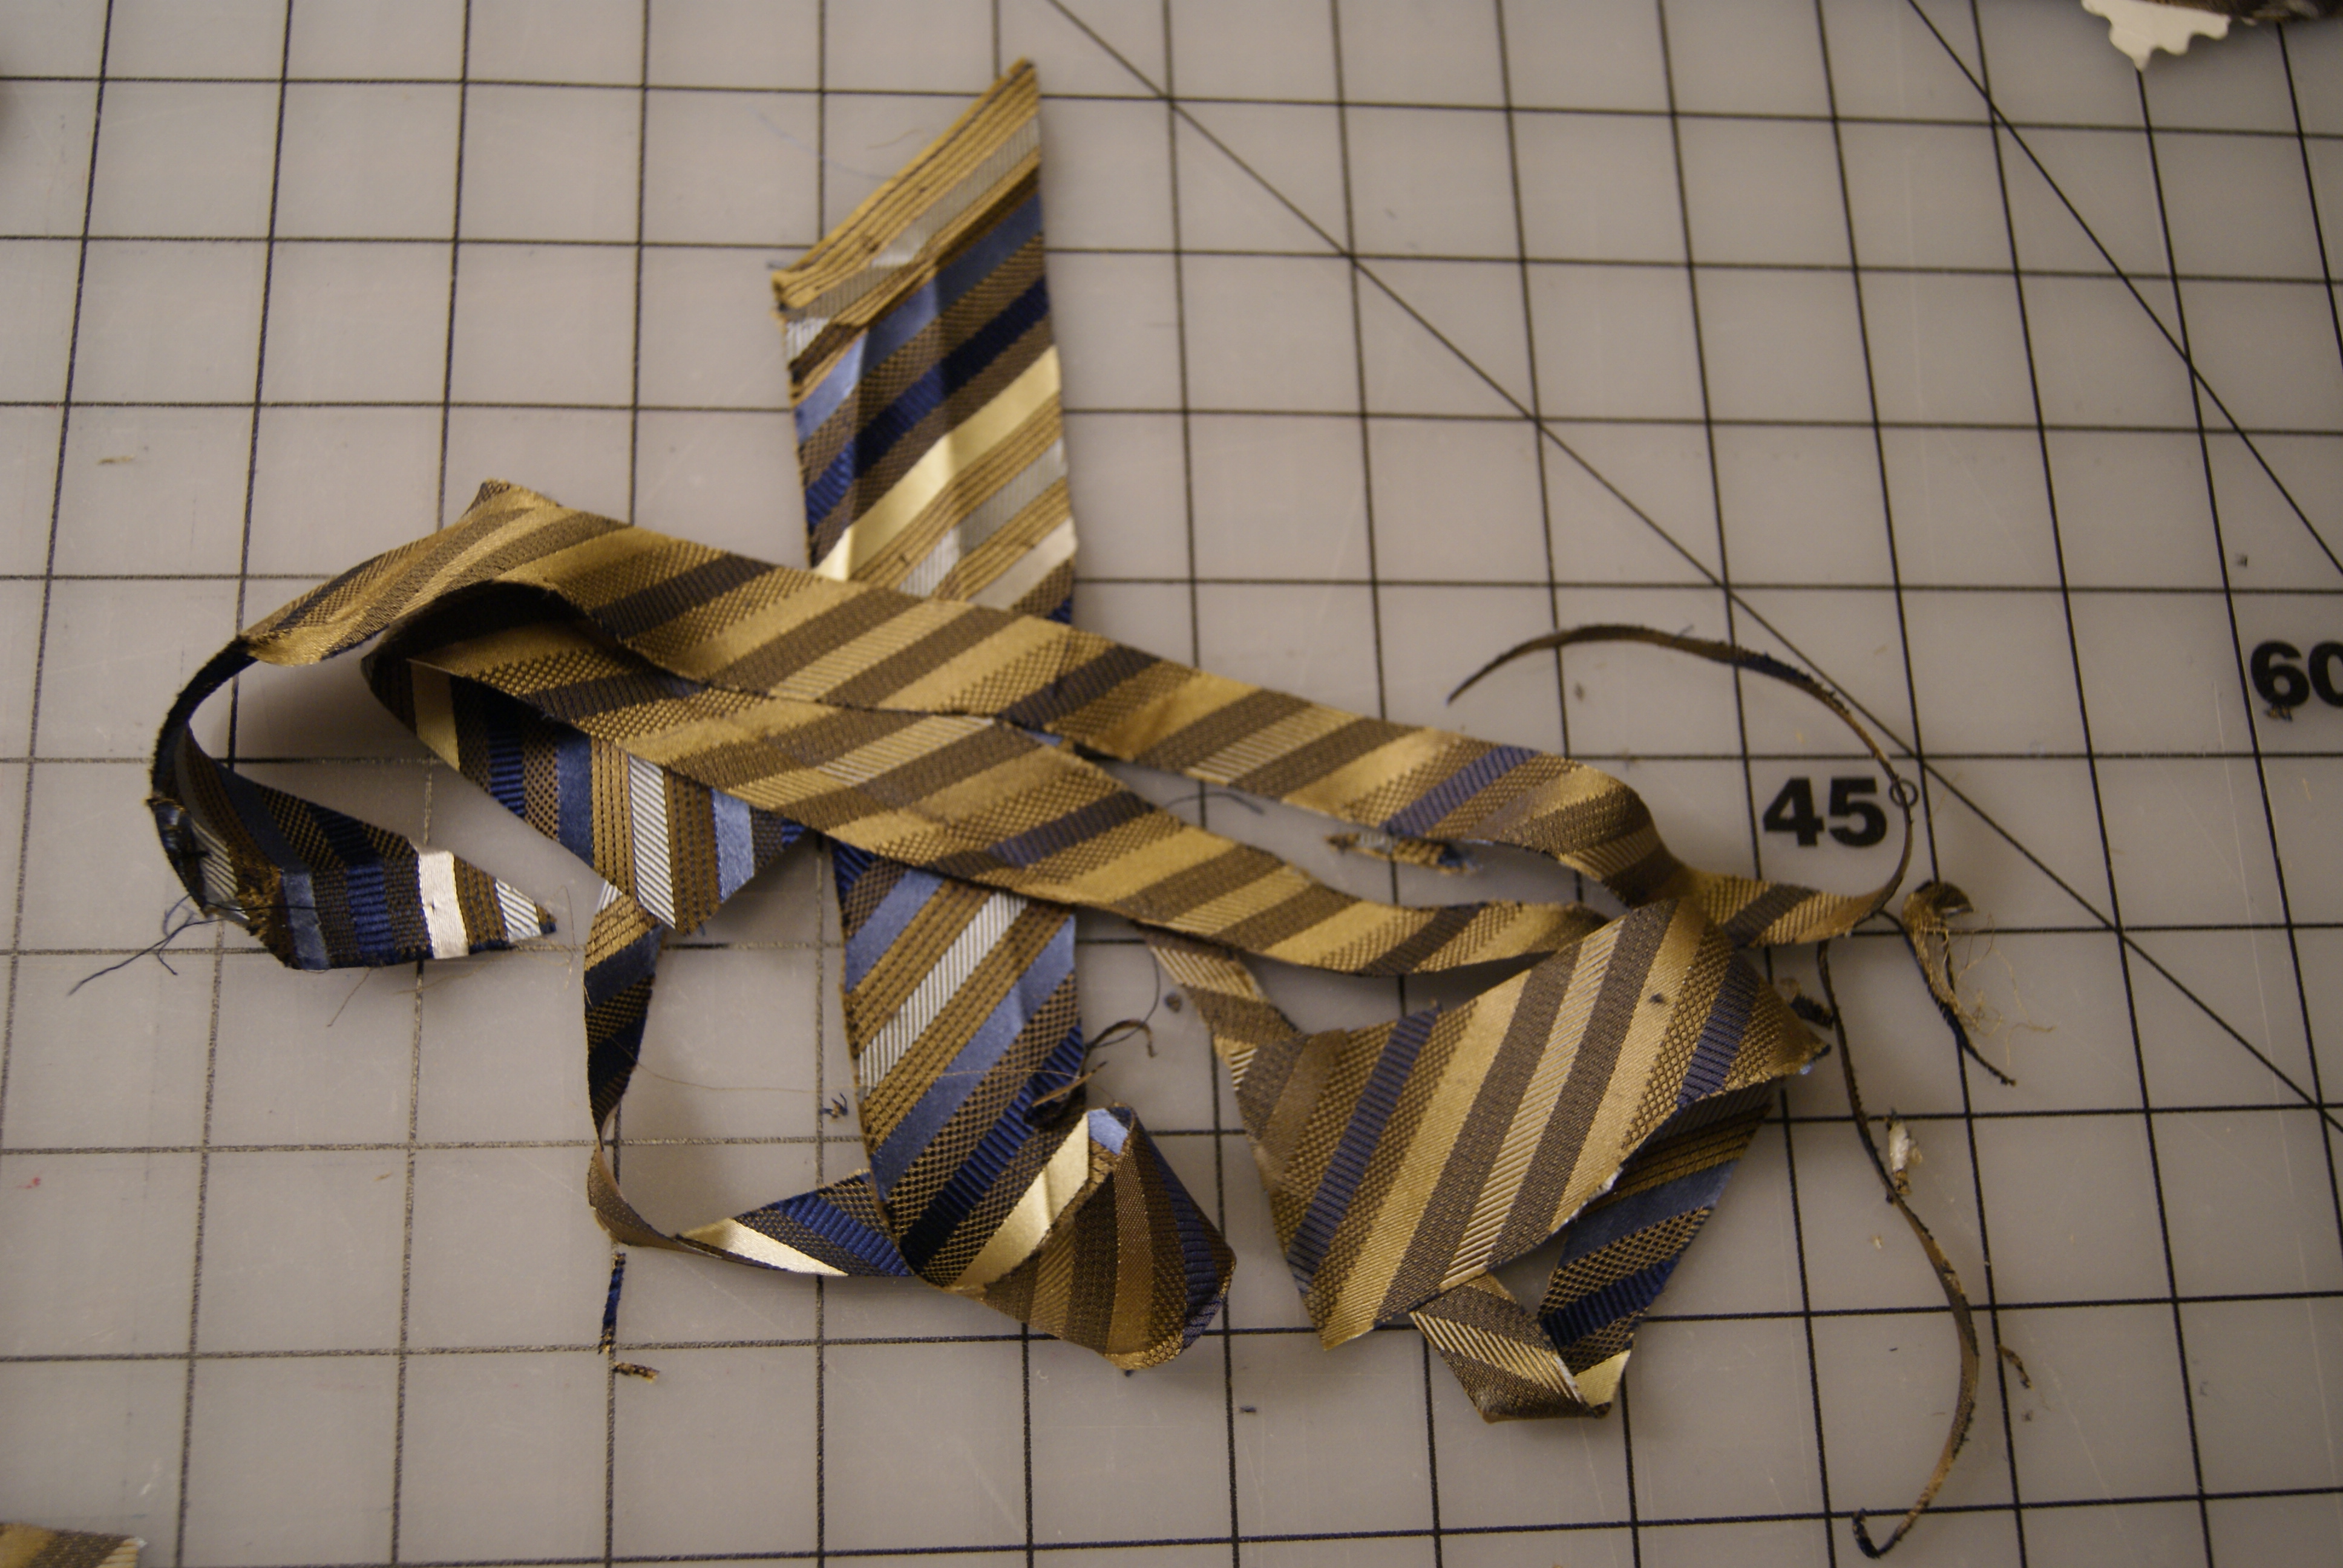
Scraps! Love ’em or hate ’em, now you’ve got more.
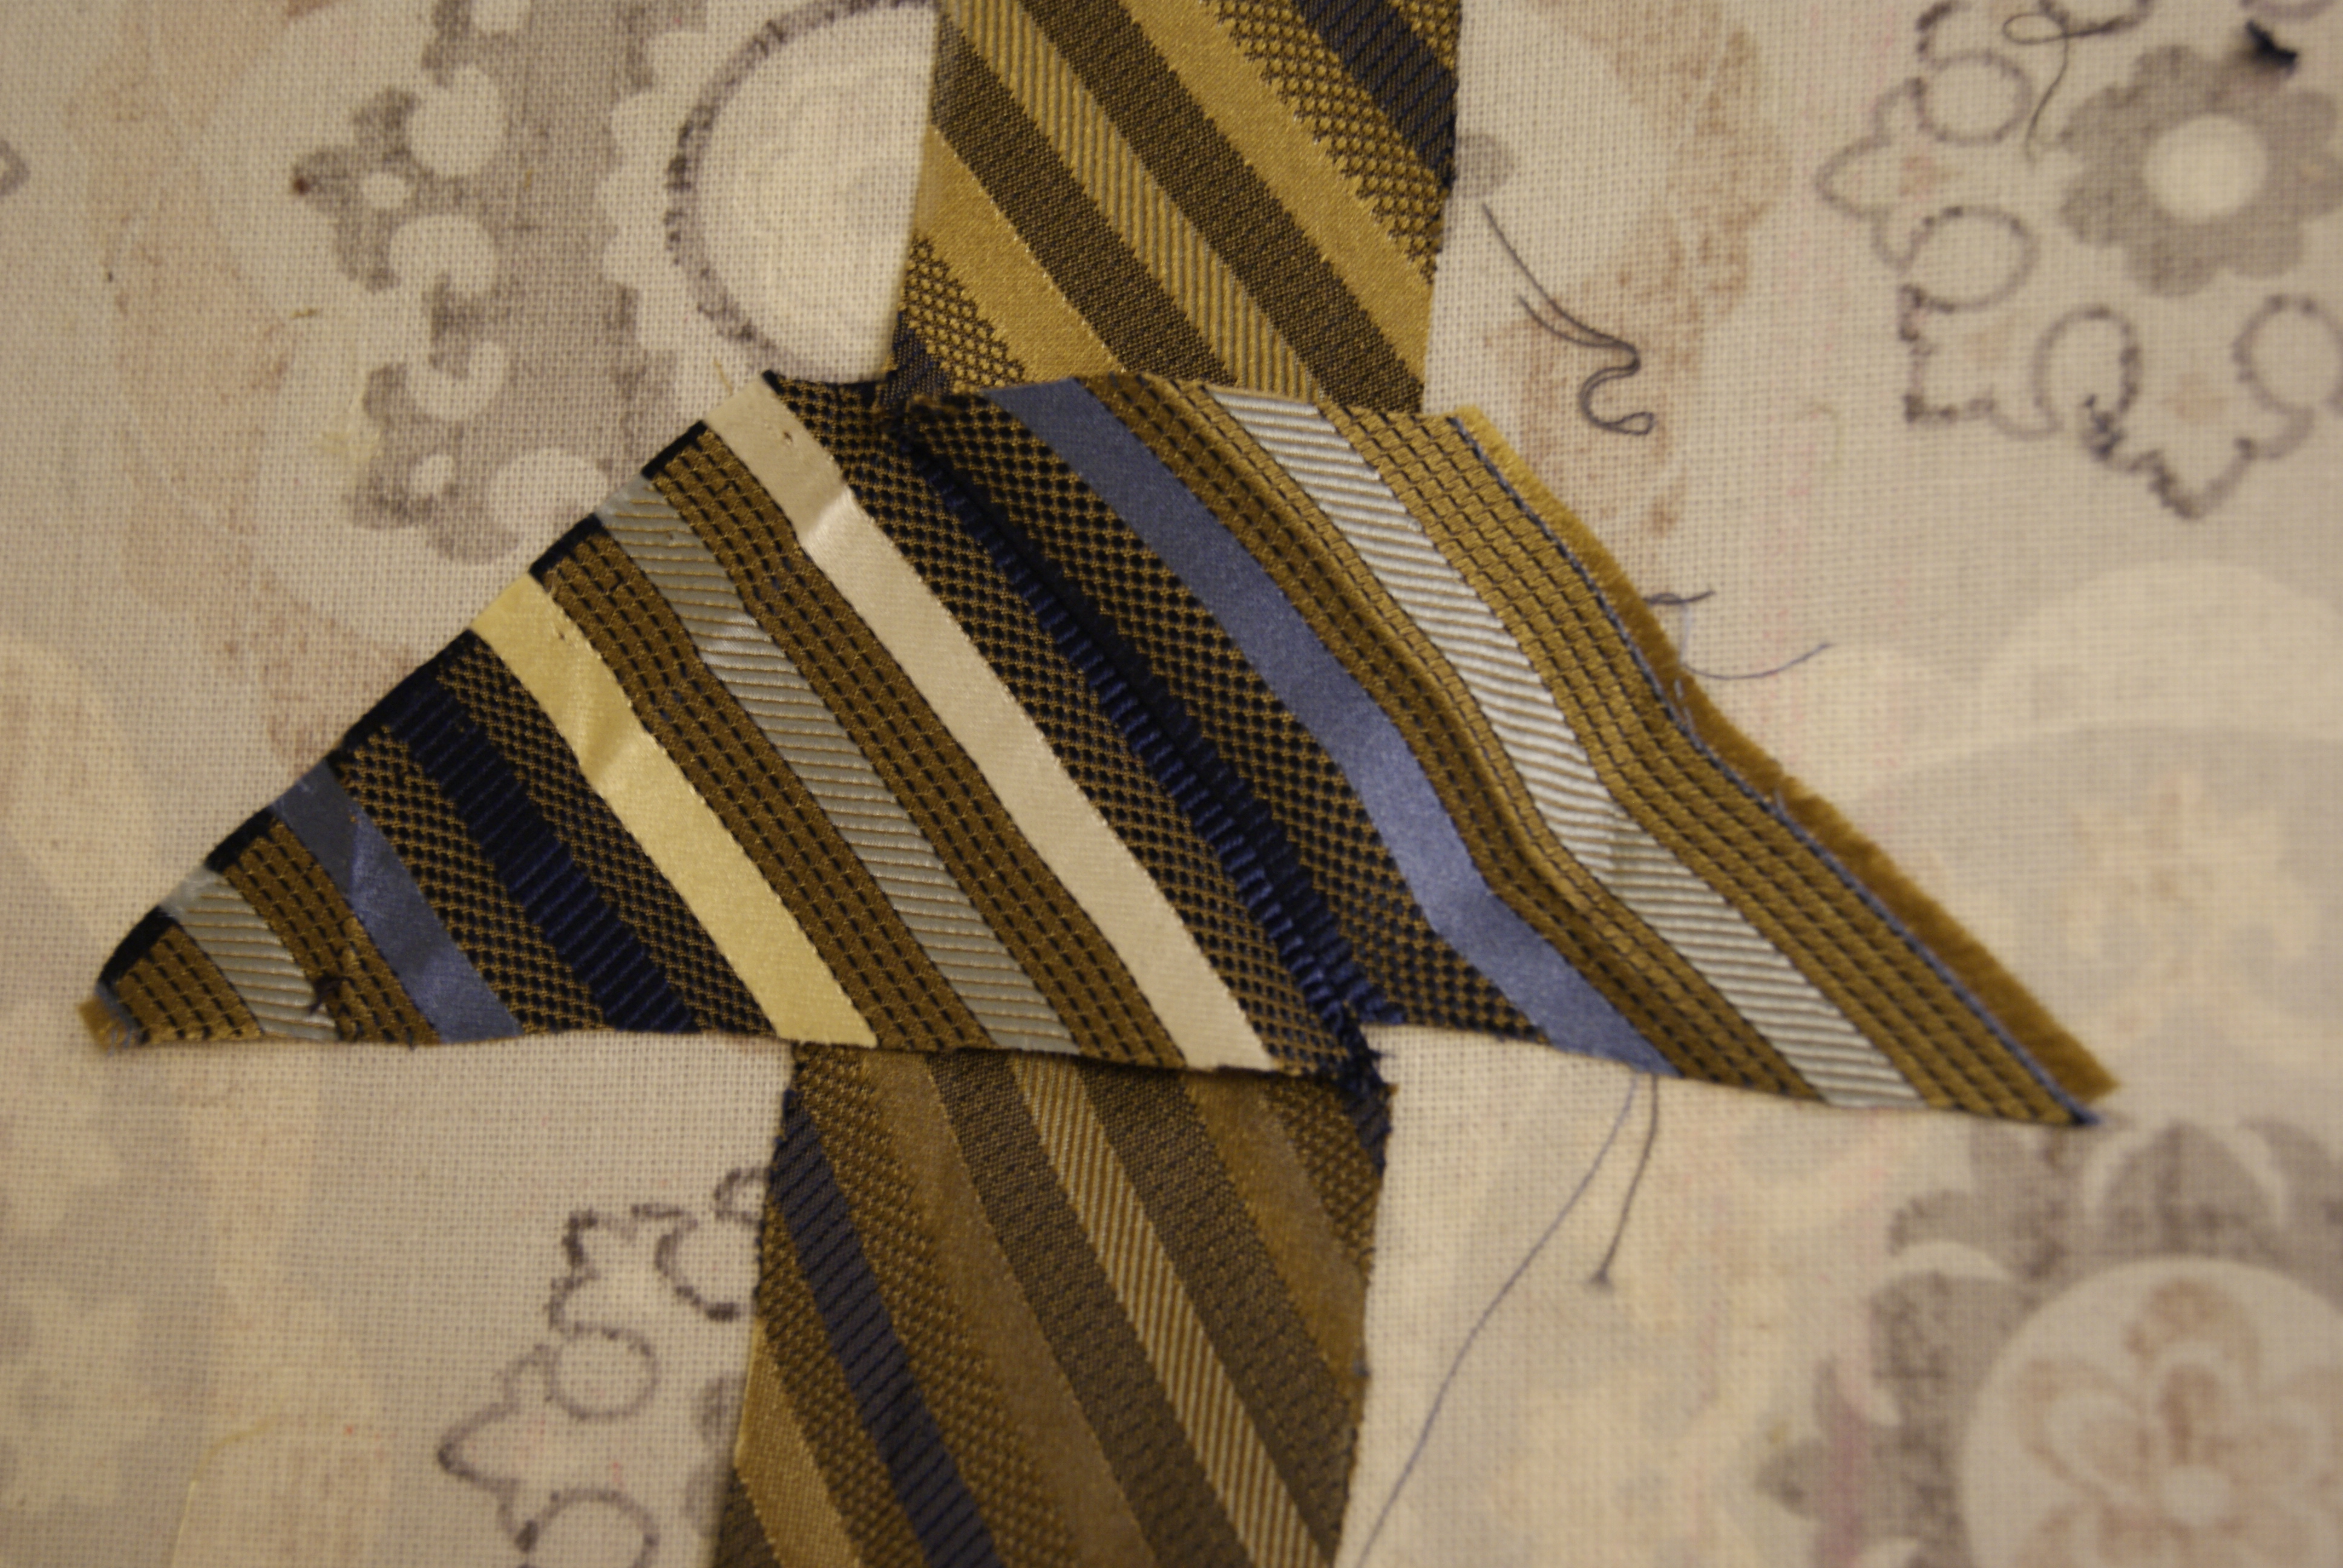
8. Now, take two of your strips (I like to go short-long-long-short, but not for any particular reason) and lay them right sides together at a right angle. If you’re a fussy cutter at heart, try to overlay your pattern exactly, so it will be continuous after you sew the strips together. If the ends of your strip are angled, make sure the full widths of the strips are overlapping completely where you will sew. Pin these strips together.
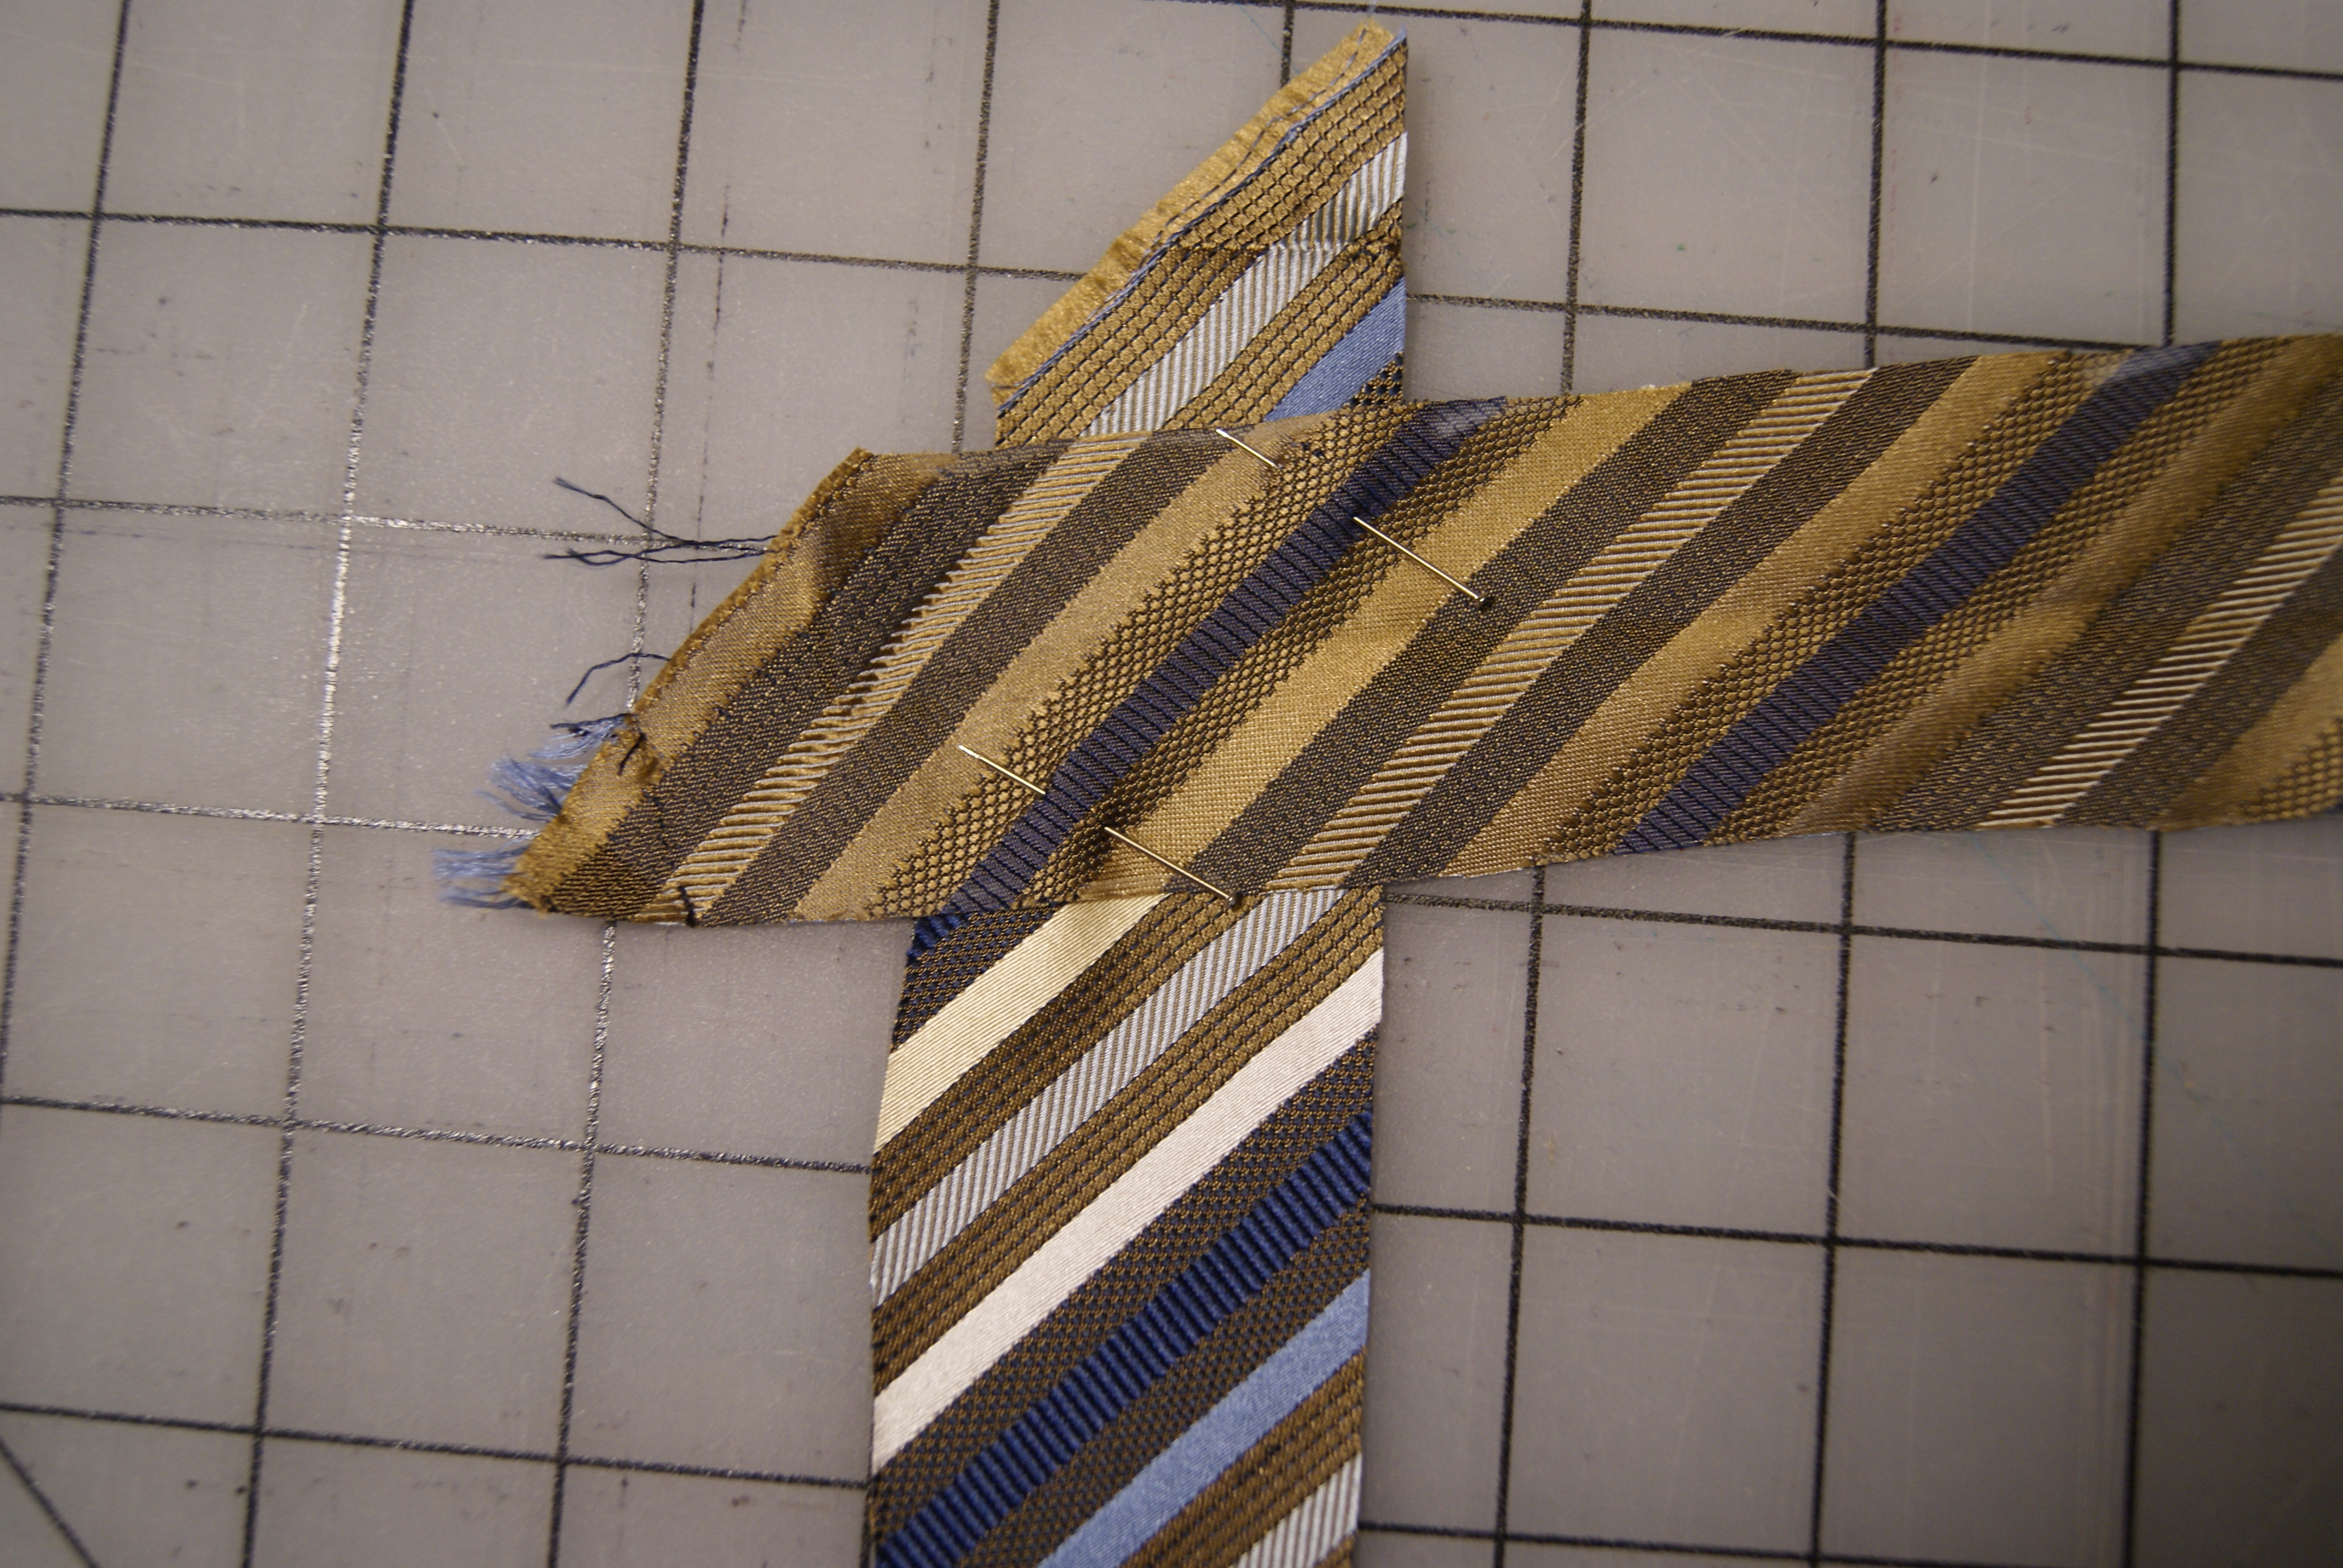
Now the fun part!
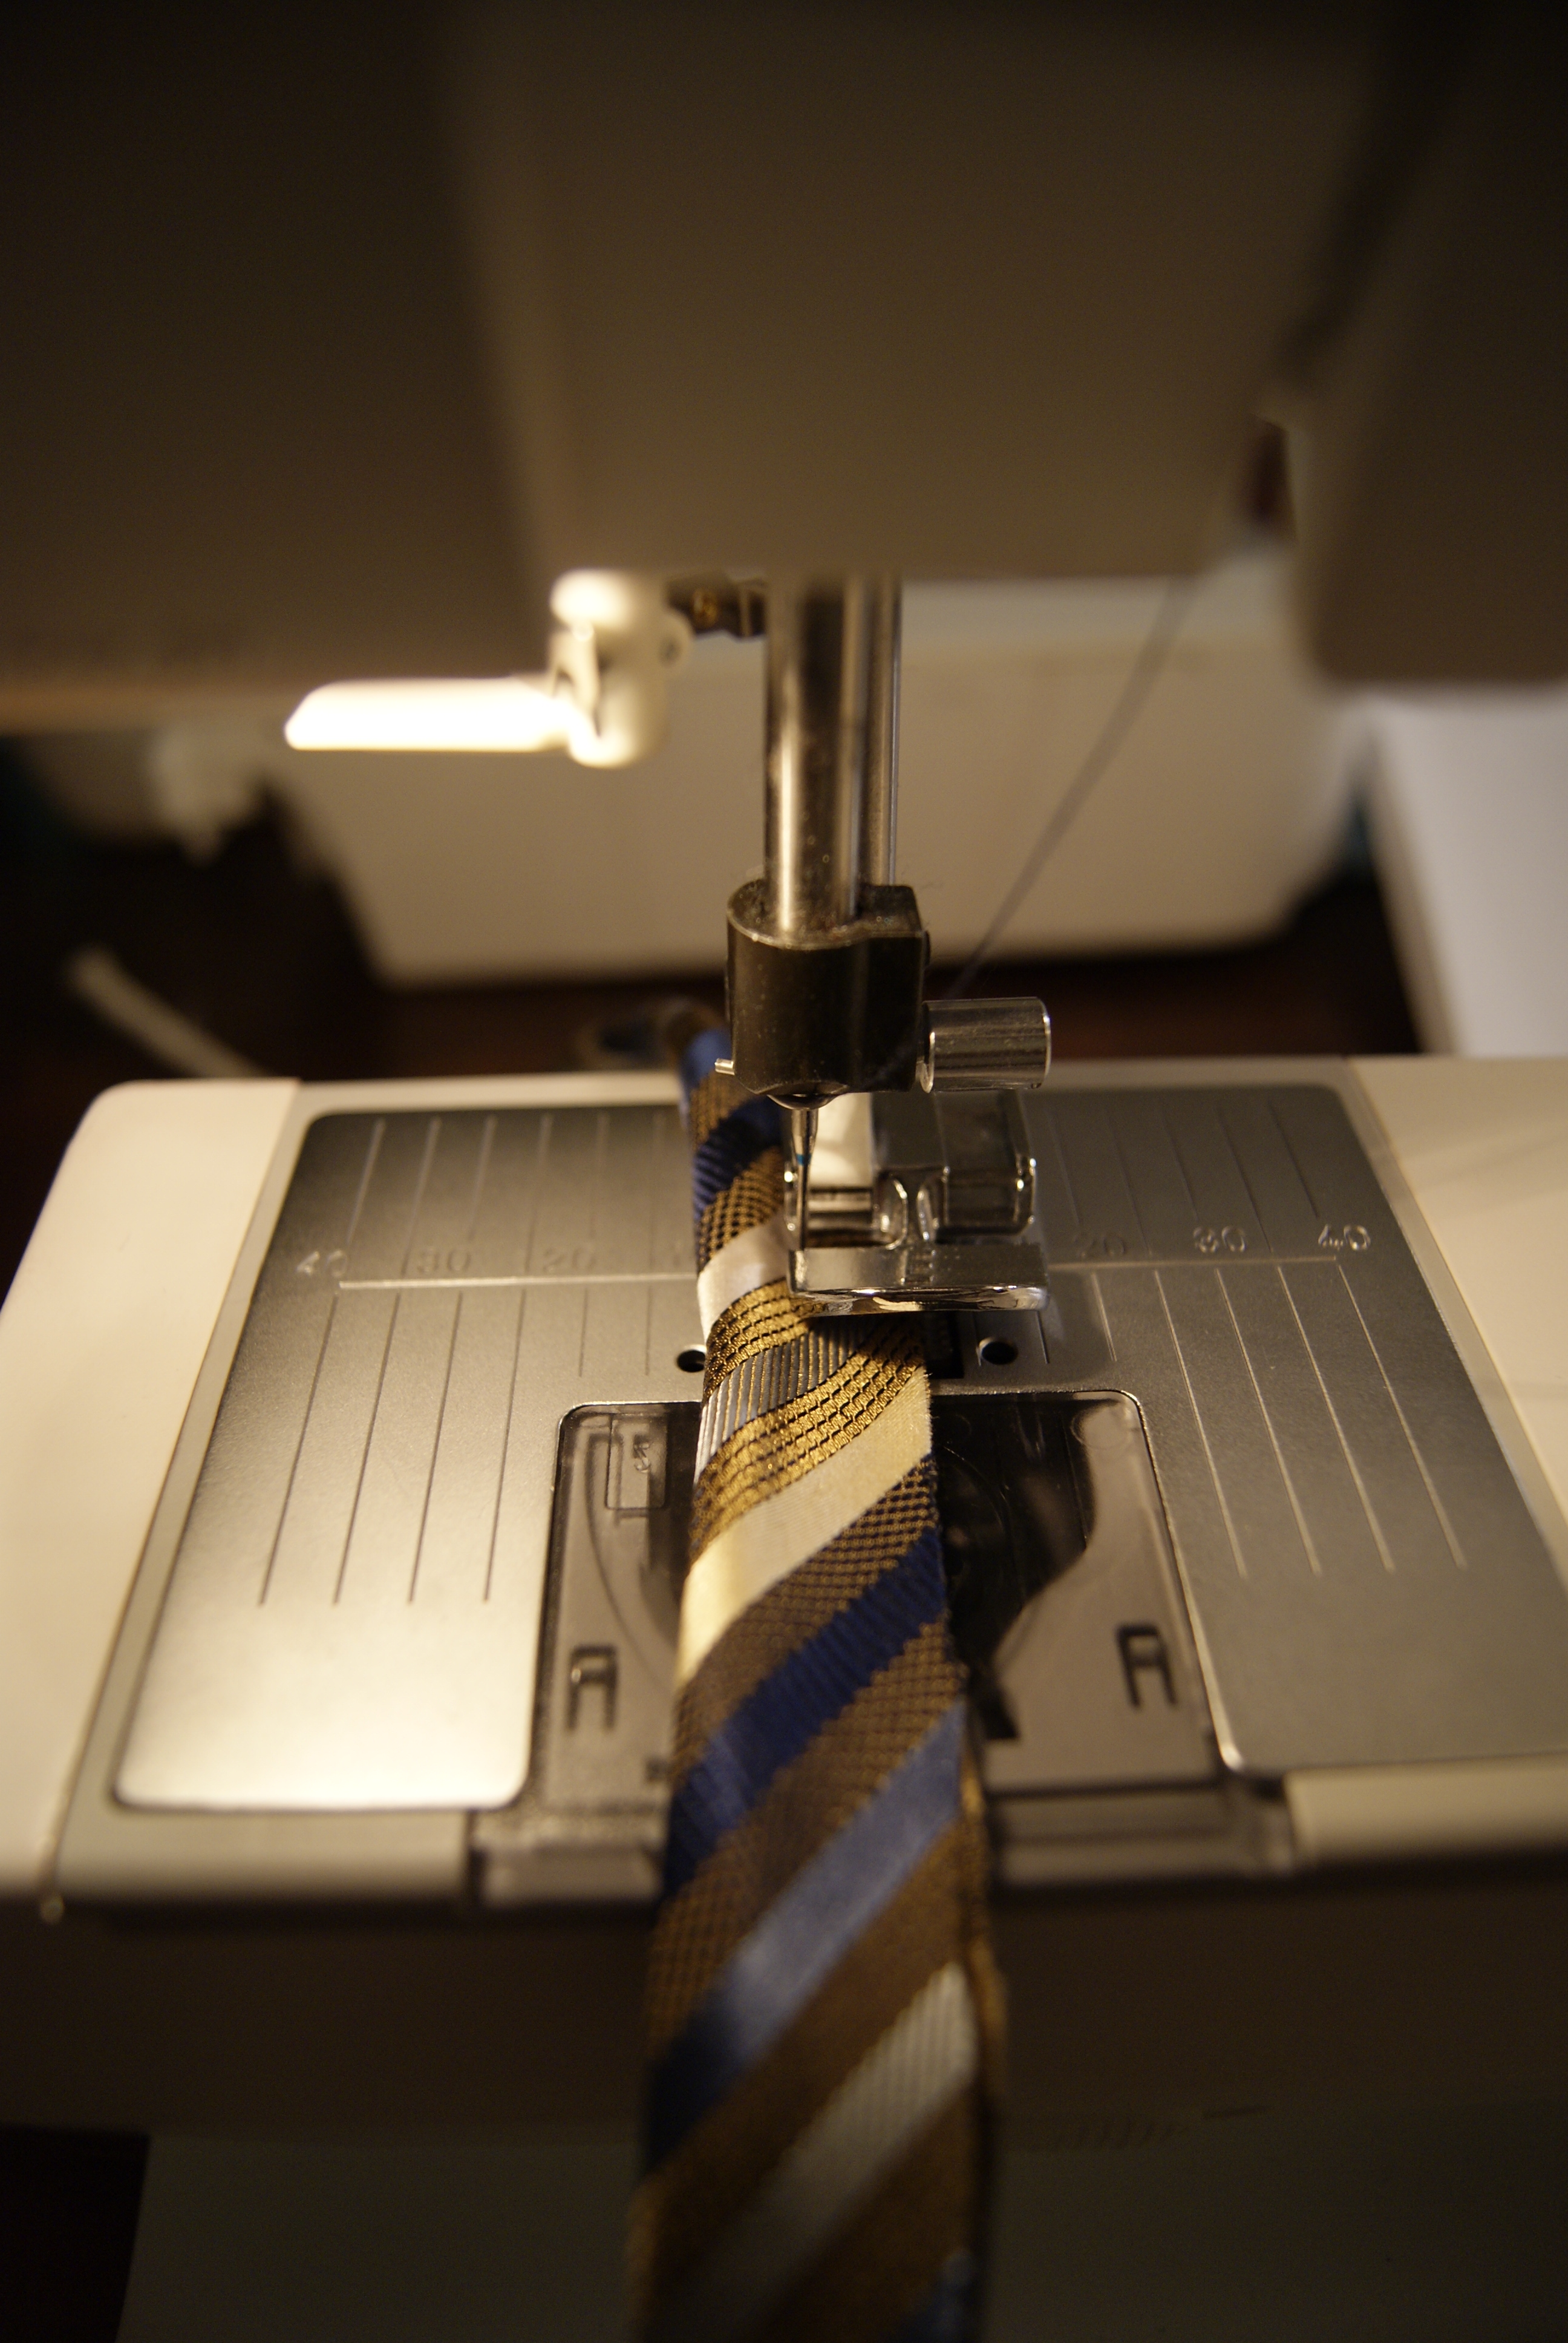
9. Sew diagonally across the overlap. This makes your seam go in the direction of the pattern and with the bias- it will stretch with the fabric, and also blend into the pattern. Make sure your seam goes across the complete width of both of your bias strips.
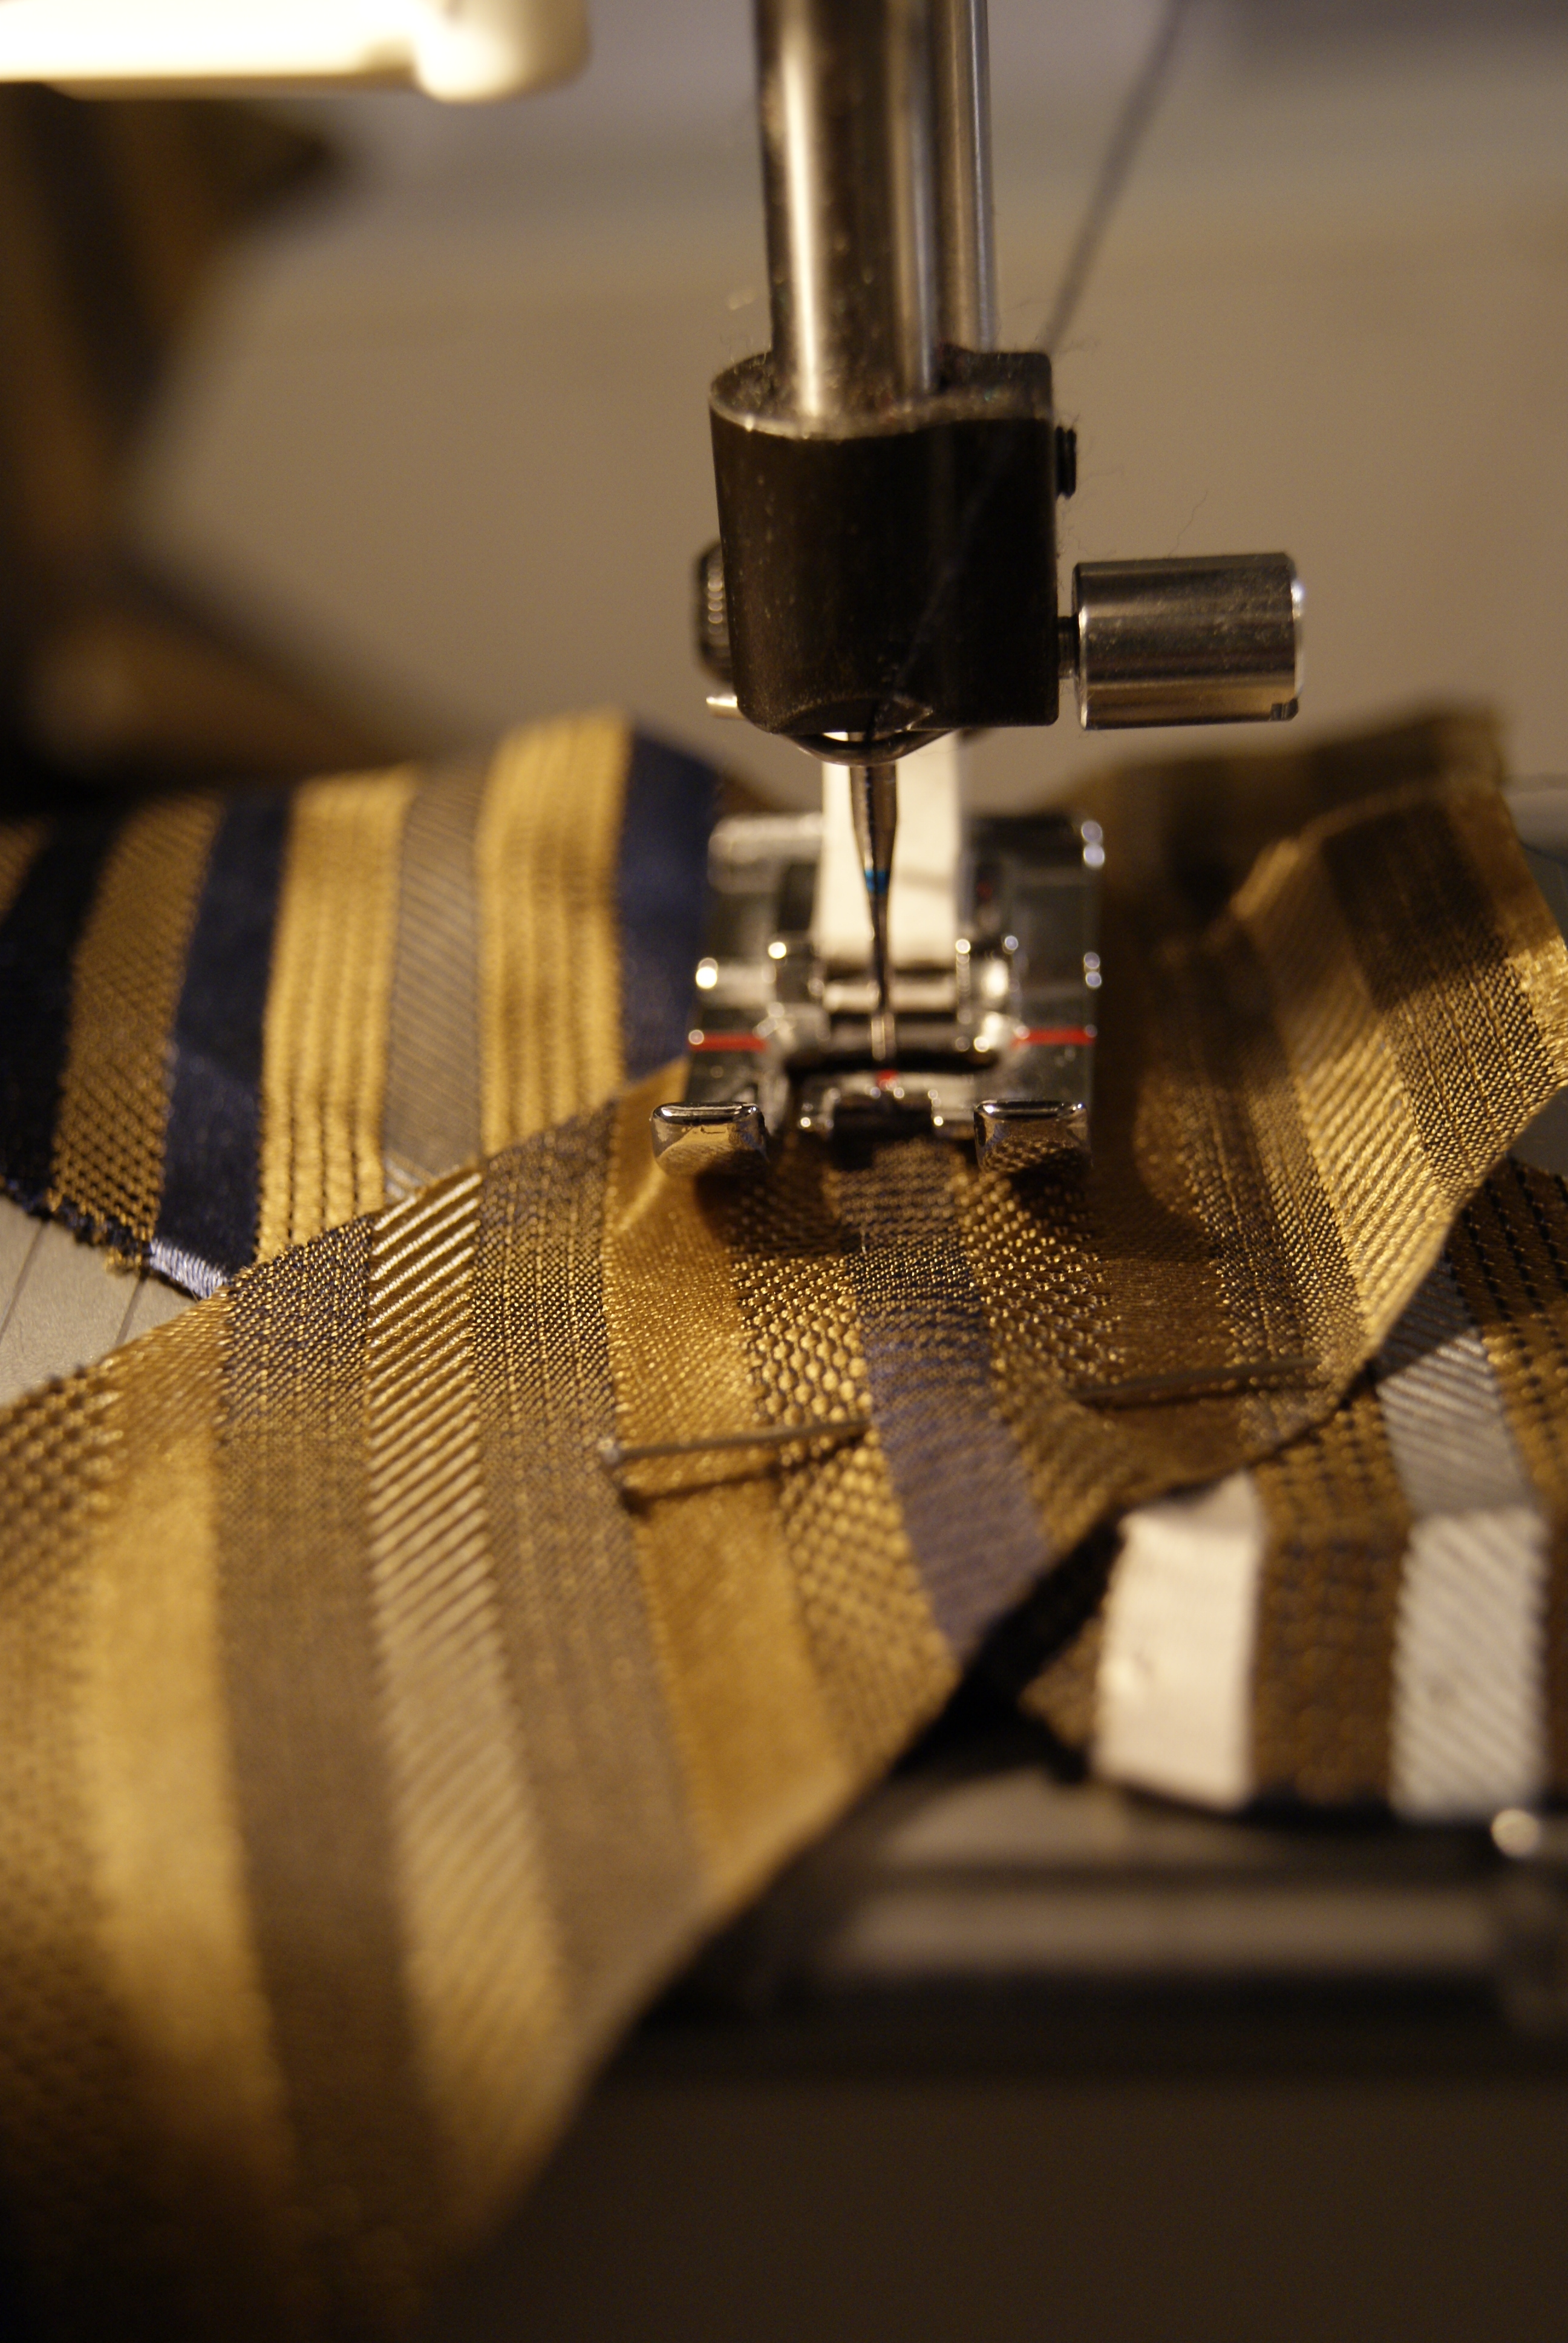
Obligatory pretty sewing shot
10. Repeat to sew all 4 of your strips end to end into one long strip.
11. Press your seams open and trim the seam allowances, including any seam allowances that came with the tie. You want to reduce as much bulk as possible in your piping because it needs to go around curves and fit in tight spaces (especially if you’re making a bag!).
Not too bad on the stripe matching
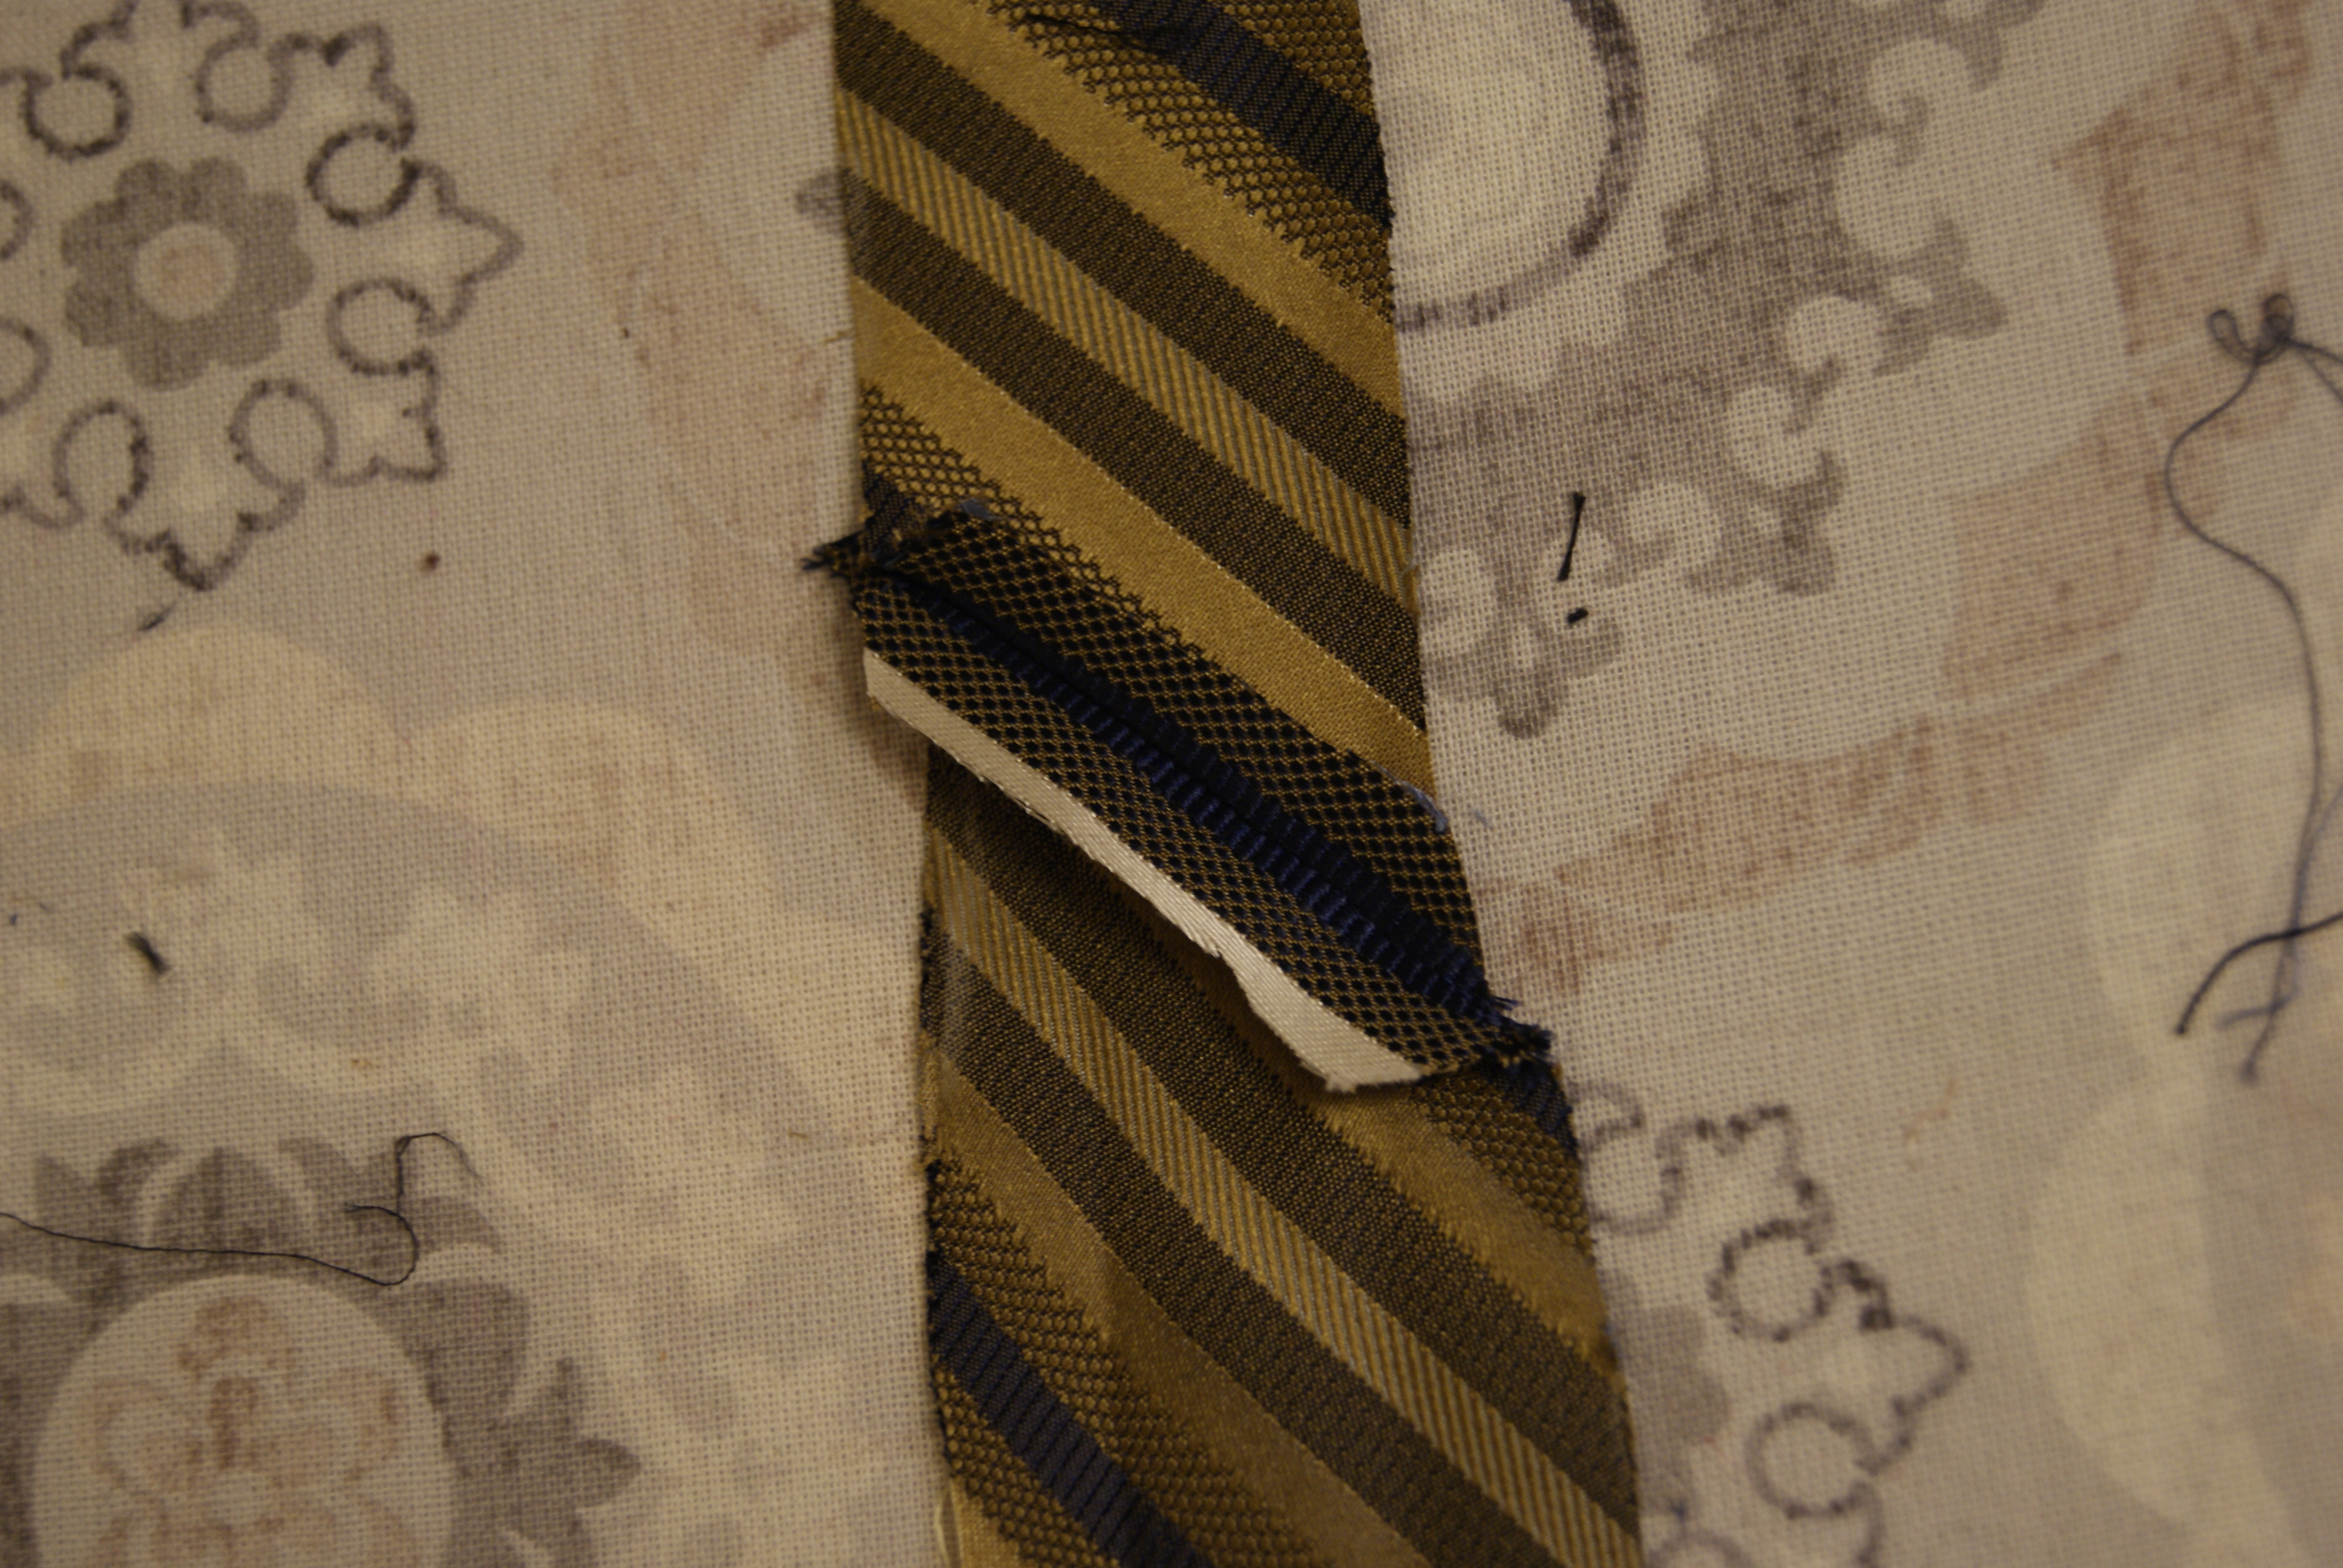
Get rid of all that extra
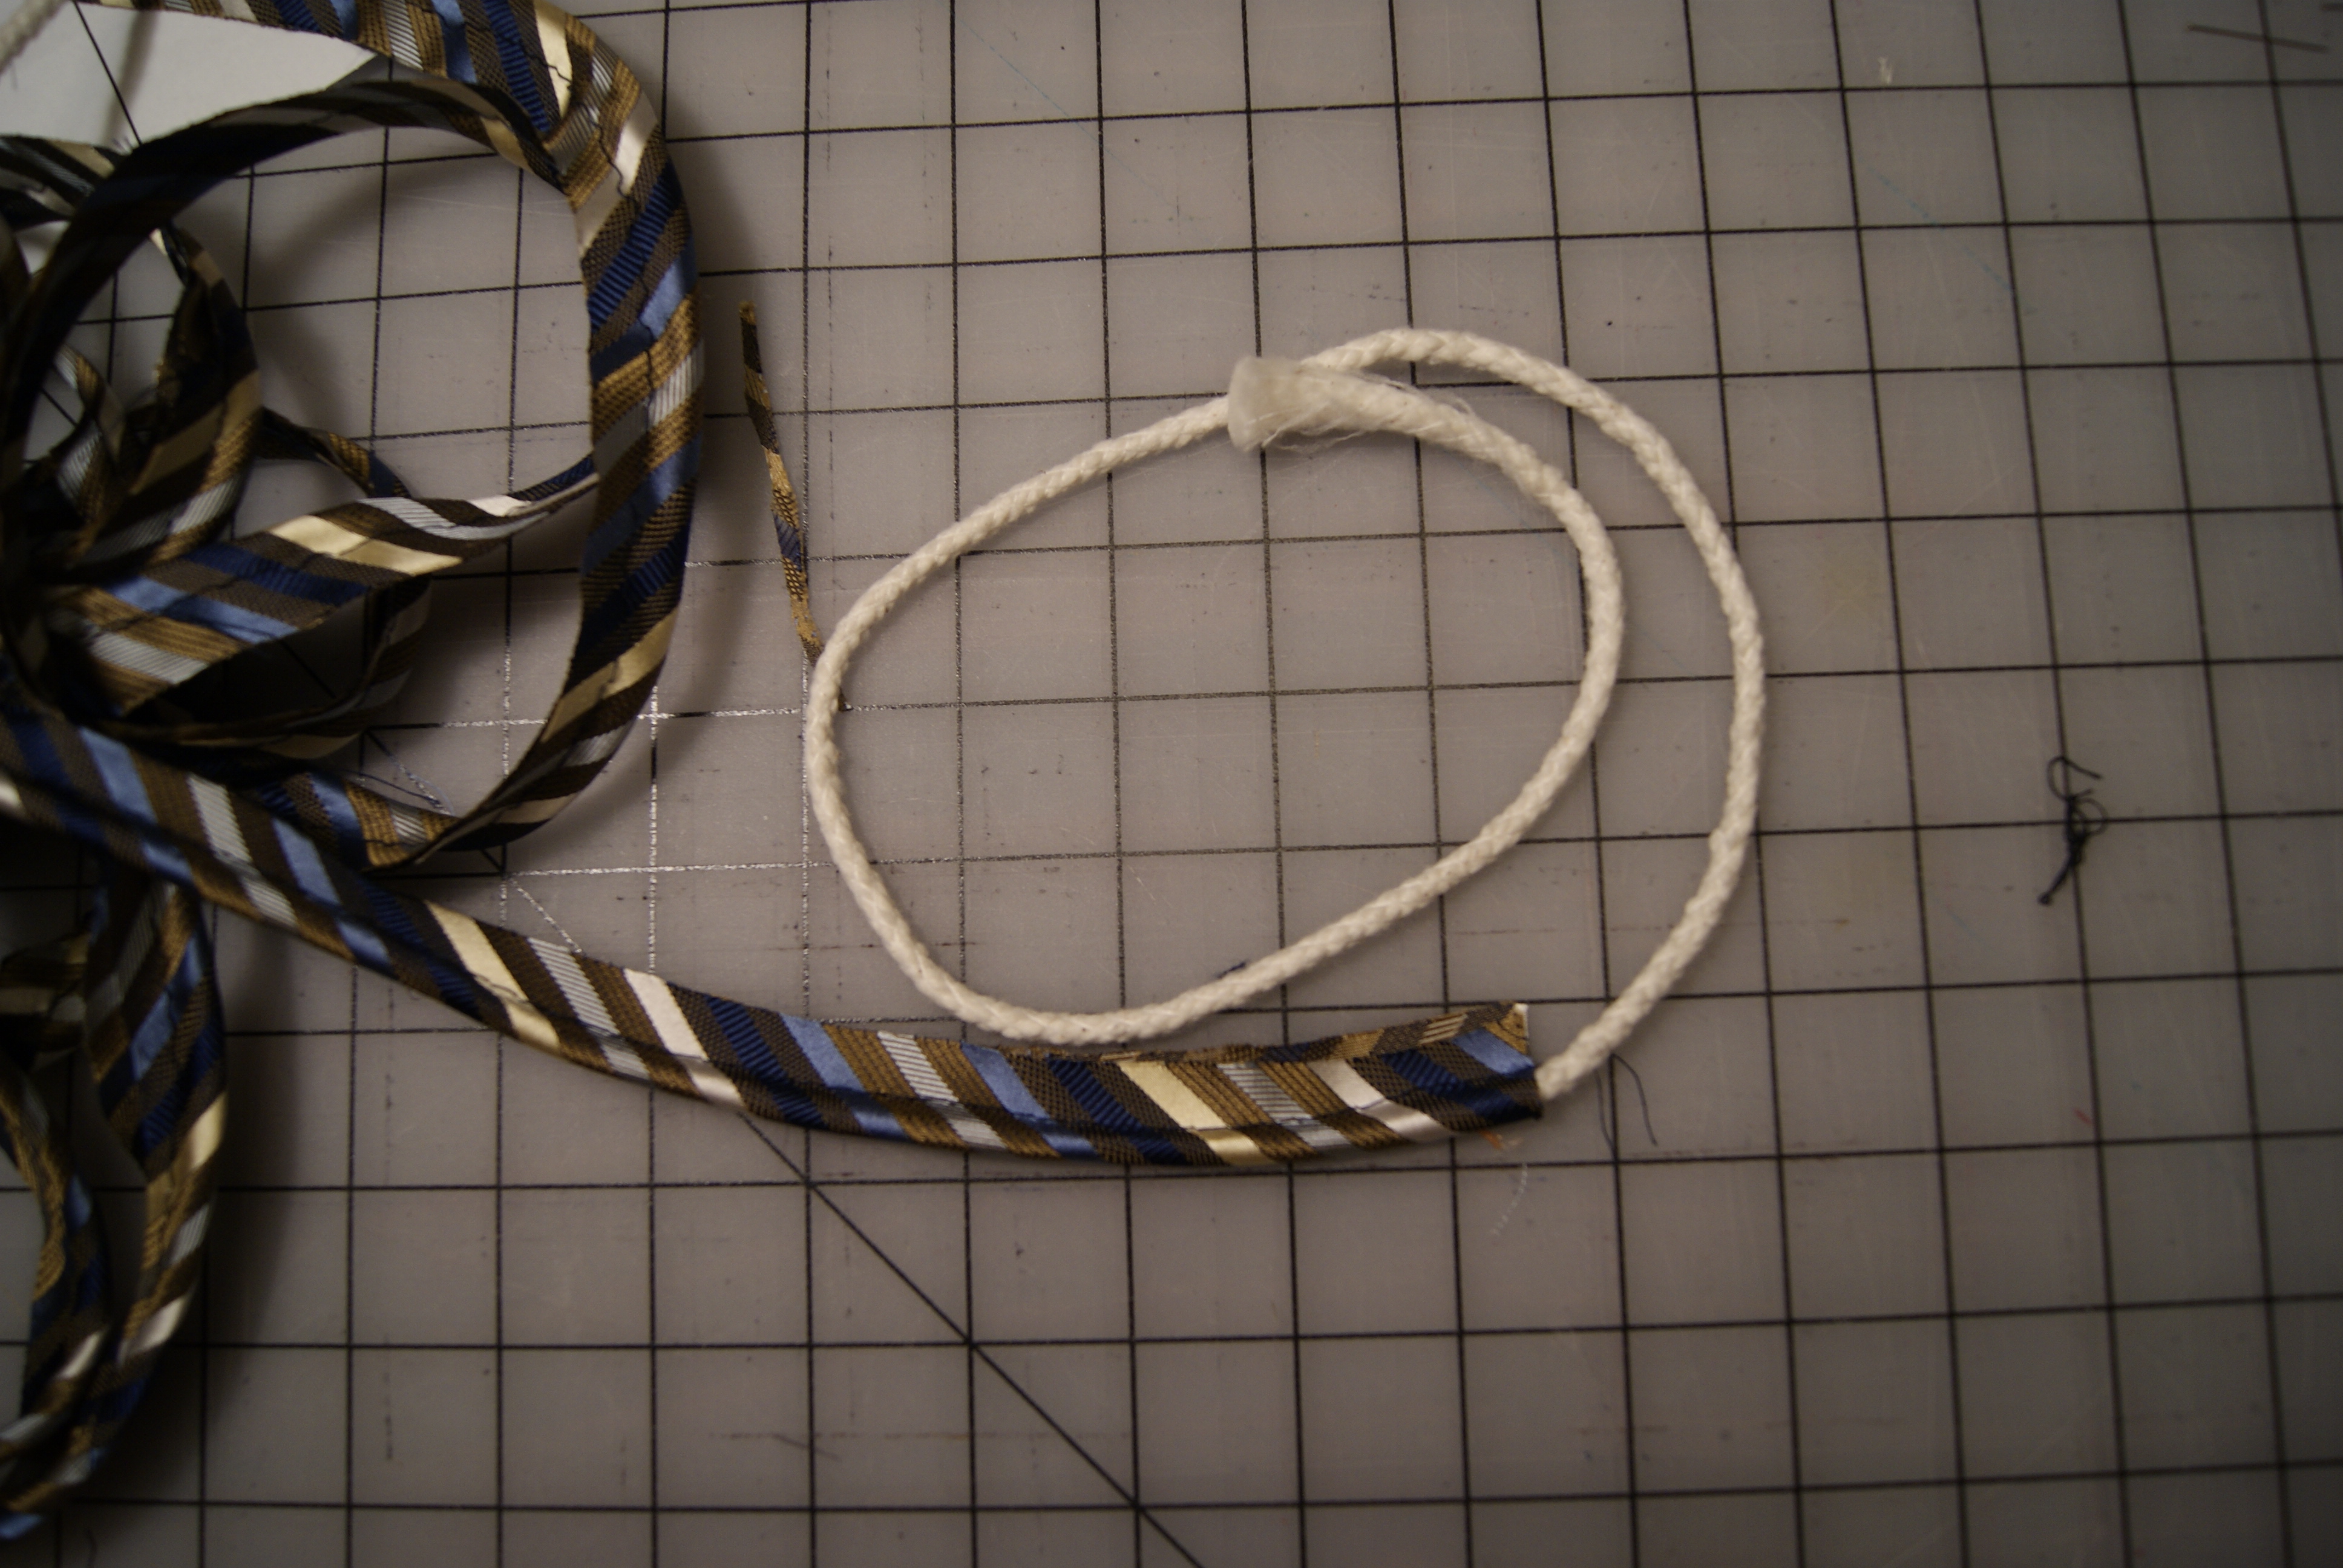
12. Press your bias tape in half longways making a long strip that is ¾” wide. You don’t have to press very hard, just enough to make a guide to hold your cording in place.

13. Cut a piece of cording at least as long as your bias strip. I like to cut it 12-18” longer because the bias tape will stretch as you sew, and as you apply it to your project. You don’t want to run out of cording half-way through. I also like to run the length of my cording through my hands a few times to work out the kinks that come with being stored on a spool.
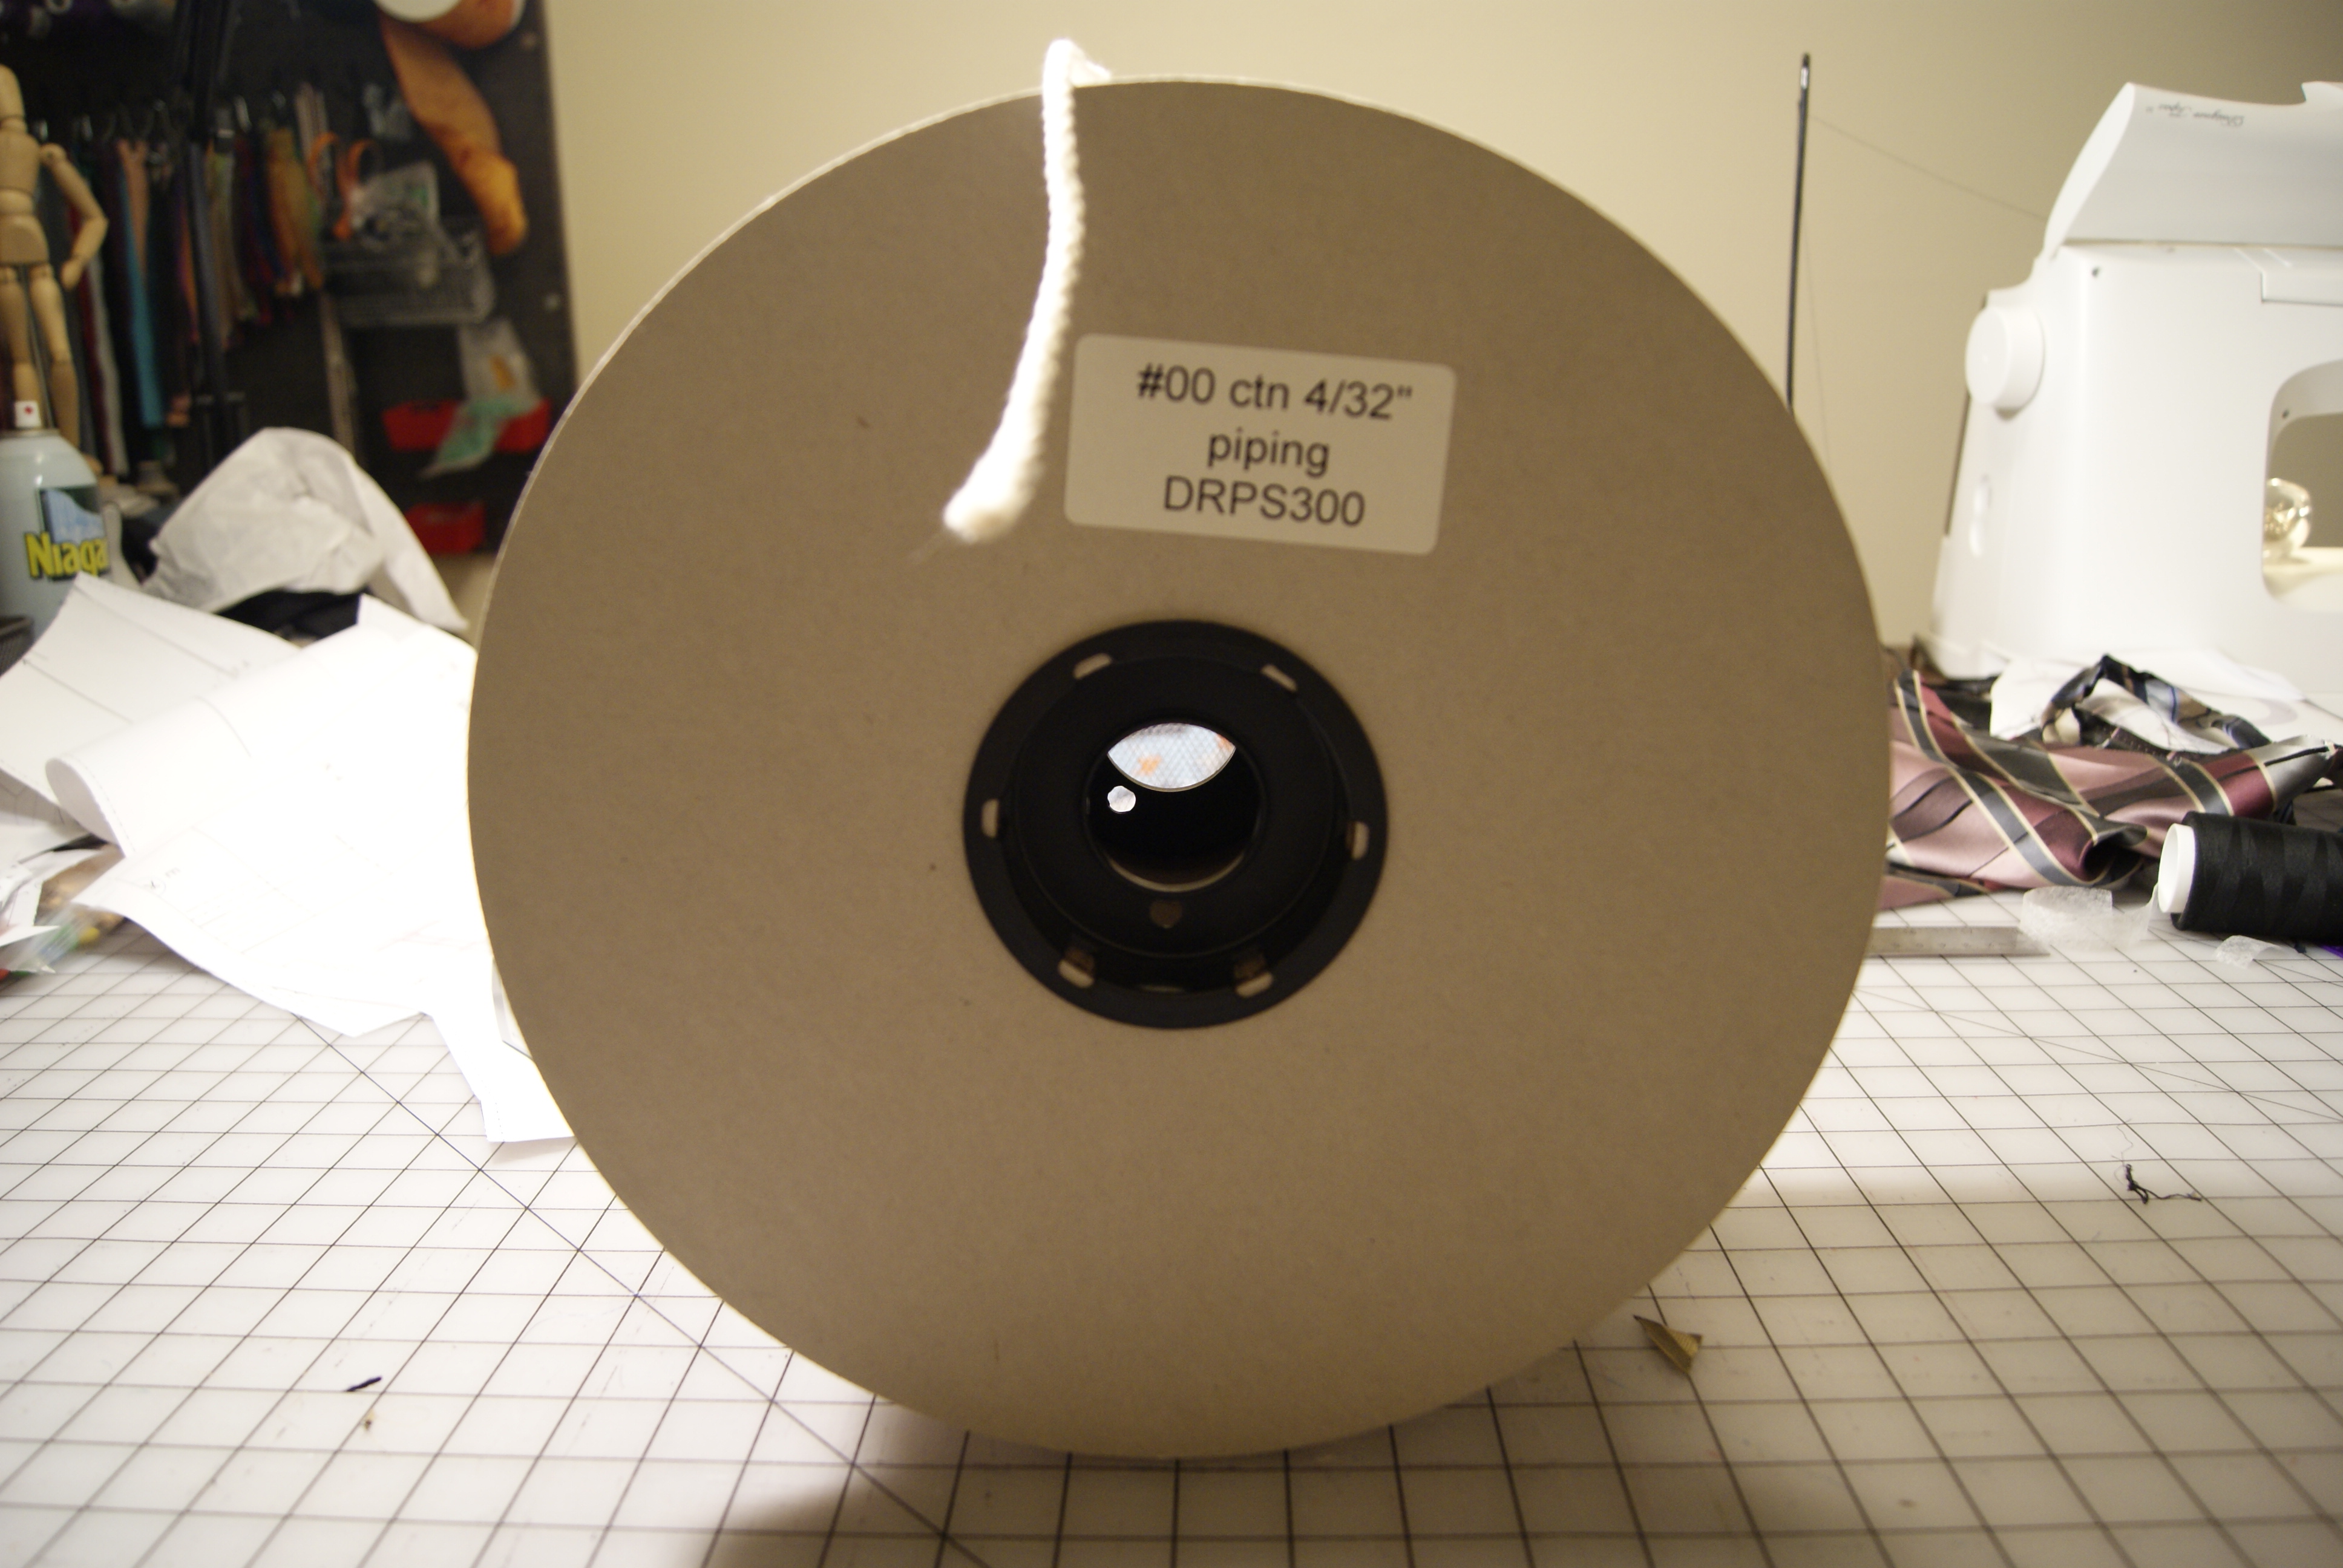
Giant spool of cording from Wawak
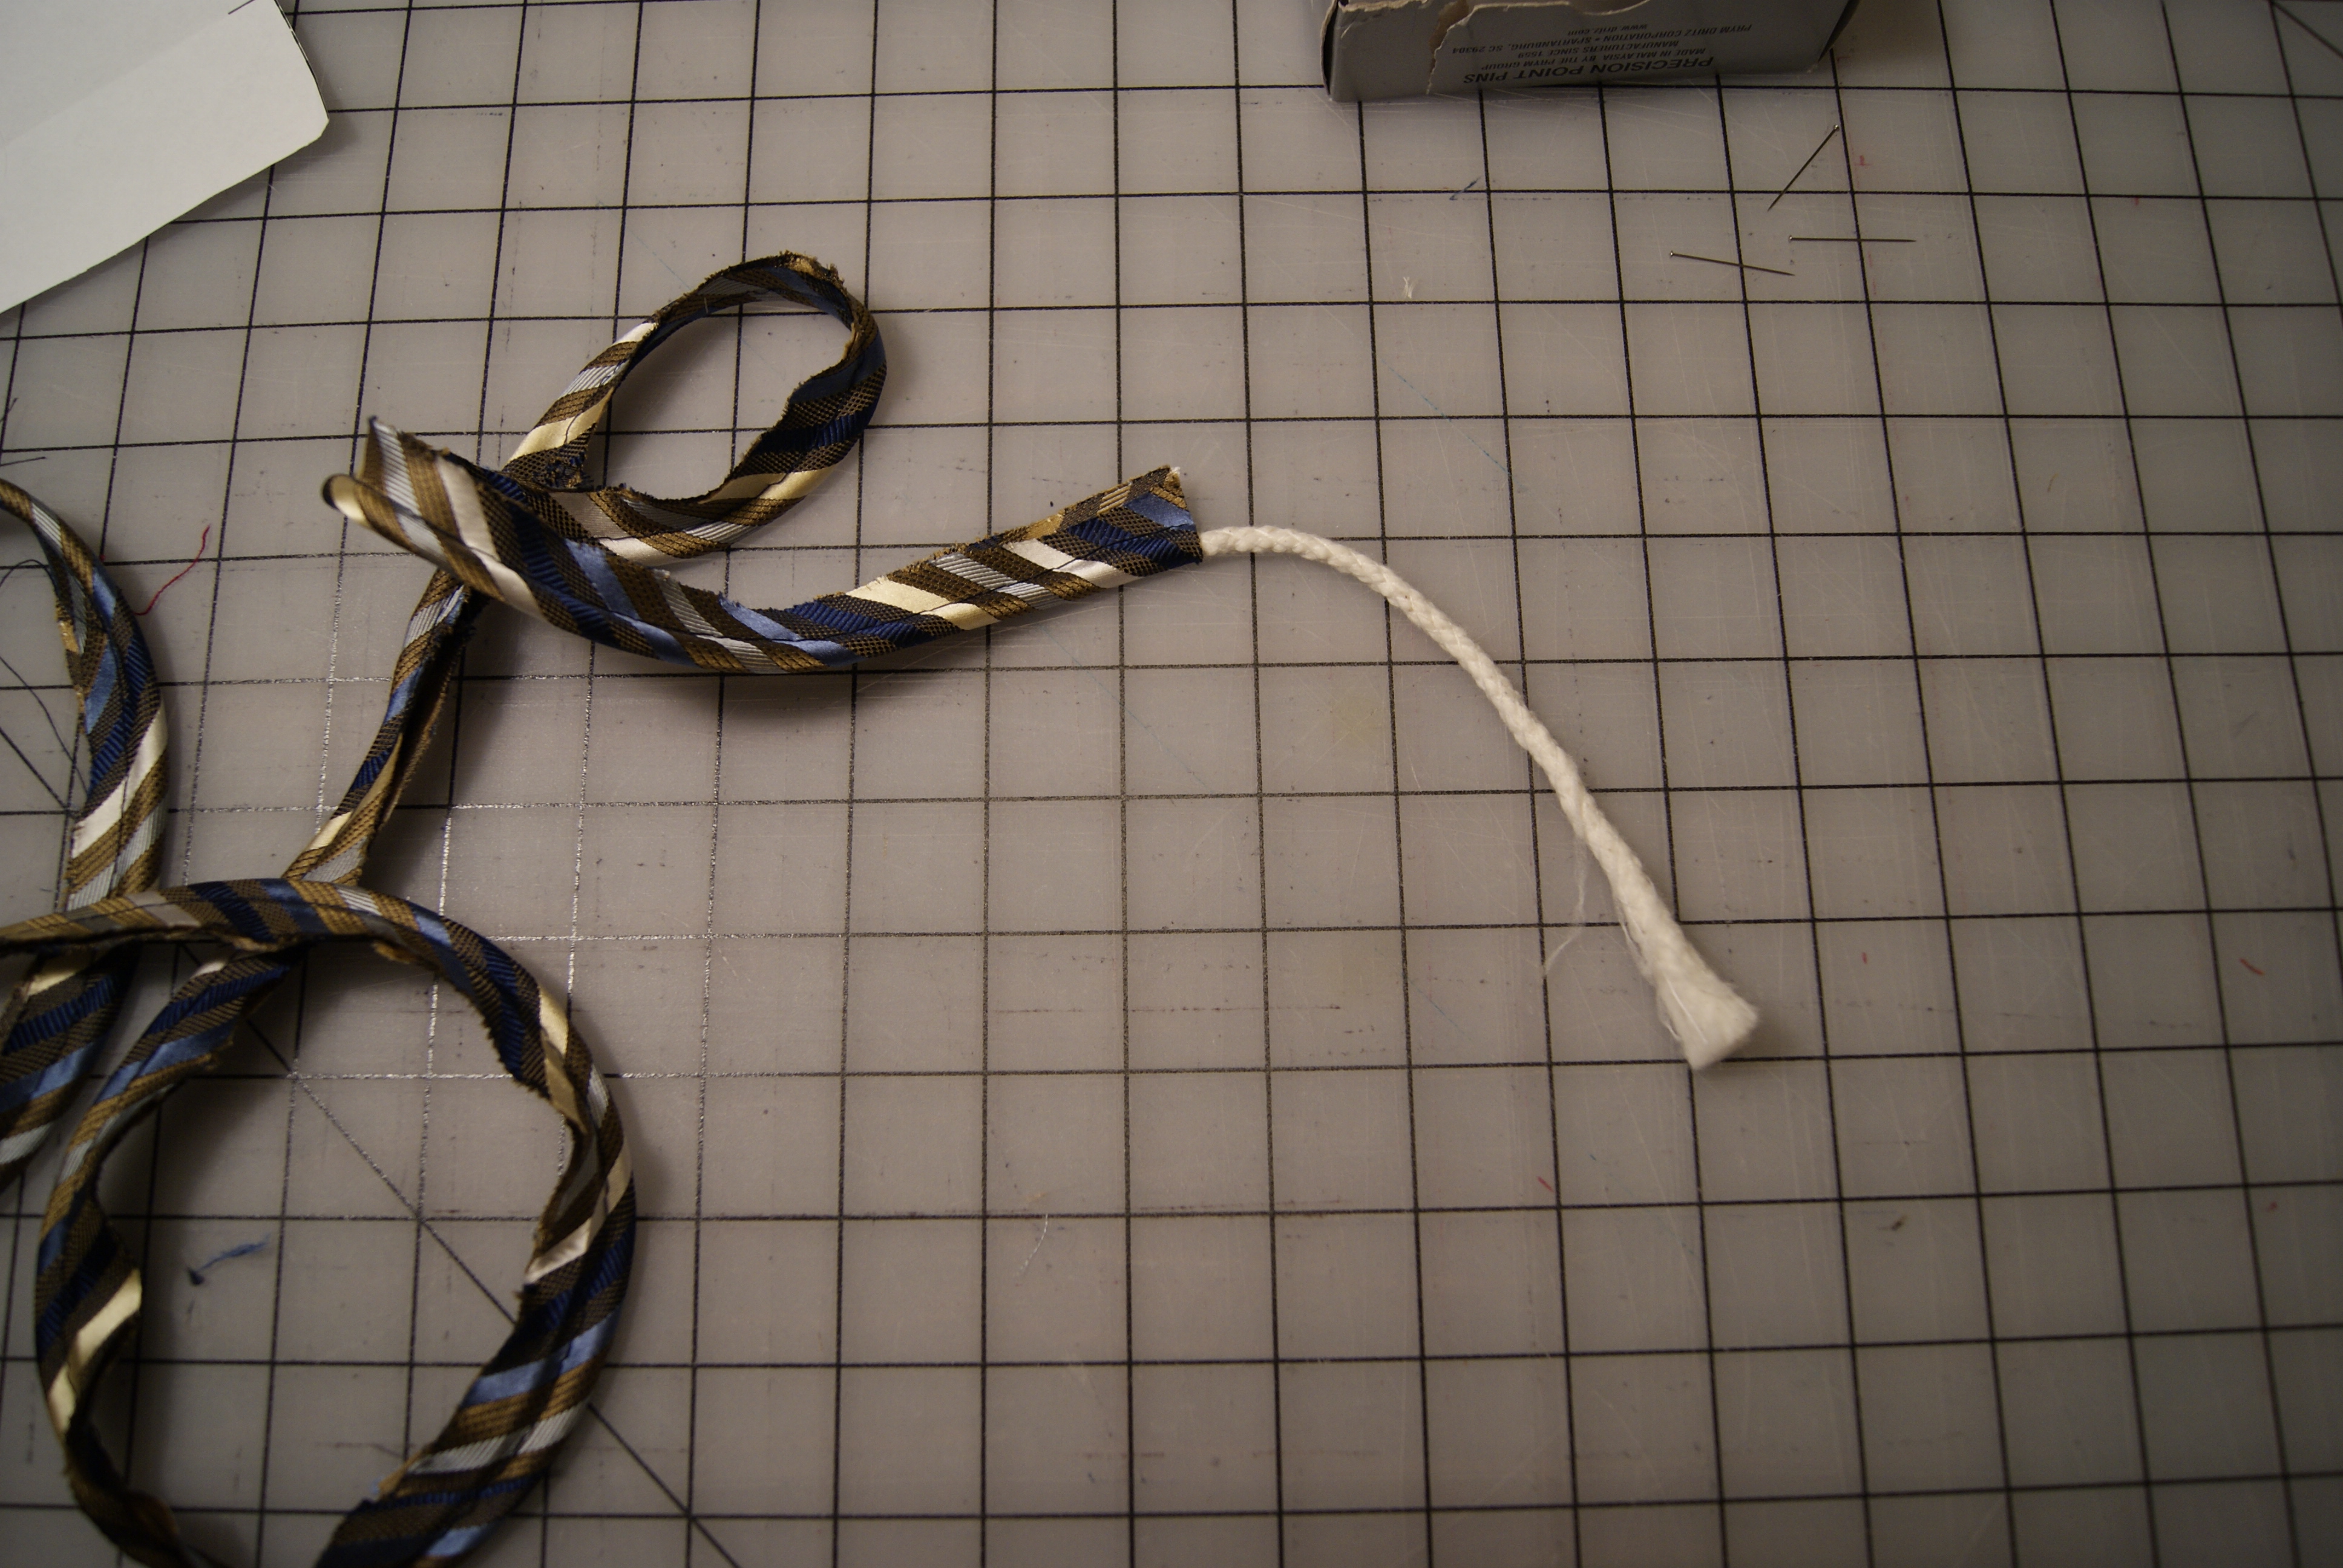
14. Lay your cording inside the fold you just pressed. Pin if you like, though I find it takes longer than securing the cording by hand, little by little as I sew.
Pinning. What a PITA
15. Using a zipper foot and your longest stitch, stitch your bias tape close to piping, enclosing it within the tape. This is you actually making the piping now. You don’t want to stitch very close because you want your basting (long stitches) to be hidden in your seam allowance, so you’ll want some play for securing it in your project as you go.
Zipper foot, long stitch
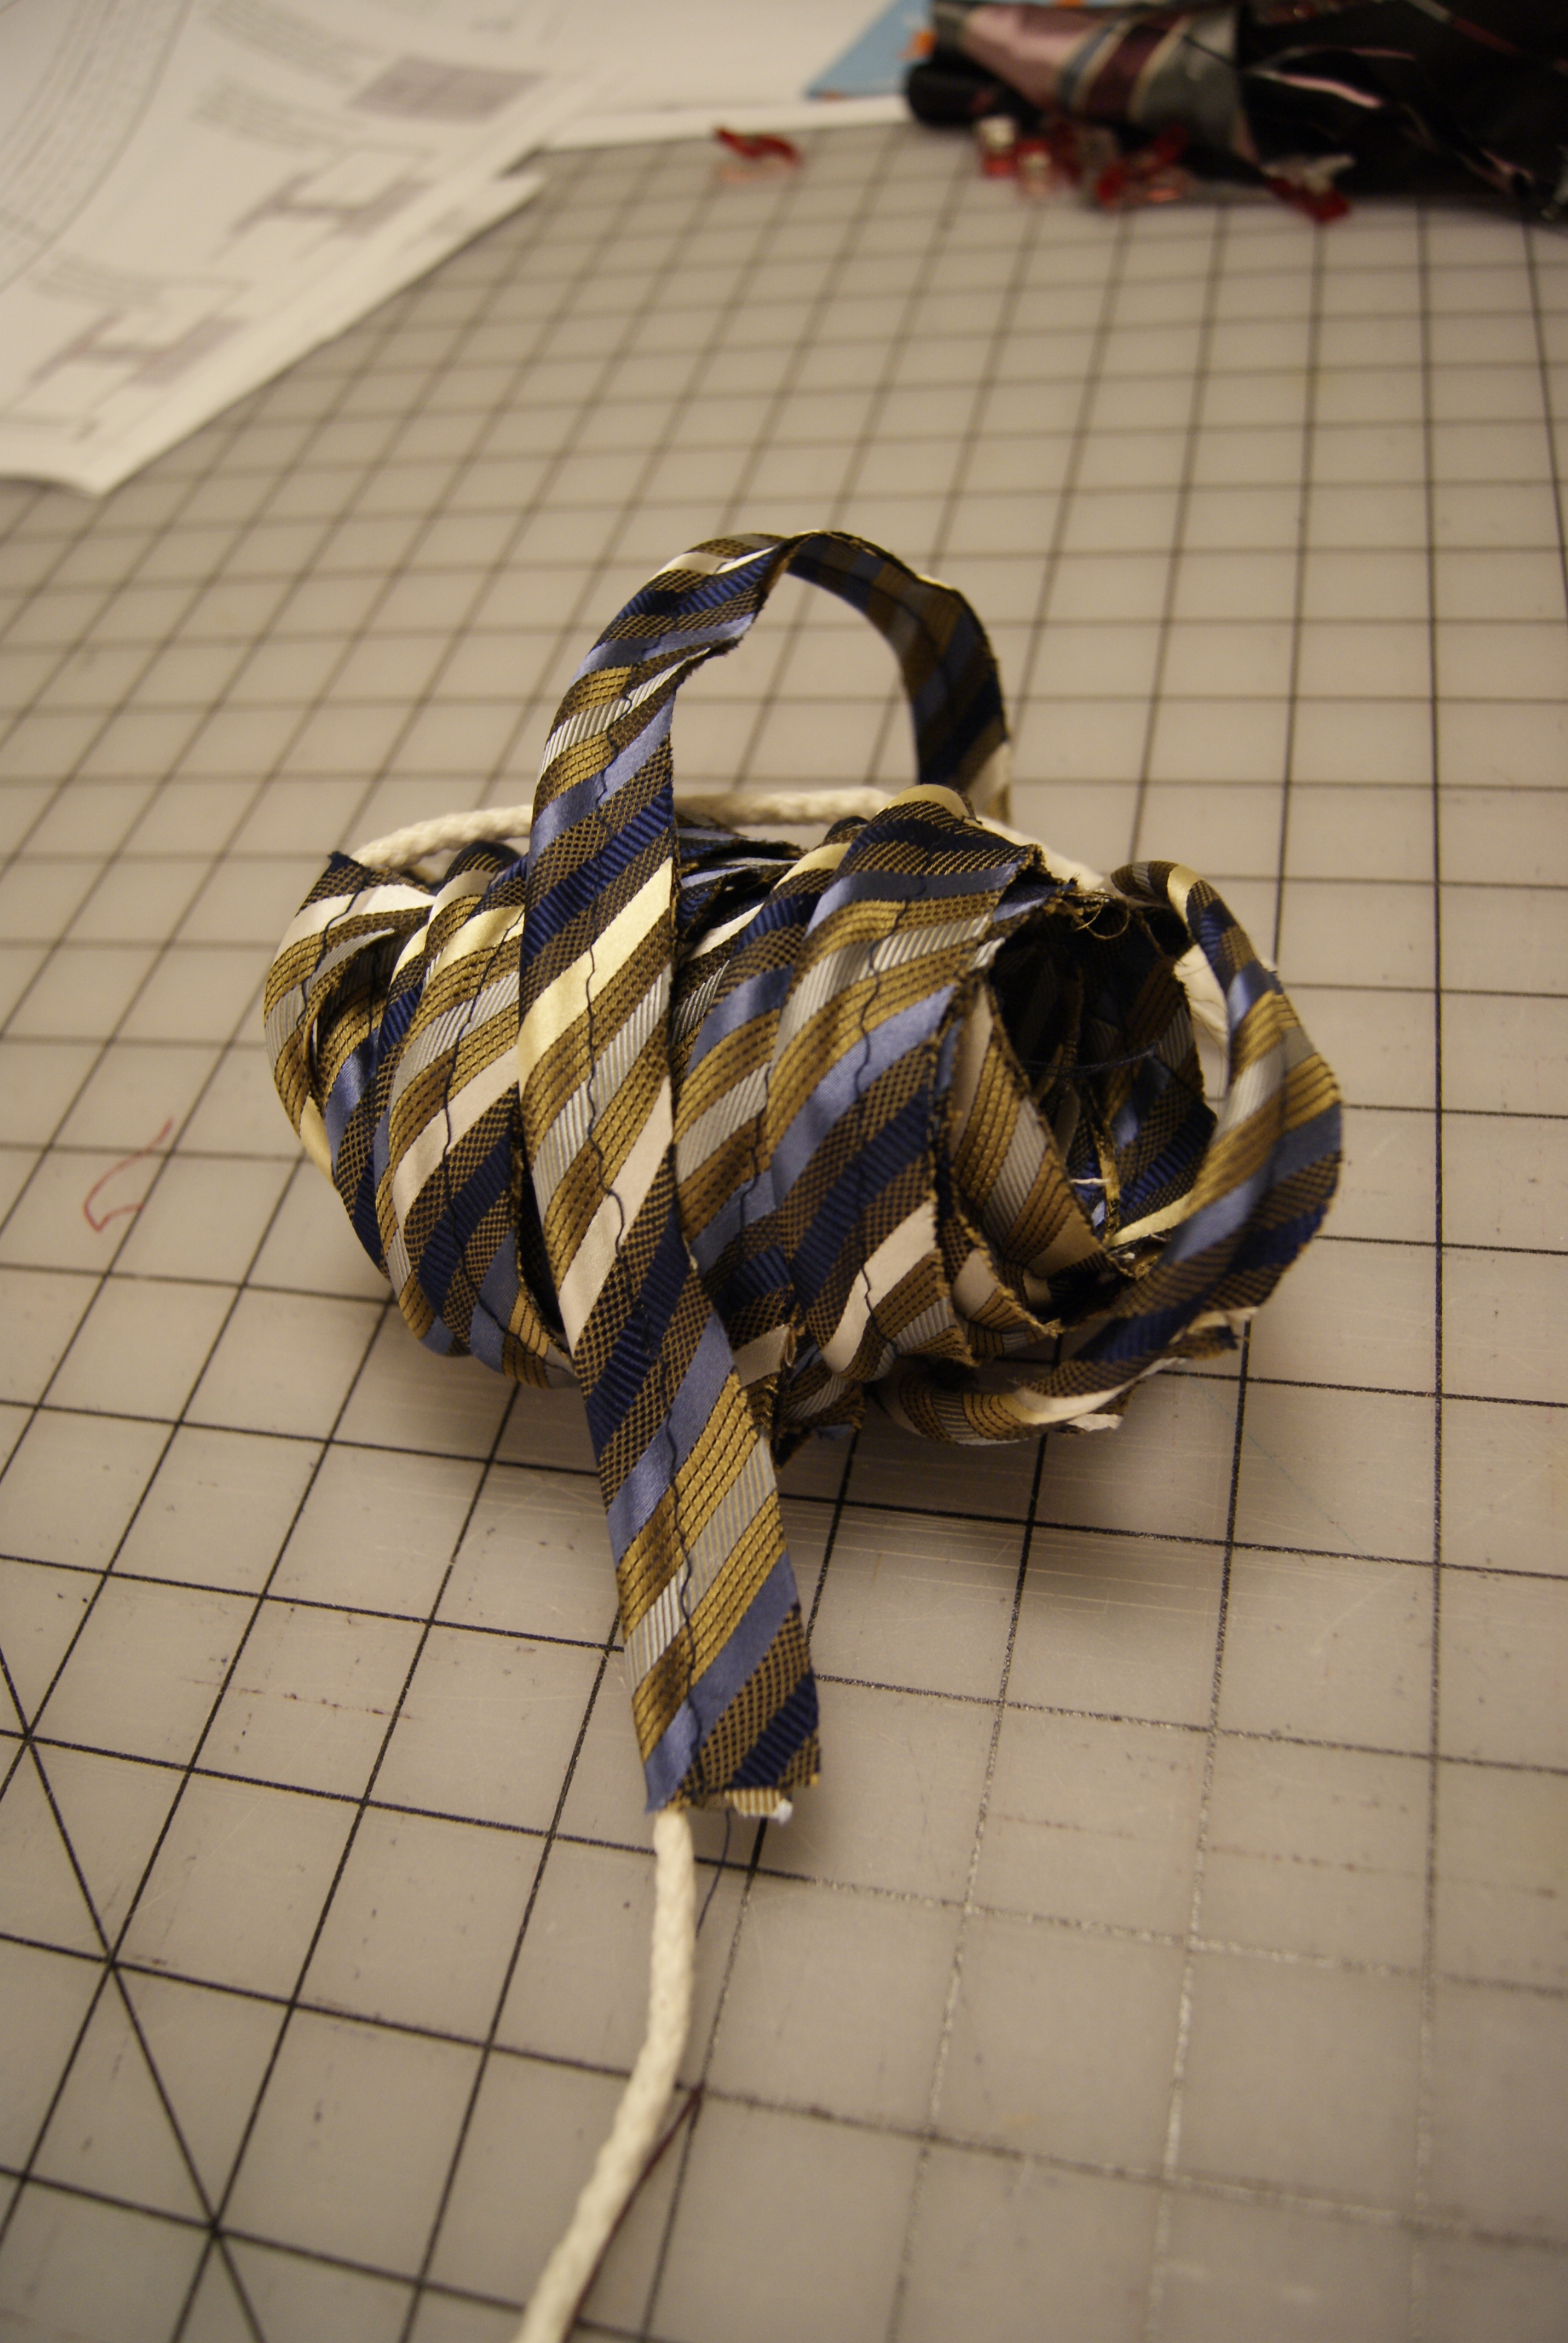
16. Once the entire length is sewn, gently stretch your piping. You’ll eat up probably 12” of the extra cording you cut, and should have a few inches hanging off each end just for insurance.
Lots left over
Post-stretching
17. Admire your beautiful piping and measure how much you managed to get. I usually end up with 3-4 yards from each tie.
Done!
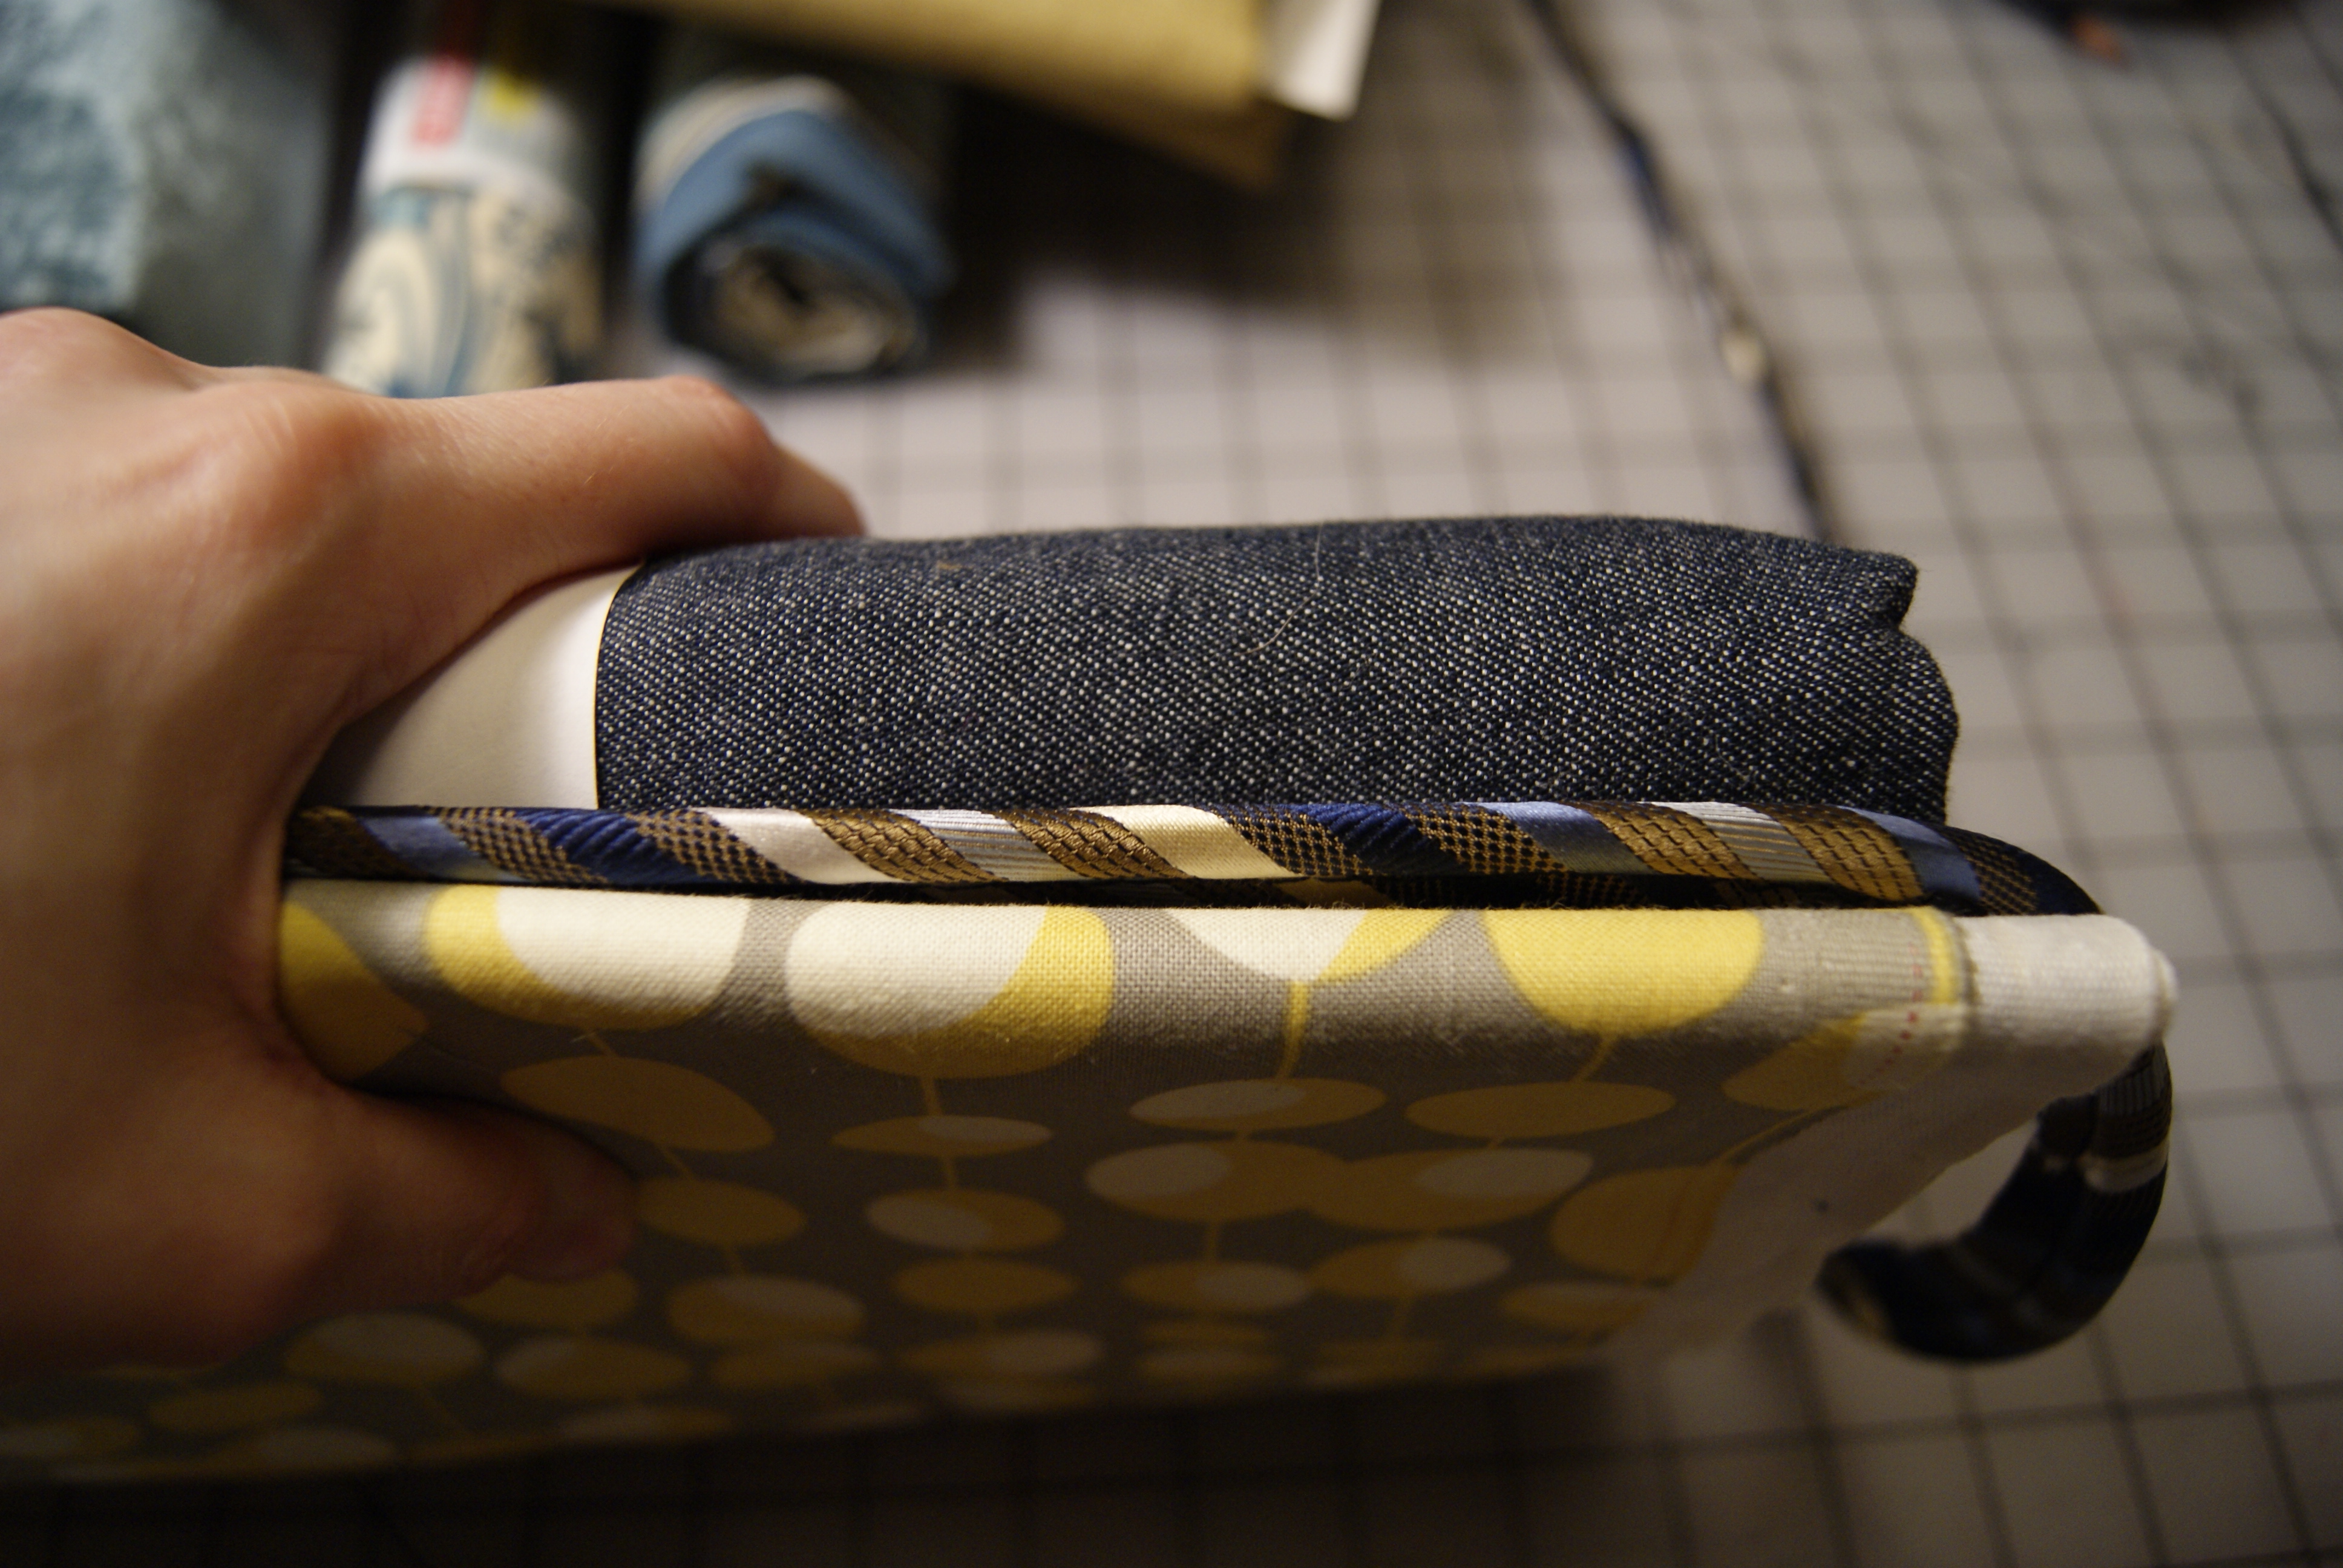
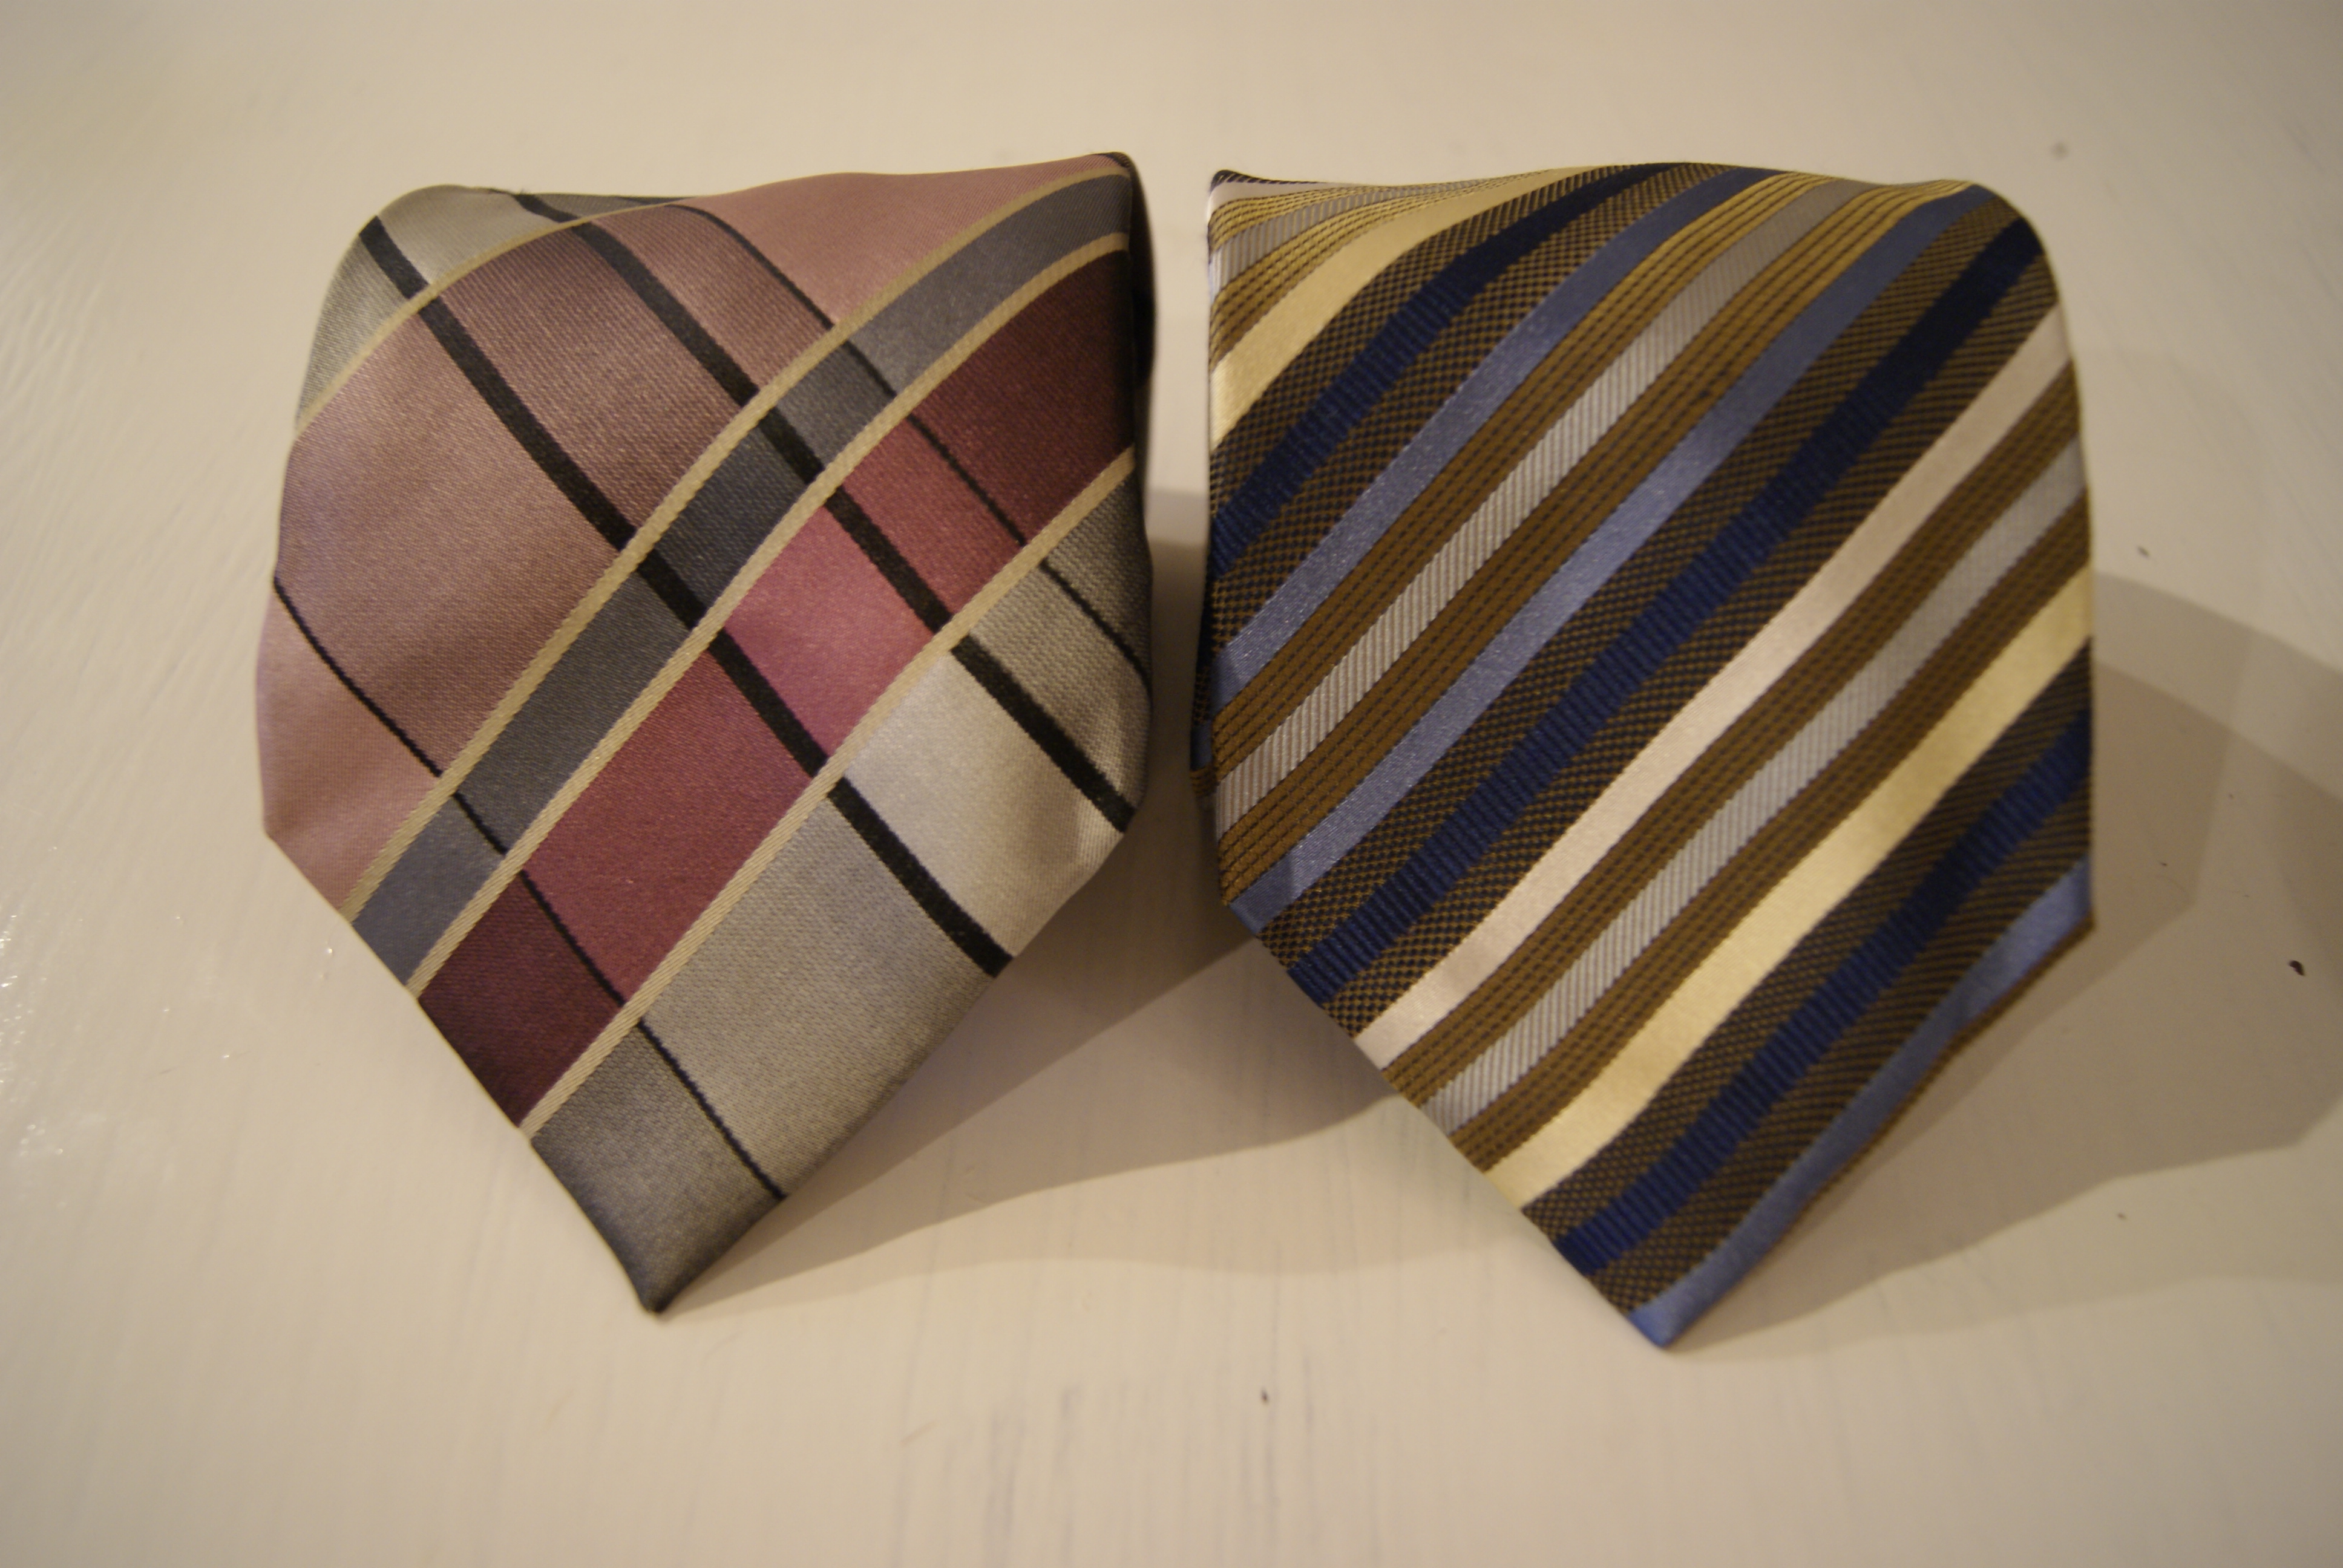
Match-up 1: Dirty Martini with denim

Match-up 2: Classic Stripes
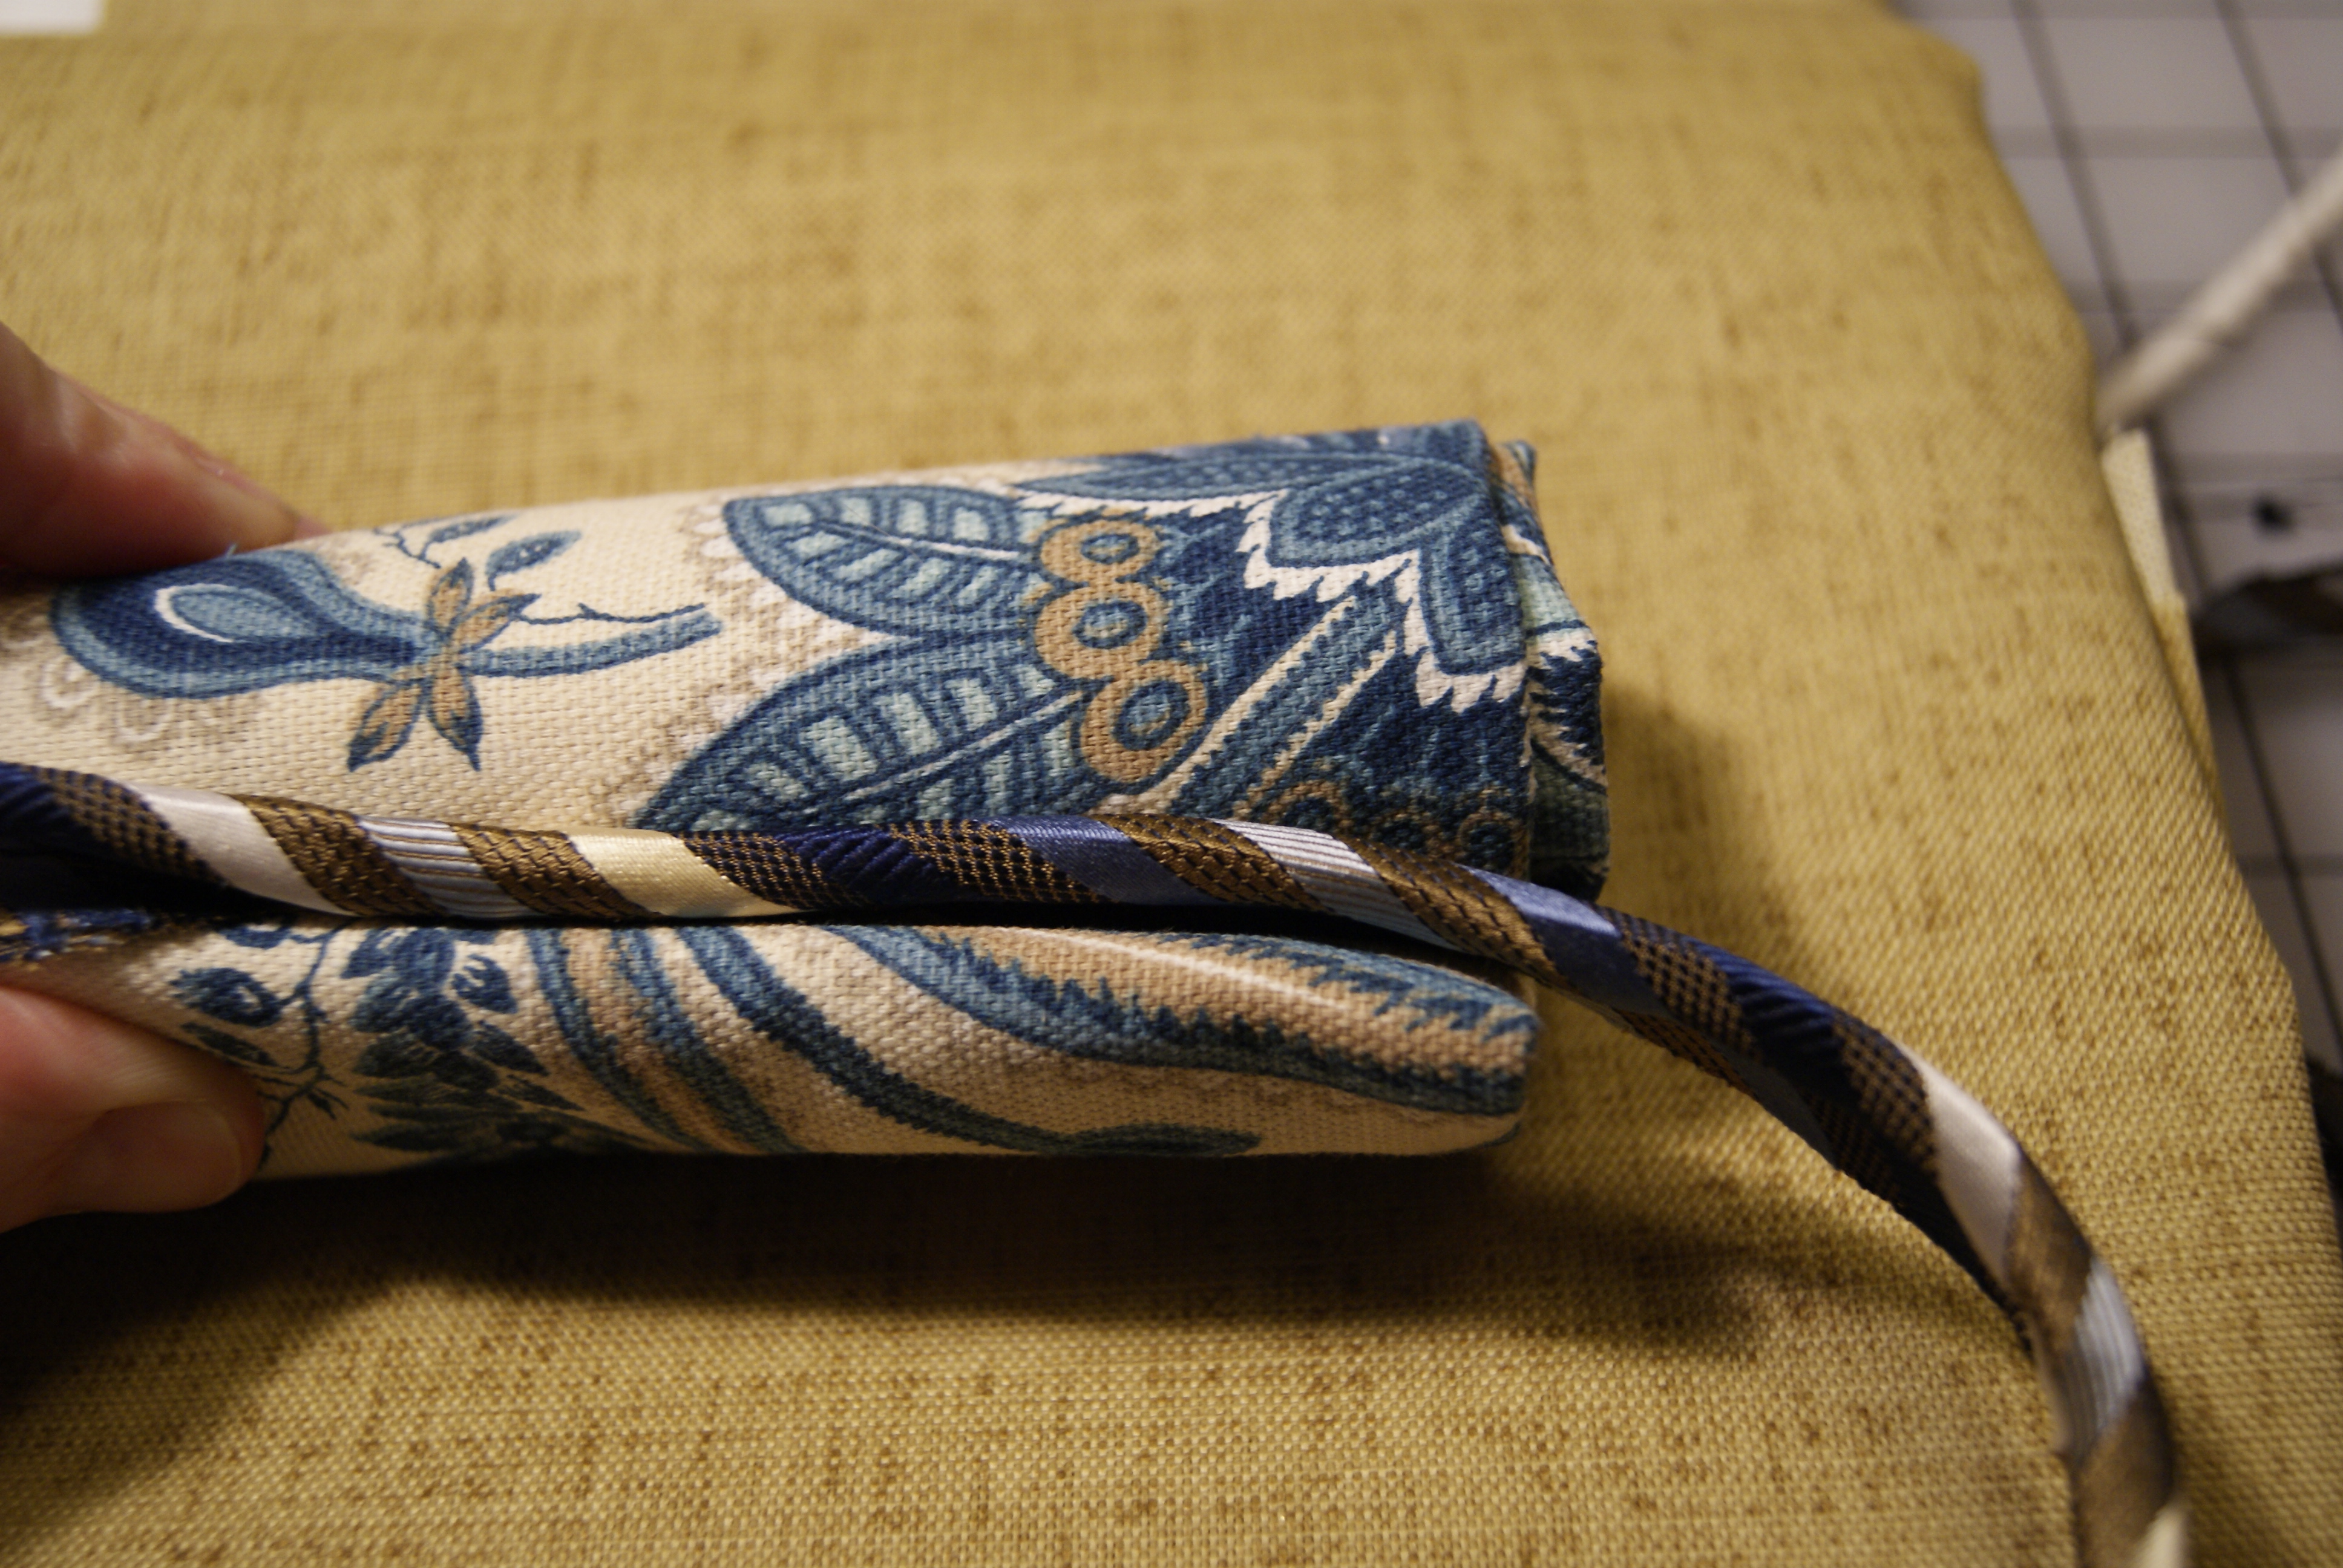
Match-up 3: Masculine & Feminine